Water damage is one of the most expensive problems a homeowner can face — and one of the sneakiest. You might not notice it until the damage is already done. One of the most overlooked causes? Missing or clogged weep holes in your windows.
Most homeowners have never even heard of weep holes. But if your windows don’t have them — or if they’re blocked — rainwater has nowhere to go. It sits inside your window frame, seeps into your walls, and quietly causes rot, mold, and structural damage that can cost thousands to fix.
The good news is that drilling weep holes in windows is a simple DIY job that most homeowners can handle in under an hour. You don’t need to be a contractor. You just need the right information, the right tools, and a little patience.
This guide walks you through everything — what weep holes are, why they matter, and exactly how to drill them correctly without damaging your window frame.
What Are Weep Holes in Windows?
If you’ve ever looked closely at the bottom of a vinyl or aluminum window frame and noticed small slots or round holes, those are weep holes. They’re intentionally placed drainage openings designed to let water escape from inside the window frame before it causes damage.
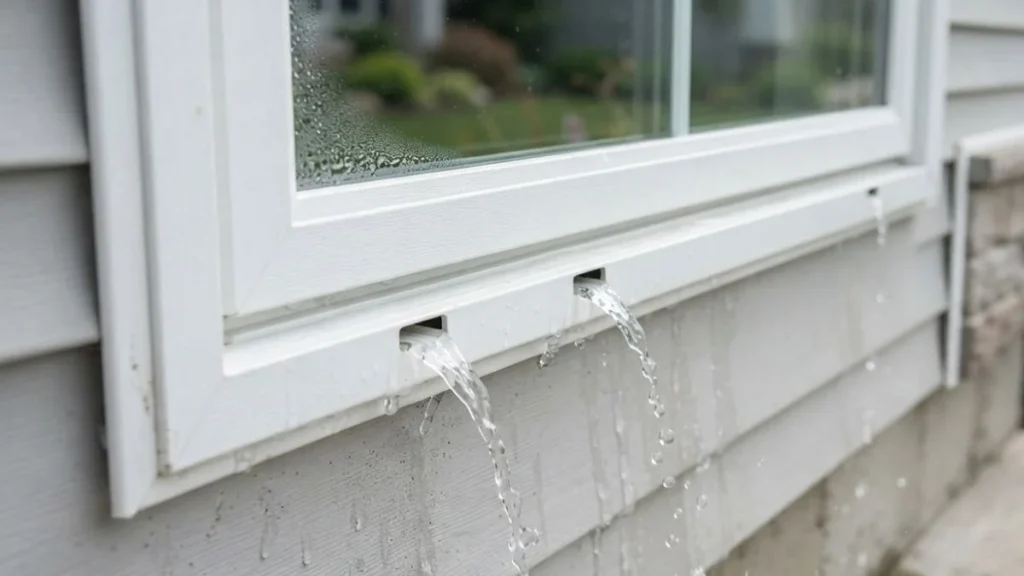
Windows — especially double-hung, sliding, and casement styles — are built with a channel along the bottom track. When rainwater or condensation collects in that channel, it needs somewhere to go. Without weep holes, that water sits and stagnates. Over time, it soaks into the frame, seeps behind the wall, and creates the perfect environment for mold and rot.
Where Are Weep Holes Located?
Weep holes are almost always found along the bottom rail or sill track of the window frame. On vinyl windows, they typically appear as small rectangular slots. On aluminum frames, they’re usually small round drilled holes. On older wood-frame windows, they may not exist at all — which is exactly why some homeowners need to add them.
What Happens When They’re Missing or Blocked?
When weep holes are absent or clogged with dirt, paint, or debris, the consequences build up slowly but hit hard:
- Water pools inside the bottom track of the frame
- Moisture seeps into the surrounding wall cavity
- Wood framing behind the window begins to rot
- Mold and mildew grow in hidden spaces
- Interior paint begins to bubble or peel near window sills
- In severe cases, structural damage occurs around the window opening
The frustrating part is that none of this is visible right away. By the time you notice water stains or a musty smell near your windows, the damage is usually already underway.
Do You Actually Need to Drill Weep Holes in Your Windows?
Not every window needs new weep holes drilled. Before you pick up a drill, it’s worth figuring out whether your windows are missing them entirely or whether existing ones are just blocked.
Signs Your Windows Are Missing Weep Holes
Run your finger along the bottom exterior edge of your window frame. If you don’t feel or see any slots, holes, or openings — and water has been pooling on your sill after rain — your windows likely weren’t built with proper drainage or the holes were sealed during a repaint or recaulking job.
Other signs include:
- Persistent water stains on the interior window sill
- A musty or damp smell near the window after rain
- Condensation that collects at the bottom of the frame and never drains
- Soft or discolored areas around the window sill or casing
Signs Your Existing Weep Holes Are Clogged
If you can see holes but water is still pooling, they’re probably blocked. Common culprits include dirt buildup, paint, caulk, insect nests, or general debris from outdoor exposure.
Quick test: Pour a small cup of water into the interior bottom track of the window. Watch what happens outside. If water doesn’t trickle out through the holes within a few seconds, they’re clogged. In that case, you may not need to drill new holes — just clear the existing ones with a thin wire or compressed air.
Only move forward with drilling if the holes are genuinely missing or if damage to the existing holes makes them unrepairable.
Tools and Materials You’ll Need

One of the best things about this project is that it requires very few tools — most of which you probably already own.
| Tool / Material | Purpose |
| Cordless drill | Main drilling tool |
| 3/16″ or 1/4″ drill bit | Standard size for most window frames |
| Masking tape | Prevents frame from cracking or chipping |
| Pencil or marker | Marking drill locations |
| Safety glasses | Eye protection from debris |
| Compressed air or vacuum | Clearing debris after drilling |
| Weep hole covers (optional) | Keeps insects and debris out |
| Waterproof sealant (optional) | Sealing edges if needed |
Choosing the Right Drill Bit
The drill bit you use depends on your window frame material:
Vinyl frames — Use a standard sharp twist bit. Keep the drill speed low to avoid generating heat, which can crack or warp the vinyl. A 3/16″ bit is usually the right size.
Aluminum frames — Use an HSS (High-Speed Steel) bit. Aluminum is soft but can burr badly if you rush. Go slow, and use a deburring tool afterward for clean edges.
Wood frames — Standard wood drill bits work fine. For larger drainage holes, a spade bit gives you more control. Make sure to seal the edges after drilling to prevent moisture from entering the wood grain.
How to Drill Weep Holes in Windows — Step-by-Step
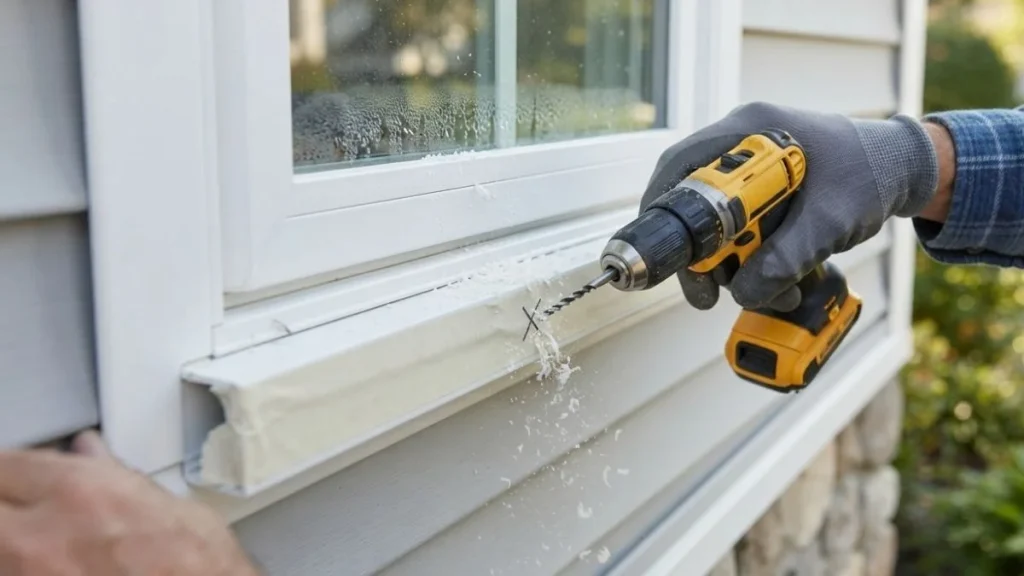
Step 1 — Inspect Your Window Frame First
Before you drill anything, take five minutes to thoroughly inspect your window. Identify the frame material, check for existing weep holes, and look for any manufacturer drainage slots that might just be clogged. Also check the thickness of the bottom rail — this tells you how deep your drill bit needs to go.
If your window has existing holes that are simply painted or caulked over, try clearing those first. Drilling new holes unnecessarily can weaken the frame if done incorrectly.
Step 2 — Mark Your Drilling Locations
Always drill at the lowest point of the bottom track or exterior sill — this ensures gravity pulls water out naturally. Space your holes 4 to 6 inches from each corner and every 12 to 18 inches along the bottom for wider windows.
Use a pencil or masking tape to mark each spot clearly before you start. This keeps your spacing even and prevents you from accidentally drilling into a corner joint or window seal.
Step 3 — Set Up Your Drill
Fit your chosen drill bit and set the drill to a low-to-medium speed. High speeds generate heat and vibration that can crack vinyl or cause aluminum to burr. Place a small strip of masking tape over each marked drilling point — this gives the bit something to grip and dramatically reduces the chance of the frame chipping or cracking when you start.
Put on your safety glasses. Drilling into window frames kicks up small debris and metal or plastic shavings that you really don’t want near your eyes.
Step 4 — Drill the Weep Holes
Position the drill bit on your marked spot and apply steady, even pressure. Don’t force it — let the drill do the work. Here’s an important tip that most guides skip: drill at a slight downward angle of about 5 to 10 degrees toward the exterior. This encourages water to flow outward rather than sitting inside the channel.
Stop every few seconds to clear debris from the hole. This keeps the bit cool and gives you a cleaner result. Once you’ve drilled through, pull the bit out slowly and wipe away any shavings immediately before they scratch the frame.
Step 5 — Test the Drainage
Once all holes are drilled, pour water slowly into the interior bottom track of the window and watch the exterior. Water should trickle out clearly and freely within seconds. If it drains slowly, the hole may need to be slightly enlarged or the angle adjusted.
This test is important — don’t skip it. It confirms the holes are actually doing their job before you consider the project done.
Step 6 — Install Weep Hole Covers (Optional but Recommended)
Weep hole covers are small plastic or mesh inserts that snap into the holes. They allow water to flow out while keeping insects, spiders, and debris from getting in. They’re inexpensive, easy to install, and highly recommended if you live in an area prone to bugs or heavy wind-driven debris.
Simply press or snap them into place after drilling. If you live in a very high-rainfall area, skip solid covers and use mesh-style ones that won’t restrict water flow.
Common Mistakes to Avoid
Even a simple job like this has a few pitfalls worth knowing about before you start.
- Drilling too high on the frame — Water won’t drain unless the hole is at the very bottom of the track. Even an inch too high can make the hole useless.
- Using too high a drill speed — This is the number one cause of cracked vinyl frames. Slow down.
- Making holes too small — A hole that’s too narrow will clog within a season. Stick to 3/16″ minimum.
- Drilling straight instead of angled — A perfectly horizontal hole drains poorly. That slight downward angle toward the exterior makes a real difference.
- Accidentally caulking over holes — This happens more than you’d think during window maintenance. Always check your weep holes after any resealing work.
- Drilling near corner joints — This can compromise the structural integrity of the frame. Keep holes at least 4 inches from any corner.
How Many Weep Holes Does a Window Need?
There’s no single universal answer, but a good rule of thumb is one hole every 12 to 18 inches along the bottom track, with a minimum of two holes per window regardless of width. For a standard 36-inch wide window, two to three holes is usually sufficient. For wider picture windows or patio doors, you may need four or more.
Some local building codes specify minimum weep hole requirements for new window installations — it’s worth checking your local regulations if you’re doing this as part of a larger renovation project.
Maintaining Your Window Weep Holes Year-Round
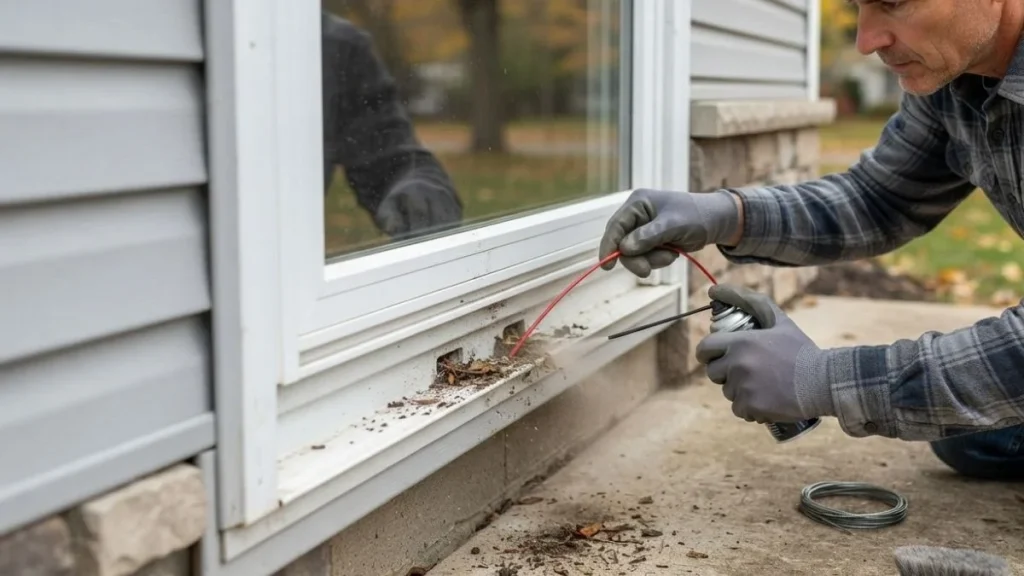
Drilling the holes is only half the job. Keeping them clear is what actually protects your home long-term.
Clean your weep holes at least twice a year — once in spring before the rainy season and once in fall before winter sets in. After heavy storms, it’s worth doing a quick check as well.
To clean clogged holes without drilling, use a thin wire, a toothpick, or a pipe cleaner to gently break up any blockage. Follow up with a shot of compressed air to clear remaining debris, then rinse with water to confirm drainage is restored.
To prevent future clogs:
- Install weep hole covers if you haven’t already
- Keep window tracks clean and free of dirt and leaves
- Avoid applying caulk directly over or near weep holes during maintenance
- Inspect holes after any exterior painting or resealing project
Read Also: Drilling Holes in Floor Joists for Electrical Wiring
Conclusion
Weep holes are a small detail that make a huge difference in how well your windows protect your home. Missing or clogged weep holes are one of the most common — and most preventable — causes of water damage around windows.
The good news is that this is one of those home maintenance tasks that looks intimidating but is actually very manageable. With a drill, the right bit, and the steps outlined in this guide, most homeowners can get the job done in under an hour.
Take ten minutes today to inspect your windows. Check for existing holes, run the water drainage test, and if something doesn’t look right — now you know exactly what to do.