A casement window that won’t close fully is more than an annoyance — it’s a direct breach in your home’s thermal envelope, and fixing it yourself typically costs under $50 compared to a $200–$400 professional service call.
The real frustration is not knowing where to start: the problem could be a swollen frame, a bent hinge arm, a stripped operator gear, or simple hardware misalignment — and each one requires a completely different fix.
This guide walks you through a clear, 7-step diagnostic path that moves from the fastest visual checks to component-level repairs, so you leave knowing exactly what is wrong and what to do about it.
Quick Diagnostic Checklist
Before touching any hardware, run through these three checks in order. Each one takes under two minutes and narrows the problem to a specific component.
Is the Latch Actually Engaging?
A casement window won’t latch when the latch bolt — the small hooked or cam-style mechanism on the sash edge — fails to reach the strike plate on the frame. This is the most common casement window latch problem, and it is often misread as a structural issue.
Do not force the handle. Forcing closure against a stuck latch cracks the latch housing or bends the strike plate, turning a $15 fix into a full hardware replacement. Instead, clean debris from the latch housing with a dry brush, then manually push the sash flush and test whether the latch catches. If it does, misalignment is minor. If it does not, note exactly where the gap is — top corner, bottom corner, or center — and move to the next check.
Visual Frame and Hardware Inspection
Stand inside, close the sash as far as it goes, and look for daylight along the frame edge. A casement window gap when closed of 1/8 inch or less usually points to hardware wear. A gap wider than 1/4 inch suggests frame movement or sash misalignment.
Check whether the sash sits flush or binds at the top and bottom corners. Binding at one corner while the opposite corner gaps is a classic sign of window sash misalignment caused by frame settling or hinge assembly wear.
The Hinge and Operator Arm Test
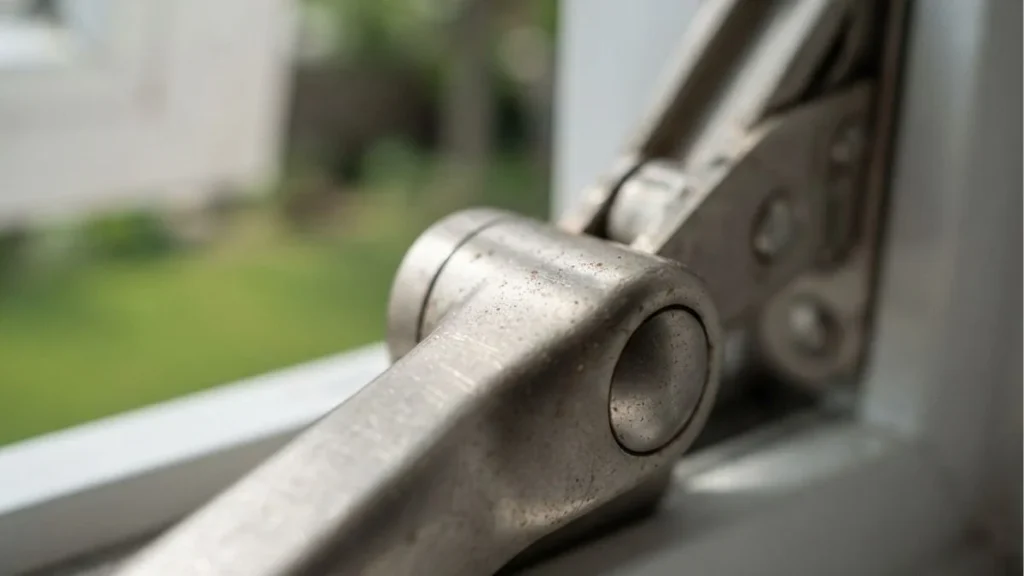
Inspect every visible hinge pin for surface rust, pitting, or lateral bend. A bent hinge arm — even by a few degrees — pulls the sash out of its intended swing plane, preventing full closure.
Next, check the operator arm position. On a correctly functioning crank operator, the arm should point directly toward the latch side of the frame when the window is fully extended. If the arm sits at an angle or the gear system feels gritty when you turn the crank, you likely have window crank operator issues rather than a frame problem. Distinguish between a bent arm (visible deformity) and a misaligned arm (straight but wrong angle) — the fixes are different.
Hinge Problems: Identification and Adjustment
Hinges are the most overlooked cause of a casement window that won’t close. They carry the full weight of the sash through thousands of open-close cycles, and even minor wear translates directly into frame misalignment.
Spotting Bent or Damaged Hinges
The clearest sign of a damaged hinge is sash binding — where one corner of the sash drags or catches against the frame during closure. This almost always happens at the top or bottom corner on the hinge side, not the latch side.
Pay particular attention to the secondary (center) hinge if your window has three. Center hinges carry disproportionate load and wear faster than the top and bottom primary hinges. Stiff or sticky hinge pins that resist smooth rotation are a reliable indicator of corrosion or lateral bending inside the hinge assembly.
Hinge Adjustment vs. Replacement
Many frames allow minor casement window hinge adjustment by loosening the mounting bolts and shimming the hinge plate side-to-side before retightening. This corrects small alignment errors without any part replacement.
Here’s the problem: a hinge with a visibly bent arm or cracked knuckle cannot be straightened reliably and must be replaced. Andersen and Pella use different hinge mounting systems — Andersen hinges typically use a snap-in channel track, while Pella uses direct-screw mounting into the frame — so confirm your manufacturer before ordering parts.
Step-by-Step Hinge Inspection Process
- Disengage the operator arm from the sash shoe to eliminate arm tension during inspection.
- Open the sash fully and visually examine each hinge pin for corrosion, pitting, or visible bend.
- Grasp the sash near each hinge point and apply gentle lateral pressure — any wobble or play indicates hinge assembly wear.
- Note which specific hinge shows binding or resistance, as replacing only the worn hinge is usually sufficient.
Operator and Crank Mechanism Failures
The operator mechanism — the gear-driven assembly that converts crank rotation into sash movement — is the second most common reason a casement window won’t close fully. Unlike hinge problems, operator failures are usually felt before they are seen.

Misplaced or Bent Operator Arm
The operator arm should travel in a smooth arc and point directly toward the latch side when the sash is fully closed. A window operator arm bent even slightly out of plane creates a mechanical obstruction that prevents the sash from seating flush against the frame, leaving a casement window gap when closed that no amount of latch adjustment will fix.
Before replacing the arm, check the pivot bolt at the operator housing. A loose pivot bolt causes the arm to wobble and mistrack without any visible deformation. Tighten it first — this resolves roughly 30% of arm-related closure failures without any part replacement.
Faulty Gear System or Shaft Damage
Window crank operator issues become obvious when the crank handle turns but the operator arm does not follow with consistent resistance. That disconnected, spinning feeling means the gear teeth inside the operator housing are stripped — the crank is rotating freely with no mechanical engagement.
The result? The sash sits wherever it last stopped, and no amount of cranking will move it. A bent crank shaft, caused by over-torquing the handle or frame settlement pressing against the mechanism, produces a different symptom: the crank turns unevenly or catches at one point in its rotation.
Both stripped gears and a bent shaft require full operator mechanism replacement. Truth Window Hardware and Andersen’s parts program stock direct-fit operators for most residential casement window models — match the operator by measuring the arm length and identifying the mounting hole pattern before ordering.
Sash Removal and Deeper Inspection
When surface-level hardware inspection doesn’t reveal the problem, sash removal is the next logical step. It exposes the full hinge assembly, track channel, and operator mechanism mounting points — components that are impossible to assess with the sash installed.

Safe Sash Removal Procedure
Gather these tools before starting:
- Adjustable wrench
- Phillips and flathead screwdrivers
- Soft-face mallet
- A second person or padded sawhorse to support the sash
Remove components in this exact sequence:
- Disengage the operator arm bolt from the sash shoe first — this releases mechanical tension before the sash is unsupported.
- Remove the hinge bolts starting from the bottom hinge upward, keeping one hand on the sash throughout.
- Remove the latch hardware last, then lift the sash straight out of the frame opening.
Never let the sash hang from a single hinge bolt. The dead weight torques the remaining fastener and cracks the frame corner — a repair that costs far more than the original closure problem.
What to Check Inside the Track
With the sash out, run a finger along the full length of the track channel. Paint buildup and compacted debris are the two most common obstructions that cause window sash misalignment without any visible hardware damage. Even 1/16 inch of dried paint along one side of the track throws the sash out of parallel alignment.
Check that the track runs straight and parallel on both sides. A twisted track — where one side sits higher than the other — indicates frame movement and requires shimming before reinstallation.
Reinstall the sash incrementally: seat the bottom hinge first, then check for binding before attaching the center and top hinges. This step-by-step reinstallation pinpoints exactly where contact occurs, eliminating guesswork from the how to fix casement window alignment process.
When DIY Won’t Solve It
Some casement window problems sit beyond the reach of hardware adjustment and part replacement. Recognizing those situations early saves you from investing labor and parts into a window that needs professional intervention or full replacement.
Clear Escalation Criteria
Stop DIY work and call a window professional when you find any of these conditions:
- Visible frame cracking along the corner joints or sill — this indicates structural movement that no hinge adjustment or operator replacement will correct
- Multiple bent hinges on the same window, which points to chronic frame racking rather than isolated hardware wear
- Operator mechanism corroded through the housing — surface rust on the arm is manageable, but corrosion that has seized the gear system internally means the entire operator mechanism is compromised
- Casement window gap when closed exceeds 3/8 inch across the full sash height, suggesting the frame itself is no longer square
Professional Repair vs. Replacement Economics
A window professional charges $150–$350 to diagnose and repair a casement window with hinge assembly or operator mechanism failure. Full casement window replacement runs $400–$950 per unit installed, depending on size and glazing type.
The repair-versus-replace calculation is straightforward: if the frame is square and only hardware has failed, repair wins. If the frame is cracked, racked, or rotted, replacement is the more cost-effective long-term answer.
Warranty Implications
Here’s what most people miss. Andersen, Pella, and Marvin all include language in their limited warranties stating that unauthorized hardware modification — including DIY hinge adjustment or operator replacement using non-OEM parts — can void coverage on the affected window unit. Check your warranty documentation before replacing any component, and use manufacturer-sourced parts where coverage is still active.
You May Read Also: Replace Casement Window With Single Hung
FAQ
What causes a casement window hinge to bend?
Hinge bending results from three main causes: cumulative load stress from a heavy sash swinging on worn pivot points, accidental impact from the window being forced open against wind resistance, and frame settlement that shifts the hinge mounting plane out of alignment with the sash travel arc.
How do I know if my window operator is broken?
The clearest sign is a crank handle that turns freely with no resistance and no corresponding sash movement — this means the internal gear teeth are stripped. A second indicator is uneven or catching rotation at one point in the crank cycle, which points to a bent crank shaft inside the operator mechanism.
Can I adjust a casement window myself, or do I need a professional?
Most casement window adjustments — including hinge shimming, pivot bolt tightening, operator arm replacement, and latch realignment — are straightforward DIY repairs requiring basic hand tools and manufacturer-matched parts. Call a professional when the frame itself is cracked, racked, or no longer square, since no hardware fix corrects a structural frame problem.