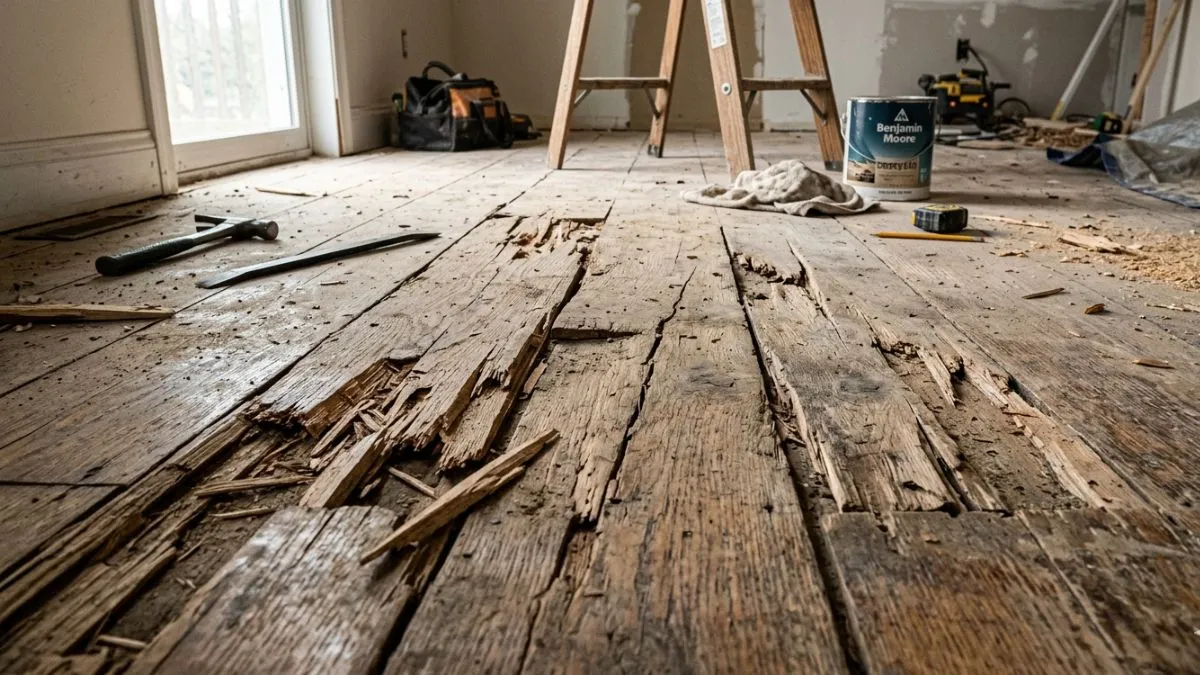
Have you noticed splinters popping up on your wood floor? These tiny cracks can quickly turn into bigger problems if left alone.
You might worry about safety, the look of your home, or even the cost of fixing it. But don’t worry—repairing splintered wood floors is easier than you think. You’ll discover simple steps to bring your floor back to life. Keep reading to protect your home and enjoy smooth, beautiful floors again.
Causes Of Wood Floor Splintering
Wood floors add warmth and beauty to any home. Over time, though, wood floors can develop splinters. Splintered wood floors not only look bad but can cause injuries. Several factors contribute to splintering, including moisture damage, wear and tear, and improper installation. Each cause affects the wood differently and requires unique care.
Moisture Damage
Moisture is one of the main reasons wood floors splinter. Wood is a natural material that absorbs water. When exposed to too much moisture, wood expands, softens, and weakens. This leads to cracks and splinters.
Common sources of moisture damage include:
- Spills that are not cleaned up quickly
- High indoor humidity
- Leaks under or around the floor
- Flooding or water seepage
Moisture causes wood fibers to swell. When the wood dries, fibers shrink and pull apart. This cycle creates gaps and rough edges that can splinter easily.
| Effect | Impact on Wood Floor |
| Swelling | Wood expands and loses shape |
| Warping | Floorboards bend or curl |
| Fiber Weakening | Wood becomes soft and fragile |
| Splintering | Wood cracks and sharp pieces form |
Prevent moisture damage by controlling indoor humidity and fixing leaks fast. Use mats near water sources and wipe spills immediately. Proper sealing also stops water from soaking into the wood.
Wear And Tear
Daily use causes gradual damage to wood floors. Wear and tear breaks down the wood surface, leading to splinters. High traffic areas suffer the most.
Common signs of wear and tear include:
- Scratches and dents from furniture and shoes
- Loss of protective finish
- Surface roughness
- Small cracks and chips
Wood fibers weaken over time due to constant pressure and movement. Dirt and grit act like sandpaper, wearing down the finish and wood beneath. This rough surface becomes vulnerable to splintering.
Here are ways wear and tear cause splintering:
- Finish wears off: Wood is exposed directly to damage.
- Surface damage: Scratches open the wood fibers.
- Fiber breakage: Wood splits and splinters form.
Regular cleaning and maintenance help reduce wear. Use soft cleaning tools and protect floors with rugs. Refinishing floors when the surface wears thin restores protection.
Improper Installation
Wood floor splintering often starts with improper installation. Poor fitting or wrong techniques cause stress on the wood. This stress leads to cracking and splintering over time.
Common installation mistakes include:
- Not leaving expansion gaps
- Using wrong adhesive or nails
- Uneven subfloor surfaces
- Incorrect acclimation of wood before installation
Wood needs space to expand and contract naturally. Without expansion gaps, boards press against each other and crack. Uneven subfloors create pressure points, breaking the wood fibers.
Preparing The Floor For Repair
Preparing a splintered wood floor for repair is a crucial step that affects the final look and durability. The process starts with making sure the floor is clean and free from dust. Next, all loose splinters must be carefully removed to avoid further damage. Finally, sanding the surface smoothens rough edges and creates a perfect base for fillers or finishes. These steps help the repair materials stick better and last longer.

Cleaning The Area
Begin by clearing the floor of dirt, dust, and debris. A clean surface allows repair materials to bond properly. Follow these steps for effective cleaning:
- Sweep the floor with a soft broom to remove loose dirt.
- Vacuum the area to pick up fine dust and particles.
- Use a damp cloth or mop to wipe down the floor gently.
Avoid soaking the wood. Excess water can cause swelling or warping. Use only a slightly damp cloth.
For tougher grime, mix a mild wood floor cleaner with water. Test the solution on a small hidden spot first to check for any damage.
| Cleaning Step | Purpose | Tip |
| Sweeping | Removes large dirt particles | Use a soft broom |
| Vacuuming | Eliminates fine dust | Use a vacuum with a brush attachment |
| Damp Wiping | Cleans surface residues | Use a lightly damp cloth, not wet |
Removing Loose Splinters
Loose splinters can worsen the damage or cause injury. Removing them carefully prevents future problems. Use these methods:
- Wear protective gloves to avoid cuts.
- Use needle-nose pliers or tweezers to pull out loose splinters.
- If splinters are too small, gently tap them out with a small hammer and chisel.
- Clean the area again to remove any splinter fragments.
Never force splinters out. This can damage the wood further. Work slowly and gently.
After removing splinters, check the floor for deep cracks or holes. These will need filling before sanding.
Sanding Techniques
Sanding smooths rough edges and prepares the wood for repair materials. Use the correct sanding method based on the damage size:
- Small areas: Use fine-grit sandpaper (120-150 grit) by hand.
- Larger areas: Use a floor sander or orbital sander with medium-grit sandpaper (80-120 grit).
Sand in the direction of the wood grain to avoid scratches. Apply light pressure and check progress frequently.
| Sanding Step | Tool | Grit Size | Purpose |
| Initial sanding | Orbital sander | 80-120 grit | Remove rough edges and splinters |
| Final sanding | Hand sanding block | 120-150 grit | Smooth the surface for finishing |
Wear a dust mask during sanding to protect your lungs. Clean the dust off the floor thoroughly before applying any filler or finish.
Repair Methods
Splintered wood floors reduce the beauty and safety of any room. Repair methods fix these issues and restore the floor’s smooth surface. Different methods suit different damage levels. Some splinters are small and need filling.
Filling Small Splinters
Small splinters can be repaired quickly with filler materials. This method smooths out rough patches without replacing boards. Start by cleaning the area to remove dust and dirt. Then, select a wood filler that matches the floor color. Use a putty knife to press the filler into the splintered cracks.
- Allow the filler to dry completely as per instructions.
- Sand the area gently to make it flush with the floor.
- Apply a finish or sealant to protect the repair.
Replacing Damaged Boards
Severe splintering often requires replacing the entire board. This process restores the floor’s structural integrity and look. First, identify the damaged board and remove it carefully. Use a circular saw to cut along the board edges without harming nearby planks.
- Remove nails or adhesive holding the board.
- Lift out the damaged board gently.
- Measure and cut a new board to match exactly.
- Fit the new board into place, ensuring tight joints.
- Nail or glue the new board down securely.
- Sand edges to blend with the floor surface.
- Finish with stain or sealant to match surrounding floor.
Replacing boards requires proper tools and some carpentry skills. It works best when splinter damage is deep or widespread. This method also fixes loose or warped boards. Here is a brief checklist for board replacement:
- Correct board type and wood species
- Matching color and finish
- Proper cutting tools (saw, chisel)
- Safety gear (gloves, goggles)
- Patience for precise fitting
This method ensures a long-lasting repair that looks natural. It also preserves the floor’s durability.
Using Wood Glue And Clamps
Wood glue and clamps help fix splintered pieces that remain attached to the floor. This method bonds broken wood parts back together tightly. Start by cleaning the splintered edges to remove dust. Apply a strong wood glue along the broken surfaces.
- Press the splintered pieces firmly together.
- Use clamps to hold the pieces in place while drying.
- Leave the clamps on for the glue’s recommended drying time.
- Remove clamps and check for stability.
- Sand excess glue and smooth the surface.
- Apply finish to protect the repair.
Wood glue creates a strong bond that restores floor strength. Clamps keep pressure steady to avoid gaps. This method works best for larger splinters still partly attached. It avoids board removal and keeps repairs neat.
Here is a quick guide for choosing wood glue types:
| Glue Type | Drying Time | Strength | Water Resistance |
| PVA (Polyvinyl Acetate) | 30 minutes to 1 hour | Medium | Low |
| Polyurethane | 1-2 hours | High | High |
| Epoxy | 5-30 minutes (fast set) | Very High | High |
Using wood glue and clamps is a precise way to repair splintered floors. It improves safety and maintains original flooring material.
Sanding And Refinishing
Repairing splintered wood floors often requires sanding and refinishing to restore the surface smoothly and beautifully. Sanding removes rough patches, old finishes, and damaged layers, preparing the wood for a fresh look. Refinishing protects the floor and enhances its color and texture. This process brings life back to tired floors and prevents further damage.

Choosing The Right Sandpaper
Selecting the correct sandpaper grit is crucial for effective sanding. Start with a coarse grit to remove splinters and uneven spots. Then, use finer grits to smooth the surface and prepare it for staining.
- Coarse Grit (36-60): Removes deep scratches and splinters quickly.
- Medium Grit (80-100): Smooths the surface after coarse sanding.
- Fine Grit (120-150): Prepares wood for stain by creating a smooth finish.
A table below summarizes the sanding sequence:
| Grit Size | Purpose | When to Use |
| 36-60 | Remove splinters and old finish | First sanding pass |
| 80-100 | Smooth rough surface | Second sanding pass |
| 120-150 | Prepare wood for staining | Final sanding pass |
Always sand in the direction of the wood grain to avoid scratches. Use a sanding block or machine for even pressure. Change sandpaper as it wears out to keep sanding effective and avoid damaging the floor.
Applying Stain And Sealant
Staining adds color and highlights the wood’s natural beauty. Sealant protects the floor from moisture, dirt, and wear. Both steps are essential for long-lasting results.
Follow these steps for best results:
- Clean the floor completely to remove dust and debris.
- Test the stain on a small hidden area to check color.
- Apply stain evenly with a brush or cloth, following wood grain.
- Wipe excess stain quickly to avoid blotches.
- Let stain dry fully before sealing.
- Apply sealant using a brush or roller for full coverage.
- Allow sealant to dry according to product instructions.
Use either water-based or oil-based products:
| Product | Advantages | Disadvantages |
| Water-Based Stain/Sealant | Fast drying, low odor, easy cleanup | Less durable than oil-based |
| Oil-Based Stain/Sealant | Durable, rich color, deep penetration | Longer drying time, strong odor |
Apply at least two coats of sealant for better protection. Sand lightly between coats with fine grit sandpaper for smooth results.
Polishing Tips
Polishing gives the floor a shiny, smooth finish that highlights the refinishing work. It also adds an extra layer of protection.
Use these tips to polish effectively:
- Choose the right polish: Select a product that matches your floor’s finish (e.g., polyurethane or wax-based).
- Clean the floor: Remove dust and dirt before polishing.
- Apply polish evenly: Use a soft cloth or applicator in small sections.
- Buff gently: Use a clean, dry cloth or buffing machine to bring out shine.
- Avoid over-polishing: Too much polish can cause buildup and dullness.
Regular polishing maintains the floor’s beauty and extends its life. Test polish products on a small area before full use to ensure compatibility with your floor finish.
Recommended: Sanding Uneven Wood Floors
Preventing Future Splintering
Splintered wood floors look unattractive and can cause injury. Repairing splinters is important, but preventing future splintering keeps floors safe and beautiful longer. Taking simple steps stops wood from cracking or breaking apart again. These tips help protect your investment and maintain your home’s charm.
Maintaining Humidity Levels
Wood floors react to moisture in the air. Too much dryness causes wood to shrink and crack. Too much humidity makes wood swell and warp. Both conditions lead to splintering over time.
Keep indoor humidity between 35% and 55%. This range keeps wood stable and reduces damage risk. Use these methods to control humidity:
- Use a humidifier in dry winter months.
- Run a dehumidifier during hot, humid summers.
- Ensure good air circulation with fans or vents.
- Seal windows and doors to prevent moisture changes.
Here is a simple guide to ideal humidity for wood floors:
| Season | Ideal Humidity Level | Effect on Wood |
| Winter | 35% – 45% | Prevents wood from drying and cracking |
| Summer | 45% – 55% | Prevents wood from absorbing too much moisture |
Check humidity regularly with an inexpensive hygrometer. Small adjustments keep wood floors healthy and splinter-free.
Regular Cleaning Practices
Cleaning wood floors properly stops damage that causes splinters. Dirt and grit act like sandpaper, wearing down wood fibers. Moisture left on floors can also weaken wood and cause cracking.
Follow these cleaning tips for safe wood floors:
- Sweep or vacuum daily to remove dust and grit.
- Use a damp mop with a wood floor cleaner once a week.
- Avoid soaking the floor with water.
- Wipe spills immediately to prevent moisture damage.
- Use soft cloths or microfiber mops to avoid scratches.
Cleaning tools impact floor health. Use these:
- Soft-bristle broom
- Vacuum with hardwood floor setting
- Microfiber mop
- pH-neutral wood cleaner
Regular cleaning removes tiny particles that cause splinters. It also keeps the wood surface smooth and strong.
Protective Floor Coverings
Protective coverings reduce wear and tear on wood floors. They shield the surface from scratches, dents, and moisture that cause splintering. Using floor coverings in high-traffic areas is smart.
Consider these options:
- Area rugs: Place rugs in hallways, entryways, and rooms with heavy use.
- Furniture pads: Attach felt pads to chair and table legs to prevent scratches.
- Runners: Use runners on stairs and narrow walkways for extra protection.
- Floor mats: Put mats near doors to catch dirt and moisture.
Choose rugs and mats with non-slip backing to avoid accidents. Clean these coverings regularly to prevent dirt buildup underneath.
Using floor coverings extends wood floor life and reduces splinter risks. Combine with cleaning and humidity control for best results.
Conclusion
Splintered wood floors can spoil any room’s look. Fixing them early saves money and effort. Use the right tools and materials for best results. Small repairs stop damage from getting worse. Clean and maintain floors to keep them strong. A smooth, safe floor feels good to walk on.
Take time to care for your wood floors. Enjoy a home that looks neat and inviting.