Is your porch floor under the column showing signs of damage or wear? You might be wondering if it’s time to replace it before the problem gets worse.
A sturdy porch floor is key to keeping your home safe and looking great. You’ll discover simple steps to replace the porch floor under your column, even if you’re not a professional. By the end, you’ll know exactly what to do to protect your porch and enhance your home’s curb appeal.
Assessing Porch Floor Damage
Assessing porch floor damage is an important first step before replacing the porch floor under a column. This process helps determine the extent of the problem and guides the repairs needed to keep your porch safe and sturdy. A damaged porch floor can cause serious issues, especially when it supports a column that holds part of your roof or structure. Careful inspection protects your home and saves money by addressing problems early.
Identifying Signs Of Wear
Start by looking for visible signs that the porch floor is wearing out. These signs show that the wood or material has weakened over time. Common signs include:
- Cracks or splits in the floorboards or surface.
- Soft or spongy spots when you walk on the floor.
- Discoloration or dark stains, often caused by water damage.
- Peeling paint or surface flaking.
- Warped or uneven boards that look bent or twisted.
Use a simple tool like a screwdriver to gently press on the floor. If it sinks easily or feels soft, the wood is damaged. Also, check for signs of mold or mildew near the column base, which may show moisture issues.
| Sign | Possible Cause | Action Needed |
| Cracks in boards | Wood drying or shrinking | Replace damaged boards |
| Soft spots | Rot or decay | Check for deeper damage |
| Discoloration | Water damage | Dry and treat area |
Checking Structural Integrity
Structural integrity means the porch floor can hold the weight it needs to support. This is especially important under columns, as they carry heavy loads. To check this, follow these steps:
- Look under the porch for any sagging or bending joists.
- Tap wood surfaces with a hammer to listen for hollow sounds.
- Inspect nails and screws for rust or looseness.
- Examine the connection points between the floor and the column base.
Signs of weak structure include:
- Joists that bow or crack.
- Fasteners that pull out or rusted metal parts.
- Gaps between floorboards and supports.
Use a level tool to check if the floor is even. Uneven floors may show hidden damage. A strong structure resists movement and holds firm under pressure. Small problems can lead to big failures if ignored.
Evaluating Column Support
Columns transfer the roof or upper structure weight to the porch floor and ground. The floor must support the column well to avoid collapse or damage. Begin by inspecting the base of the column:
- Check for cracks or rot around the column foot.
- Look for gaps between the column and the floor.
- Notice any leaning or tilting of the column.
Columns that move or shift indicate poor support. Examine how the column attaches to the porch floor:
- Is the base securely fastened?
- Are the bolts or brackets rusted or broken?
- Is there water damage near the base?
Proper column support requires:
| Support Aspect | What to Check | Importance |
| Base Condition | No rot, cracks, or gaps | Prevents column shift |
| Fasteners | Secure and rust-free | Maintains attachment strength |
| Alignment | Plumb and vertical column | Ensures even weight distribution |
Careful evaluation avoids dangerous failures and keeps your porch safe for years.
Supporting The Column Safely
Replacing the porch floor under a column requires careful attention to supporting the column safely. This step is crucial because columns carry the weight of the porch roof or structure above. Without proper support, the column can shift or collapse, causing damage or injury. Taking the right safety measures protects both the workers and the home during the replacement process.
Using Temporary Bracing
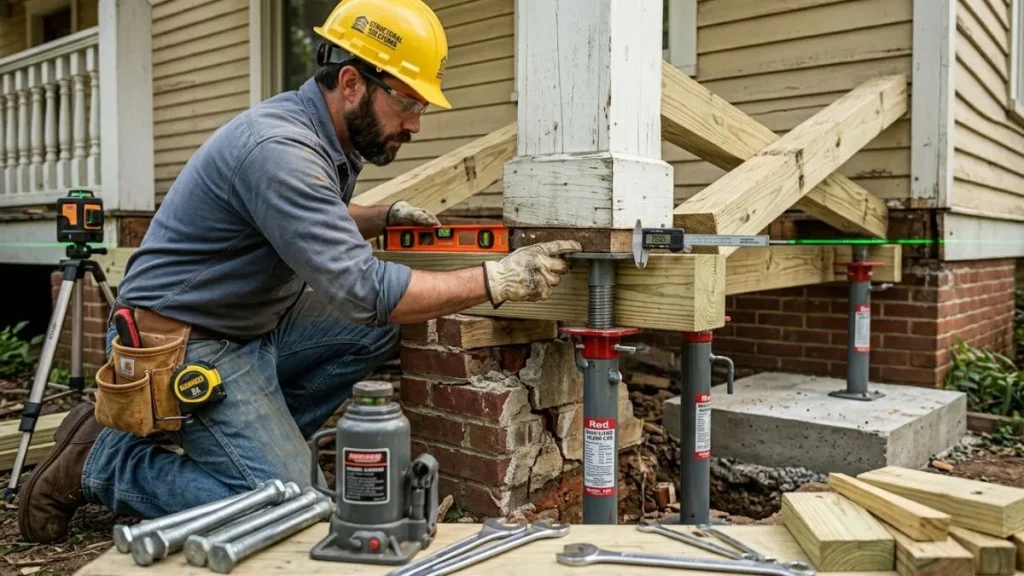
Temporary bracing holds the column firmly in place while the porch floor is replaced. It stops any movement that could weaken the structure. Using the right tools and materials for bracing is essential for safety and stability.
- Materials needed: Strong wooden beams or metal braces, adjustable jacks, nails, or screws.
- Placement: Braces should be placed diagonally between the column and a stable surface like the porch frame or ground.
- Adjustability: Adjustable jacks help fine-tune the support, keeping the column perfectly vertical.
Here is a simple guide to set up temporary bracing:
- Measure the height from the porch floor to the column base.
- Cut wooden beams to fit securely between the porch frame and the column.
- Attach braces diagonally using screws or nails for firm hold.
- Place adjustable jacks under the column if needed for extra support.
- Check that the column does not move by gently pushing it.
Ensuring Stability During Replacement
Maintaining stability throughout the floor replacement is critical. The column must stay in place without shifting. This requires constant monitoring and careful work.
Tips to keep stability:
- Check braces regularly for any loosening or damage.
- Work slowly and avoid applying pressure to the column.
- Keep tools and materials off the column base to prevent shifting.
- Have a helper observe the column while you work.
Safety checks should happen at each stage:
- Before removing old porch floor boards.
- During removal and replacement of floor joists.
- When installing new porch floor panels.
- After securing all new materials in place.
Remember: Column stability protects the entire porch structure. Take the time to do it right for safety and durability.
Removing The Old Porch Floor
Replacing the porch floor under a column starts with removing the old porch floor. This step prepares the area for a sturdy, fresh surface. Removing the old floor requires care to avoid damaging the supporting structures. It also clears out worn materials that can weaken the porch. Proper removal helps ensure the new floor lasts long and stays safe. The process involves detaching floorboards, handling nails and fasteners, and disposing of old materials. Each task needs attention to detail and the right tools.
Detaching Floorboards
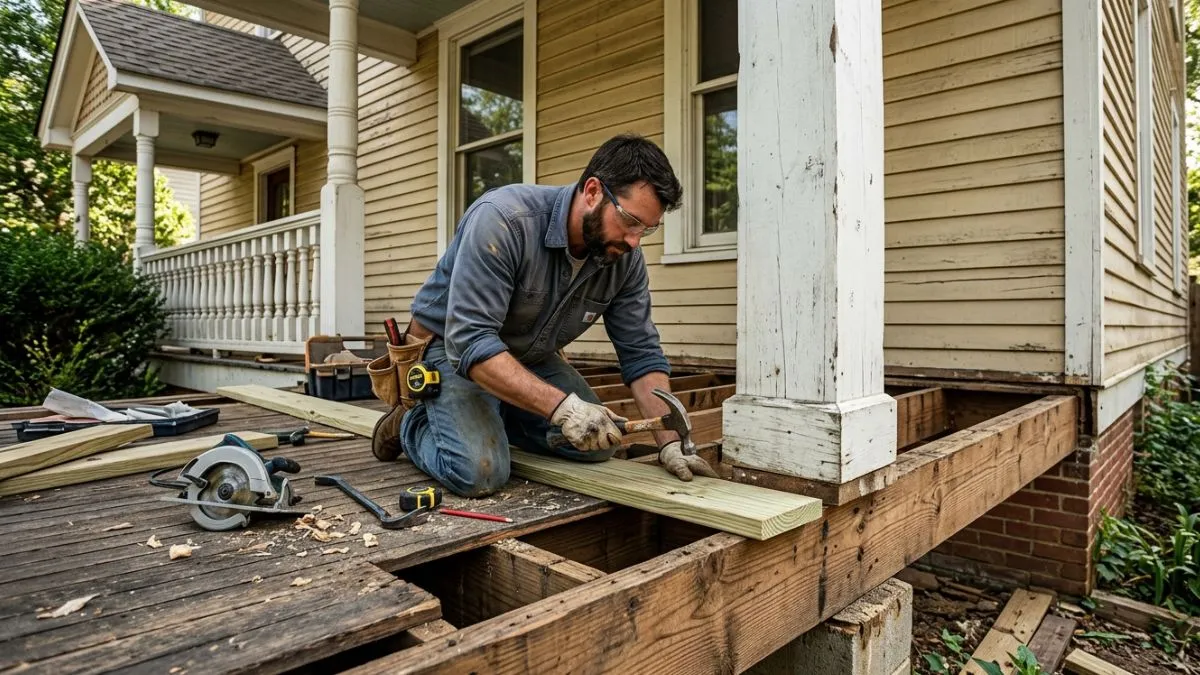
Begin by carefully detaching the floorboards from the porch frame. Use a pry bar or crowbar to lift boards gently. Insert the tool under the board edge and apply steady pressure. Avoid sudden force to prevent breaking the wood or damaging the joists underneath.
- Start at one corner or edge of the porch.
- Work slowly across the surface, loosening each board.
- Keep boards intact if possible to reuse or recycle.
Some porch floors use screws, others nails. Check how boards are fastened before prying. If screws are present, remove them with a drill or screwdriver first. This makes detaching easier and cleaner. Floorboards may vary in size and thickness, so adjust your tools accordingly.
| Tool | Use |
| Pry Bar | Lift and separate floorboards |
| Hammer | Tap pry bar under boards gently |
| Screwdriver/Drill | Remove screws holding boards |
Remove all floorboards completely before moving on. This clears space to inspect the porch frame for damage or rot.
Handling Nails And Fasteners
Old nails and fasteners can cause injury or damage new materials. Remove all nails, screws, and staples after detaching boards. Use a claw hammer or nail puller to extract nails carefully. If nails are bent or stuck, use pliers for better grip.
Steps for handling nails and fasteners:
- Identify visible nails or screws on floorboards and joists.
- Use the right tool to pull each fastener out.
- Check for small leftover pieces embedded in wood or frame.
- Dispose of nails safely to avoid injury.
Keep a magnetic nail finder handy to locate hidden metal fasteners. Removing all fasteners prevents interference with new flooring installation. It also reduces the risk of nails pushing through new boards.
Safety tips:
- Wear heavy gloves to protect hands.
- Use eye protection against flying debris.
- Work slowly to avoid slipping or sudden tool movement.
Disposing Of Old Materials
Proper disposal of old porch materials keeps your workspace clean and safe. Sort materials into wood, metal, and trash piles. Wood boards may be recycled or reused if in good condition. Nails and metal fasteners should go to metal recycling if possible.
Follow local guidelines for disposal:
- Take large wood pieces to recycling centers or donation sites.
- Dispose of damaged or rotted wood in the trash.
- Recycle metal nails and fasteners at scrap yards.
- Consider renting a dumpster for large projects.
Keep the porch area clear of debris during the project to avoid accidents. Use heavy-duty trash bags and containers for smaller waste. Sweep the area after removal to catch dust and small particles.
Clear disposal helps prepare the porch for inspection and repair. It also creates a clean slate for installing the new floor under the column.
Preparing The Subfloor
Replacing a porch floor under a column requires a strong and stable base. Preparing the subfloor is an essential step to ensure the new floor lasts long and supports the column safely. This process involves checking the structure beneath the floor, fixing any problems, and making the surface smooth and even. A well-prepared subfloor keeps the porch safe and attractive for years.
Inspecting Joists And Beams
The first step in preparing the subfloor is a careful inspection of the joists and beams. These are the main wooden supports beneath the porch floor. Their condition affects the porch’s strength and safety.
Start by looking for signs of damage, such as:
- Rot: Soft, crumbly wood indicates water damage.
- Cracks: Large or deep cracks weaken the structure.
- Warping: Bent or twisted wood can cause an uneven floor.
- Insect damage: Holes or tunnels suggest pests like termites.
Use a screwdriver or awl to poke the wood gently. Soft spots show decay. Also, check if the joists and beams are properly connected and secure. Loose or missing nails and screws need attention.
| Condition | What to Look For | Impact on Porch |
| Rot | Soft, dark, or crumbly wood | Weakens support, risk of collapse |
| Cracks | Visible splits or breaks | Reduces stability, uneven floor |
| Warping | Bent or twisted joists | Causes floor unevenness |
| Insect Damage | Small holes, tunnels | Compromises wood strength |
Repairing Or Replacing Damaged Sections
After inspecting, repair or replace any damaged joists and beams. This step restores the subfloor’s strength and safety.
Follow these steps:
- Remove damaged wood: Cut out rotten or broken sections carefully.
- Choose quality materials: Use treated lumber for durability and resistance to moisture.
- Match sizes: Replace with wood of the same size and type.
- Secure firmly: Use nails, screws, or metal brackets to attach new pieces.
- Check alignment: Ensure the new sections are level and straight.
For minor damage, use wood filler or epoxy to fill cracks and holes. Let it dry fully before sanding. For larger damage, full replacement is safer.
Consider these tools and materials for repairs:
| Tool/Material | Purpose |
| Circular saw | Cutting damaged wood |
| Hammer and nails | Securing new pieces |
| Wood screws and drill | Strong fastening |
| Wood filler or epoxy | Filling small cracks |
| Metal brackets | Extra joint support |
Cleaning And Leveling Surface
Once repairs are complete, clean and level the subfloor surface. This step prepares the porch for new flooring installation.
Start by removing all debris, dust, and loose wood pieces. Use a broom or vacuum for a thorough clean. Dirt can stop adhesives and fasteners from working well.
Next, check for uneven areas. Use a level tool to spot dips or bumps. Small dips can be fixed with a floor leveling compound or patching material. Spread it evenly and let it dry.
For larger uneven spots:
- Sand down high areas carefully with a power sander.
- Add shims or thin strips of wood to low areas.
Make sure the surface is flat and smooth. A level subfloor prevents squeaks and extends the life of the new porch floor.
Keep these tips in mind:
- Wear a dust mask when sanding.
- Use a damp cloth to wipe away sanding dust.
- Double-check level after cleaning and patching.
Installing New Porch Flooring
Replacing the porch floor under a column requires careful planning and precise work. Installing new porch flooring improves the porch’s safety and appearance. This process involves selecting the right materials, cutting boards to fit the space, and securing everything firmly. Proper installation ensures durability and a neat finish that can withstand weather and foot traffic.
Choosing Suitable Materials
Choosing the right materials is crucial for a strong, long-lasting porch floor. The material must resist moisture, insects, and outdoor wear. Here are common options:
- Pressure-treated wood: Affordable and widely used. It resists rot and insects but may need sealing.
- Cedar or redwood: Naturally resistant to decay and looks great. More expensive but lasts longer without chemicals.
- Composite decking: Made from wood fibers and plastic. Low maintenance and resistant to fading and cracking.
- Concrete or stone tiles: Very durable and weather-resistant. Best for modern or heavy-use porches.
Compare key features in the table below:
| Material | Durability | Maintenance | Cost |
| Pressure-treated wood | Good | Needs sealing regularly | Low |
| Cedar/Redwood | Very Good | Low | Medium to High |
| Composite decking | Excellent | Very Low | Medium to High |
| Concrete/Stone | Excellent | Low | High |
Choose the material that fits your budget, style, and porch use. Always pick materials rated for outdoor use to avoid early damage.
Cutting And Fitting Boards
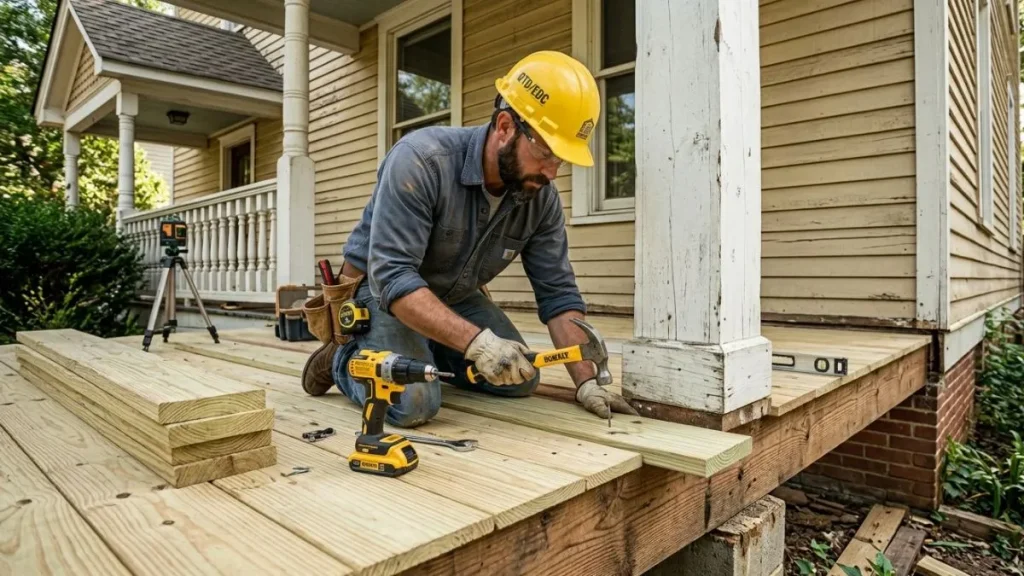
Accurate cutting and fitting are essential for a smooth porch floor. Start by measuring the porch area carefully. Mark each board to match the space, especially around columns or corners. Use a circular saw or miter saw for straight, clean cuts.
Steps to cut and fit boards:
- Measure length and width of the porch floor area.
- Mark boards with a pencil, allowing a small gap (about 1/8 inch) for expansion.
- Cut boards along the marks, keeping edges smooth with sandpaper.
- Test fit boards on the porch to check alignment and spacing.
- Trim any boards that do not fit perfectly.
Use these tips for a better fit:
- Cut one board at a time for accuracy.
- Keep grain direction consistent for a uniform look.
- Leave space around columns for slight movement.
- Label boards if the porch has complex shapes or multiple cuts.
Good cutting and fitting prevent gaps and uneven surfaces. This leads to a safer and more attractive porch floor.
Securing Flooring Properly
Properly securing porch flooring ensures safety and durability. Use the right fasteners and techniques to hold boards firmly. This prevents movement, squeaking, and damage over time.
Follow these steps to secure the flooring:
- Choose corrosion-resistant screws or nails made for outdoor use.
- Start fastening boards at one end, working across the porch.
- Drive fasteners into joists or supports, not just the surface.
- Leave a small gap between boards for drainage and expansion.
- Check board alignment regularly during fastening.
- Use a level to keep the floor flat.
Recommended fasteners:
| Fastener Type | Material | Best For |
| Deck screws | Stainless steel or coated | Wood and composite boards |
| Galvanized nails | Steel with zinc coating | Pressure-treated wood |
| Hidden fasteners | Plastic or metal clips | Composite or specialty decking |
Secure flooring correctly to avoid costly repairs later. Tight, stable boards create a porch floor that lasts and looks great.
Reinforcing Column Base
Replacing the porch floor under a column requires careful attention to the reinforcement of the column base. This step ensures the structural stability and longevity of both the porch and the column. A weak or damaged column base can lead to sagging, tilting, or even collapse over time. Strengthening this area protects your home and maintains its curb appeal. Reinforcing the column base involves checking the footing, adding support brackets, and sealing against weather damage. Each task contributes to a solid foundation for the porch column.
Checking Column Footing
The first step in reinforcing the column base is inspecting the footing. The footing is the concrete or masonry base that supports the column. It must be stable and free from cracks or erosion.
- Look for visible cracks or gaps around the footing.
- Check if the footing has sunk or shifted from its original position.
- Examine soil condition around the footing for signs of erosion or water pooling.
If damage exists, the footing may need repair or replacement. Use a simple test by pressing a screwdriver into the soil near the footing. Soft or loose soil indicates poor support. Table below shows common footing issues and solutions:
| Issue | Cause | Solution |
| Cracks in footing | Concrete aging or settling | Patch cracks with concrete filler or epoxy |
| Sunken footing | Weak soil or water erosion | Lift and stabilize footing; add gravel base |
| Loose soil | Poor drainage or soil type | Improve drainage and compact soil firmly |
Proper footing ensures the column stands firm, preventing porch floor damage.
Adding Support Brackets
Support brackets add strength to the column base by connecting the column securely to the porch floor or footing. These metal brackets reduce movement and help carry the load safely.
Types of support brackets include:
- L-shaped brackets – attach column sides to the floor frame.
- Post base brackets – hold the bottom of the column upright.
- Angle brackets – reinforce corners and joints.
Steps to install support brackets:
- Remove any old or damaged wood around the column base.
- Place the bracket at the column bottom, fitting it flush against the wood and floor.
- Use galvanized screws or bolts to fasten the bracket securely.
- Double-check alignment to keep the column vertical.
Support brackets resist shifting and prevent wobbling. They also protect the column from rot by minimizing contact with wet wood. Choose brackets made of rust-resistant materials like stainless steel or galvanized steel for best results.
Sealing And Weatherproofing
Sealing the column base is crucial to prevent water damage and decay. Moisture causes wood rot, weakens fasteners, and shortens porch life. Weatherproofing keeps the base dry and durable.
Effective sealing includes:
- Applying waterproof sealant around the base and any joints.
- Using silicone caulk to fill gaps between the column and porch floor.
- Installing a drip edge or flashing to direct water away.
- Painting or staining wood surfaces with weather-resistant coatings.
Tips for sealing:
- Clean the area thoroughly before applying sealant.
- Allow sealant to dry fully before exposing to rain.
- Inspect seals annually and reapply if cracks or peeling appear.
Weatherproofing extends the life of the column base and porch floor. It also saves money on repairs by reducing damage from rain, snow, and humidity.
Finishing Touches
Replacing the porch floor under a column is a big job, but the finishing touches make all the difference. These final steps help the porch look neat, strong, and lasting. Paying attention to small details creates a clean and safe space around the column and floor.
Cleaning And Preparing The Surface
After replacing the floor, clean dust and debris well. Use a broom or vacuum to remove loose dirt. Wipe the surface with a damp cloth to remove fine dust. This step helps paint or sealant stick better.
Sealing And Protecting The Floor
Apply a quality sealant to protect the new floor from water and weather. Use a brush or roller to cover every inch evenly. Let the sealant dry completely before using the porch.
- Choose a sealant made for outdoor wood or concrete.
- Apply two coats for better durability.
- Check drying times on the product label.
Painting Or Staining For A Finished Look
Paint or stain the floor to match your porch style. This step improves appearance and adds a layer of protection. Use colors that resist fading and dirt.
- Pick a color that matches your home.
- Use outdoor paint or stain products.
- Apply thin, even coats for the best finish.
Adding Trim And Baseboards
Install trim or baseboards around the column base. This hides gaps and gives a polished look. Choose materials that resist moisture and insects.
| Material | Benefit | Maintenance |
| PVC Trim | Waterproof and durable | Wipe clean as needed |
| Wood Trim | Classic look | Requires painting and sealing |
| Composite Trim | Resists rot and insects | Low maintenance |
Final Inspection And Safety Check
Check the area for loose boards, nails, or gaps. Make sure the floor is even and stable. Tighten screws and smooth rough edges. Safety is key for porch floors under columns.
Read Also: How to Attach a Porch Roof to a Brick House
Conclusion
Replacing the porch floor under a column takes careful steps. Start by checking the column’s support first. Remove the old floor carefully to avoid damage. Use strong materials to ensure safety and durability. Take your time to measure and cut pieces right.
Proper installation keeps your porch stable for years. Small repairs now save bigger problems later. A solid porch floor under the column means peace of mind. Stay patient and follow the process step by step. Your home will look better and stay safe.