Your porch floor faces a lot every day—rain, snow, sun, and dirt. If water seeps in, it can cause damage that’s costly and frustrating to fix.
But what if you could stop that before it starts? Learning how to waterproof your porch floor is easier than you think, and it protects your investment while keeping your space safe and beautiful. Keep reading, and you’ll discover simple, effective steps to make your porch floor last for years to come.
Assessing Porch Floor Material
Before starting to waterproof a porch floor, it is important to assess the floor material carefully. Knowing the type of material helps choose the right waterproofing method and products. Each material reacts differently to water and sealants. Some floors absorb water quickly, while others resist it naturally.
Identifying Common Floor Types
Porch floors come in several common materials. Identifying the floor type is the first step in waterproofing. Here are the most frequent porch floor materials:
- Wood: Often made of cedar, pine, or redwood, wood floors need special care to prevent rot and warping.
- Concrete: Durable and strong, concrete floors may develop cracks that allow water to seep in.
- Tile: Ceramic or porcelain tiles are water-resistant but need grout sealing to prevent leaks.
- Composite decking: Made from wood fibers and plastic, composite floors resist moisture but require cleaning before sealing.
- Stone: Natural stone floors like slate or granite look beautiful but can be porous and need sealing.
Checking For Existing Damage
Examining the porch floor for damage is crucial before applying any waterproofing solution. Damage can allow water to penetrate and ruin the floor. Look closely for these common issues:
- Cracks: Small or large cracks in concrete, tile, or stone can let water in.
- Rot: Soft, spongy spots on wood indicate rot caused by moisture.
- Loose or missing grout: Gaps in tile grout lead to leaks.
- Peeling paint or sealant: Indicates poor adhesion and water damage underneath.
- Mold or mildew: Black or green spots show moisture problems.
Repairing damage before waterproofing is vital. Fix cracks with filler or patching compound. Replace rotten wood boards. Re-grout tiles if needed. Clean mold with a suitable cleaner. Only after the floor is sound should waterproofing begin. This prevents trapped moisture and extends the floor’s life.
Gathering Waterproofing Supplies
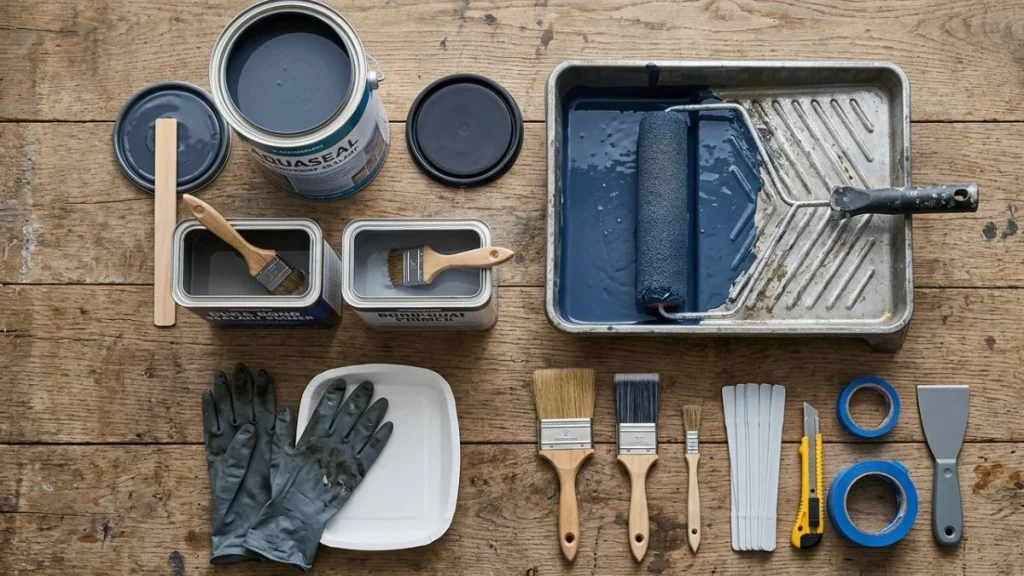
Waterproofing a porch floor starts with gathering the right supplies. Having the proper tools and materials makes the job easier and ensures a long-lasting result. Preparing well also saves time and prevents mistakes during the project.
Essential Tools And Materials
Start by collecting all necessary tools and materials before beginning any work. This preparation helps keep the process smooth and organized. Here is a list of the key items you will need:
- Wire brush or floor scraper: To clean old paint, dirt, and debris off the porch surface.
- Broom and vacuum: For removing dust and loose particles after scraping.
- Pressure washer (optional): Useful for deep cleaning concrete or wood floors.
- Sandpaper or sanding block: To smooth rough areas and help the sealant stick better.
- Painter’s tape: To protect edges and nearby walls from sealant spills.
- Paint roller and brushes: For applying the sealant evenly.
- Sealant tray: To hold the sealant during application.
- Protective gloves and mask: To keep your hands and lungs safe from chemicals.
Choosing The Right Sealant
Selecting the correct sealant is critical for protecting your porch floor from water damage. Different floors require different types of sealants. For example, wood and concrete need distinct products. Knowing the options helps you pick a sealant that lasts and performs well.
Consider these common sealant types:
- Acrylic Sealant: Easy to apply and dries fast. Good for concrete floors but less flexible.
- Polyurethane Sealant: Very durable and flexible. Works well on wood and concrete but takes longer to dry.
- Epoxy Sealant: Creates a hard, strong surface. Best for heavy-use areas but can be tricky to apply.
- Silicone Sealant: Highly water-resistant and flexible. Usually used for small cracks and joints rather than large floors.
Preparing The Porch Floor
Preparing the porch floor is a crucial step before applying any waterproofing material. A clean, smooth surface helps the waterproofing layer stick better and last longer. Skipping this step can lead to water damage and costly repairs.
Cleaning The Surface
Cleaning the porch floor removes dirt, dust, and debris that block the waterproofing from bonding well. Start by sweeping the floor with a stiff broom. Remove leaves, twigs, and loose dirt. After sweeping, wash the surface with a strong soap or detergent mixed with water.
- Use a scrub brush or a stiff broom to clean stubborn stains.
- Rinse the floor thoroughly with a garden hose or a bucket of clean water.
- Allow the floor to dry completely before moving to the next step.
For concrete or stone floors, a pressure washer can remove deep dirt and old paint. Use it carefully to avoid damage. Avoid using harsh chemicals that can weaken the floor or leave residues. A clean surface should look uniform without patches of dirt or stains.
Repairing Cracks And Gaps
Cracks and gaps on the porch floor allow water to seep in, causing damage. Repairing these imperfections is essential before waterproofing. Start by inspecting the entire floor for cracks, holes, or gaps. Use a flashlight to see small cracks clearly.
Clean cracks by removing loose debris with a wire brush or vacuum. Fill small cracks with a concrete patch or waterproof filler. For larger gaps, use a backer rod before applying the filler to save material and improve strength.
- Clean the crack or gap thoroughly.
- Insert a backer rod in wide gaps.
- Apply waterproof filler or patch with a putty knife.
- Smooth the surface and let it dry fully.
After repairs, check the surface for any uneven areas. Sand or scrape rough spots to make the floor smooth. A smooth surface helps the waterproof layer stick better and prevents water from pooling.
Applying Primer And Sealant
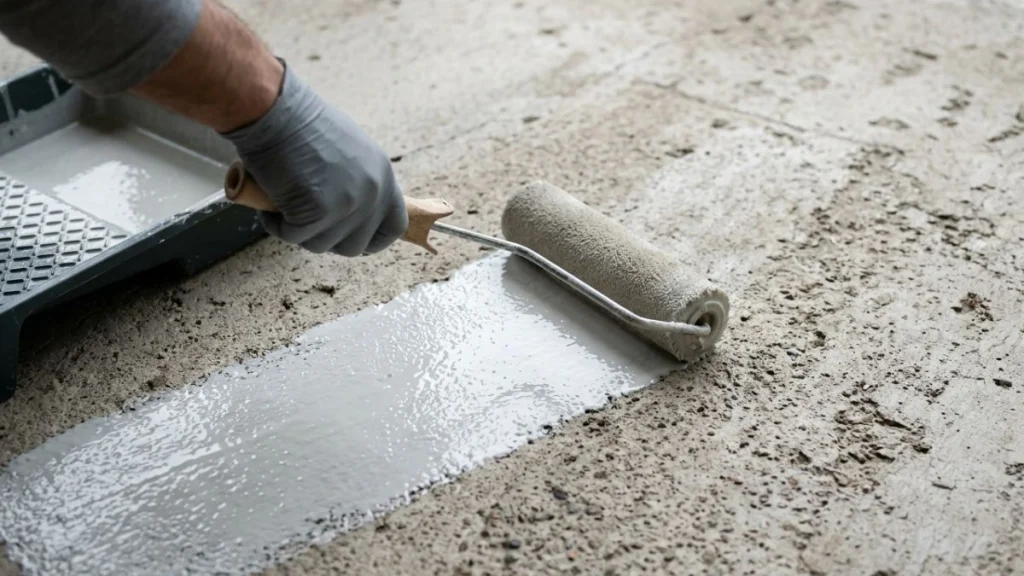
Applying primer and sealant is a critical step in waterproofing a porch floor. These materials create a protective layer that stops water from seeping into the wood or concrete. Primer helps the sealant stick better and lasts longer. Sealant forms a strong, water-resistant barrier that keeps moisture out.
Steps For Primer Application
Start by cleaning the porch floor thoroughly. Remove dirt, dust, and old paint. A clean surface helps the primer stick well. Use a broom or vacuum, then wash with mild soap and water. Let it dry completely before applying primer.
Next, choose a primer made for your porch material, such as wood or concrete. Read the label to confirm it works with your floor type. Use a brush or roller to apply a thin, even coat of primer. Avoid thick layers to prevent peeling.
Follow these steps for primer application:
- Clean the surface fully and let dry.
- Stir the primer to mix it well.
- Apply a thin, even coat using a brush or roller.
- Allow the primer to dry as per instructions (usually 1-2 hours).
- Lightly sand the surface if recommended for better adhesion.
Here is a quick guide on drying times for common primers:
| Primer Type | Drying Time | Surface Compatibility |
| Oil-Based Primer | 2-4 hours | Wood, Metal |
| Latex Primer | 1-2 hours | Wood, Concrete |
| Shellac Primer | 30 minutes – 1 hour | Wood, Drywall |
Wait for the primer to dry fully before moving on. Proper drying ensures the sealant bonds tightly.
Sealant Application Techniques
Sealant protects the porch floor by creating a waterproof shield. Use a sealant made for outdoor floors, designed to resist rain, sun, and temperature changes. Choose between clear or tinted sealants based on your porch look.
Apply the sealant after the primer is dry. Stir the sealant well to mix it. Use a clean brush or roller to spread the sealant evenly. Work in small sections to cover the whole floor without missing spots. Apply thin coats rather than thick ones to avoid bubbles or runs.
Follow these sealant application tips:
- Apply sealant along the edges first for full coverage.
- Use smooth, even strokes in one direction.
- Allow each coat to dry completely before adding another.
- Apply 2-3 coats for best waterproofing.
- Lightly sand between coats if the surface feels rough.
Different sealants have varying drying times and durability. Here is a comparison:
| Sealant Type | Drying Time | Durability | Best For |
| Acrylic Sealant | 1-2 hours | Moderate | Wood, Concrete |
| Polyurethane Sealant | 4-6 hours | High | Wood, High-Traffic Areas |
| Epoxy Sealant | 12-24 hours | Very High | Concrete, Heavy Use |
Let the final coat dry fully before walking on the porch. Proper sealing protects your porch floor for years.
Using Waterproof Membranes
Waterproof membranes are a reliable solution for protecting your porch floor from water damage. These thin layers act as a barrier, stopping water from seeping into the surface below. Using waterproof membranes helps keep the porch dry and extends its life. They are easy to apply and work well with various porch floor materials like wood, concrete, or tiles.
Types Of Membranes
There are several types of waterproof membranes available. Each type suits different porch materials and conditions. Understanding these options helps you pick the best one for your porch.
- Liquid-applied membranes: These come as a liquid you spread or spray over the surface. They form a seamless, flexible layer when dry.
- Sheet membranes: These are pre-made sheets of waterproof material you roll out and stick on the porch floor.
- Bituminous membranes: Made from asphalt or tar, these sheets are strong and durable. They are often used on concrete floors.
- Polyurethane membranes: These liquid membranes provide excellent flexibility and resistance to wear.
- EPDM rubber membranes: Made from synthetic rubber, these sheets are tough and weather-resistant.
Installation Tips
Proper installation ensures the membrane works well to protect your porch. Follow these steps and tips for a strong, waterproof layer.
- Clean the surface: Remove dirt, dust, and old paint. A clean surface helps the membrane stick better.
- Repair cracks: Fill any cracks or holes. Uneven surfaces can cause leaks.
- Apply primer: Some membranes need a primer coat. This improves adhesion and coverage.
- Use the right tools: Rollers, brushes, or trowels work best depending on the membrane type.
- Follow drying times: Let each layer dry fully before applying the next one.
- Seal joints carefully: Overlap sheet membranes and seal edges tightly to avoid gaps.
- Protect the membrane: Avoid walking on it until fully cured. Use protective coatings if recommended.
Maintaining Waterproofing
Maintaining waterproofing on your porch floor is vital to protect it from water damage and extend its life. Even after applying a waterproof layer, constant care is necessary. Water, sun, and weather changes can wear down protective coatings over time. Regular upkeep keeps your porch safe and looking good.
Regular Inspections
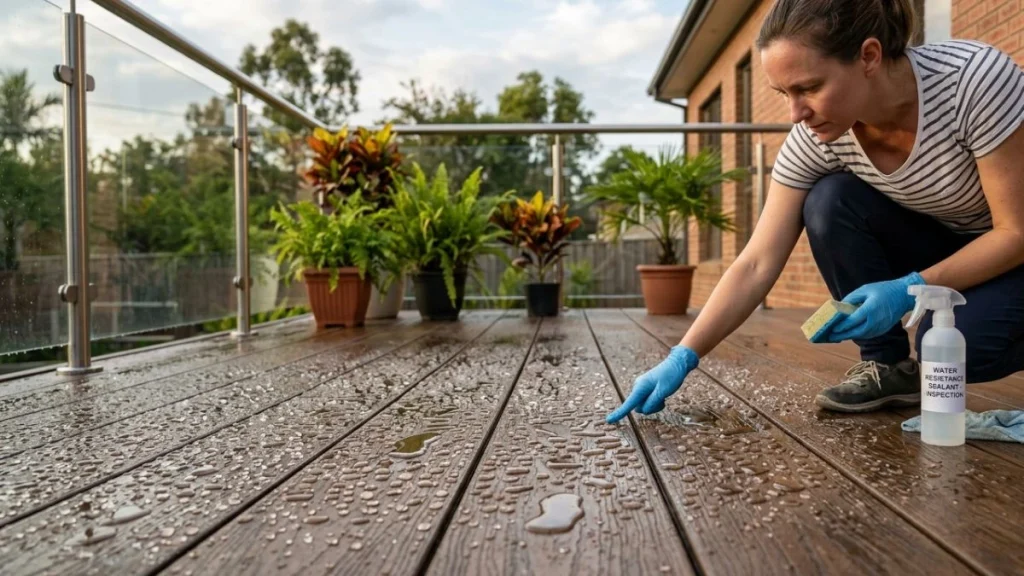
Checking your porch floor often helps catch problems early. Look closely for cracks, peeling, or soft spots on the surface. These signs show the waterproof layer might be failing.
Here are key points to check during inspections:
- Cracks or splits: Small cracks let water in, causing damage below.
- Peeling or bubbling: Sealants lifting mean water can seep underneath.
- Discoloration or stains: Dark spots may show water pooling or mold growth.
- Soft or spongy areas: Indicate wood or material rot from water damage.
Use a flashlight to see hard-to-spot issues. Inspect after heavy rain or storms to find leaks early.
| Inspection Area | What to Look For | Action Needed |
| Surface | Cracks, peeling, bubbles | Clean and repair damaged spots |
| Edges and corners | Gaps or lifted sealant | Reseal edges to prevent leaks |
| Underneath (if accessible) | Moisture or rot signs | Fix structural damage promptly |
Regular inspections help avoid costly repairs. Schedule them at least twice a year for best results.
Reapplying Sealant
Sealants protect your porch floor from water. Over time, they wear out and need reapplication. Keeping this layer fresh is crucial to maintaining waterproofing.
Follow these steps to reapply sealant correctly:
- Clean the surface: Remove dirt, dust, and old sealant residue.
- Dry completely: Ensure the porch floor is dry before sealing.
- Choose the right sealant: Use a product designed for your porch material.
- Apply evenly: Use a brush or roller for a smooth, full coverage.
- Allow to dry: Follow product instructions for drying time.
Here’s a quick comparison of common porch sealants:
| Sealant Type | Best For | Dry Time | Durability |
| Acrylic | Wood, concrete | 2-4 hours | 1-2 years |
| Polyurethane | Wood, metal | 4-6 hours | 3-5 years |
| Epoxy | Concrete, metal | 24 hours | 5+ years |
Reapply sealant every 1-3 years depending on weather and wear. Keep a small brush handy for quick touch-ups on cracks or edges.
You May Read Also: Waterproofing Concrete Porch Over Basement
Conclusion
Waterproofing your porch floor protects it from water damage. It helps keep the wood strong and safe. Regular care extends the life of your porch. Small steps make a big difference over time. Seal cracks and apply waterproof coating carefully.
Let the porch dry fully before use. Enjoy a dry, clean, and lasting outdoor space. This simple work saves you money later. Start today and protect your porch well.