Is your tile floor looking uneven and causing you frustration? Uneven tiles can make your space feel uncomfortable and even unsafe.
But don’t worry—fixing this issue is easier than you might think. You’ll discover simple, practical steps to level your tile floor and restore its smooth, polished look. Keep reading to learn how you can tackle this problem yourself and bring back the comfort and beauty your floor deserves.
Causes Of Uneven Tile Floors
Uneven tile floors can be frustrating and unsafe. They often cause tripping and damage to tiles. Several factors can lead to tiles not lying flat or level. These problems usually come from below the surface or from mistakes during installation. Identifying the root cause is the first step toward a smooth, even floor.
Subfloor Issues
The subfloor is the base layer under your tiles. It supports the entire tile floor. Problems with the subfloor are a common cause of uneven tiles. A weak or damaged subfloor creates an unstable surface.
Common subfloor issues include:
- Uneven Surface: If the subfloor has bumps or dips, tiles will not lay flat.
- Water Damage: Moisture can warp wood or weaken concrete, causing unevenness.
- Rot or Mold: These weaken the subfloor and cause tiles to lift or crack.
- Improper Thickness: A subfloor that is too thin may flex under weight.
Fixing subfloor problems often involves leveling, repairing, or replacing the base. A solid subfloor is key to a perfect tile floor.
Improper Installation
Many uneven tile floors result from poor installation practices. Even with a good subfloor, tiles can become uneven if not installed correctly.
Common installation mistakes include:
- Uneven Adhesive Application: Too much or too little glue causes tiles to sit unevenly.
- Incorrect Tile Spacing: Uneven grout lines lead to a bumpy surface.
- Skipping Level Checks: Not using a level tool during installation causes slants.
- Inadequate Curing Time: Walking on tiles before the adhesive dries can shift them.
Settling And Structural Movement
Houses and buildings naturally settle over time. This movement can cause tile floors to become uneven.
Key points about settling and structural movement:
- Soil Shifting: Changes in soil moisture or compaction cause foundations to move.
- Foundation Cracks: Small cracks may lift or tilt tiles above.
- Temperature Changes: Expansion and contraction of materials create stress on tiles.
- Vibrations: Nearby construction or heavy traffic may loosen tiles.
Repairing settling issues often means addressing the foundation or soil beneath the house. Without fixing the base problem, tile floors may continue to shift.
Assessing The Floor Level
Assessing the floor level is the first and most important step in fixing an uneven tile floor. Knowing the exact condition of your floor helps you decide the best way to correct it. A floor that is not level can cause tiles to crack or come loose over time. Careful measurement and inspection reveal where the floor is high or low. This information guides the repair process and ensures a smooth, durable tile installation.
Using A Level And Straightedge
A level and straightedge are simple tools that help find uneven areas on the floor. A level shows whether a surface is flat or tilted. A straightedge is a long, straight piece of metal or wood used to check the floor’s flatness over a distance.
Follow these steps to use them effectively:
- Place the straightedge on the floor, spanning several tiles or the area you want to check.
- Set the level on top of the straightedge to see if it is perfectly horizontal.
- Move the straightedge around the room, checking different spots and directions.
- Note any gaps between the floor and straightedge. These gaps show low spots.
- Check if the level tilts to one side. This tilt indicates a slope or high spot.
Using these tools together gives a clear idea of where the floor is uneven. Mark the problem areas with chalk or tape for easy identification.
Identifying High And Low Spots
Finding high and low spots on the floor helps plan the repair method. High spots may require grinding or sanding down, while low spots need filling or leveling compound.
Use this approach to identify these areas:
- Walk across the floor slowly, feeling for any bumps or dips under your feet.
- Check the floor visually by looking at the tile edges and grout lines for gaps or unevenness.
- Use the straightedge to span suspected problem spots.
- Tap the floor with a rubber mallet to listen for hollow sounds, which often mean low spots.
Document your findings clearly. Use a floor plan sketch and mark spots:
- H for high areas
- L for low areas
| Spot Type | Cause | Repair Method |
| High Spot | Uneven subfloor, settling, or debris | Grinding or sanding down |
| Low Spot | Holes, dips, or missing material | Filling with leveling compound |
Identifying these spots accurately saves time and money during repair. It ensures your tile floor will be even and stable for years.
Fixing Minor Unevenness
Uneven tile floors can cause trips and look unattractive. Fixing minor unevenness helps create a smooth, safe surface without replacing all tiles. Small bumps or dips can be corrected with simple tools and materials.
Applying Self-leveling Compound
The self-leveling compound is a liquid material that spreads evenly to fill low spots on the floor. It creates a flat surface for tiles or other flooring. This method is perfect for small dips or shallow uneven areas.
Steps to apply self-leveling compound:
- Clean the floor: Remove dust, dirt, and grease. A clean floor helps the compound stick well.
- Prime the surface: Use a primer made for self-leveling compounds. It improves adhesion and prevents bubbles.
- Mix the compound: Follow the instructions on the package. Use clean water and mix until smooth.
- Pour and spread: Pour the mixture on low spots. Use a trowel or squeegee to spread it evenly.
- Let it dry: Drying time depends on the product but usually takes a few hours.
Use self-leveling compound only on minor dips. Deep holes need more repair work before using this method.
Sanding High Spots
Sanding is effective to reduce small bumps or high spots on a tile floor. It smooths the surface for a better look and safer walk. Use sanding tools designed for tile or concrete surfaces.
Steps for sanding high spots:
- Mark high areas: Walk over the floor and mark spots that feel uneven.
- Choose sanding tool: Use an electric sander or hand sanding block with coarse grit sandpaper (40-60 grit).
- Wear safety gear: Use a dust mask and goggles to protect yourself from dust.
- Sand carefully: Move the sander gently over high spots. Avoid removing too much material.
- Check progress: Stop often and test the floor with your hand or level.
- Clean dust: Vacuum and wipe the floor to remove dust before any further work.
Repairing Severe Unevenness
Severe unevenness in a tile floor can cause tripping hazards and damage tiles over time. Fixing this problem takes more than just filling small gaps or cracks. It requires careful work to restore the floor’s flat surface.
Removing And Reinstalling Tiles
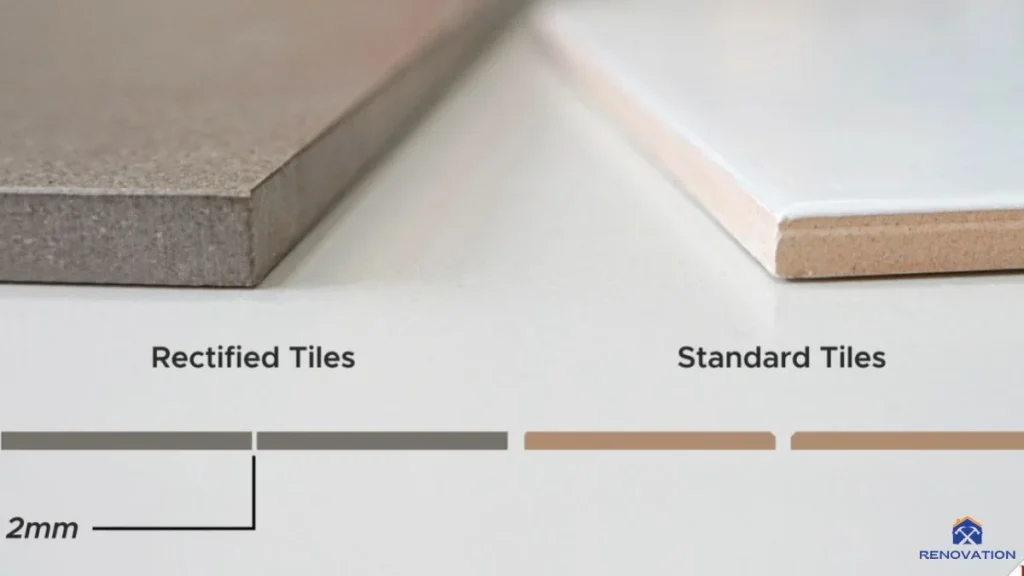
When tiles are badly uneven, removing and reinstalling them is often necessary. This process helps ensure the floor becomes level and stable.
- Start by clearing the area. Remove furniture and clean the floor.
- Use a chisel and hammer. Gently tap under the edges of the tiles to lift them without breaking.
- Label the tiles. Mark each tile’s position to make reinstalling easier.
After removing tiles, check for any damage. Broken or cracked tiles should be replaced.
Before reinstalling, clean the surface well. Remove old adhesive and dust to help new glue stick better. Use a quality tile adhesive. Spread it evenly using a notched trowel. Place each tile back in its original spot using the labels.
- Press tiles firmly to set them in place.
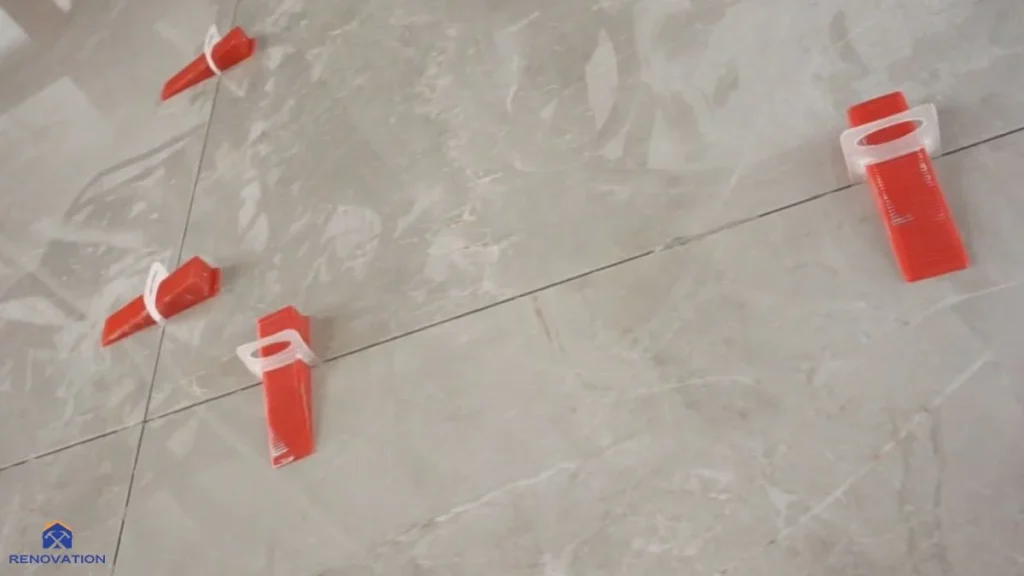
- Use tile spacers to keep consistent gaps.
- Allow adhesive to dry fully before grouting.
Replacing Or Repairing Subfloor
Severe unevenness often comes from a damaged or warped subfloor. Fixing the subfloor is key to a flat tile surface.
First, inspect the subfloor after tile removal. Look for:
- Soft spots or sagging areas
- Water damage or mold
- Loose or missing screws
Small damaged areas can be repaired with wood filler or patching compounds. For large damaged sections, replace the subfloor entirely.
- Remove damaged subfloor panels. Use a circular saw carefully to cut out bad sections.
- Check the joists underneath. Repair or reinforce if they are weak or cracked.
- Install new plywood panels. Choose moisture-resistant types for durability.
- Secure panels firmly. Use screws spaced every 6 to 8 inches.
- Sand the surface. Make it smooth and ready for tile installation.
Preventing Future Unevenness
Uneven tile floors cause discomfort and look unattractive. Fixing them is important, but preventing future unevenness saves time and money.
Proper Subfloor Preparation
The base under your tiles must be strong, clean, and level. A poor subfloor causes tiles to shift or crack. Start by removing old flooring and debris. Check the surface for bumps, cracks, or holes.
- Clean the subfloor completely to remove dust and grease.
- Repair cracks with a suitable filler or patching compound.
- Level the surface using a self-leveling compound if needed.
- Ensure dryness to prevent moisture problems later.
Use a level tool or straightedge to check evenness. The table below shows common subfloor types and preparation tips:
| Subfloor Type | Preparation Tips |
| Concrete | Clean, repair cracks, apply leveling compound if uneven |
| Wood | Fix loose boards, add plywood underlayment, check moisture |
| Existing Tile | Remove damaged tiles, clean surface, apply primer |
Proper subfloor preparation creates a stable base. This step helps tiles stay flat and prevents future lifting or cracking.
Correct Installation Techniques
Installing tiles the right way avoids uneven floors. Start by planning the layout carefully. Use spacers for even gaps and apply thinset mortar evenly. Follow these key practices:
- Mix thinset mortar according to package instructions for proper adhesion.
- Use a notched trowel to spread mortar evenly on the subfloor.
- Press tiles firmly into the mortar to avoid air pockets beneath.
- Check tile level often with a level tool during installation.
- Adjust tiles immediately if you notice unevenness.
- Allow mortar to dry fully before grouting and walking on tiles.
Using tile leveling systems can help keep tiles flush with each other. These tools reduce lippage and create a smooth surface. Remember, rushing the job leads to mistakes. Take time to align tiles properly.
Regular Maintenance Tips
Even with good preparation and installation, maintenance keeps tile floors flat and beautiful. Check tiles often for loose or damaged pieces. Clean floors regularly to avoid dirt buildup that can cause damage. Follow these tips:
- Sweep or vacuum daily to remove dust and grit.
- Mop with mild cleaner weekly to keep tiles and grout clean.
- Inspect grout lines for cracks and repair promptly.
- Fix loose tiles quickly to prevent shifting.
- Use furniture pads to avoid scratching tiles.
Keep humidity and moisture levels in check. Excess moisture causes tiles to lift or the subfloor to weaken. Use dehumidifiers in damp areas like basements.
Read Also: How To Clean Floor Tile Grout Without Scrubbing
Conclusion
Fixing an uneven tile floor improves both safety and appearance. Start by checking the problem areas carefully. Use the right tools to level the surface. Take your time to avoid mistakes and damage. Small repairs can make a big difference in the room.
Regular maintenance helps keep tiles smooth and strong. You can enjoy a neat, even floor that lasts longer. Simple steps lead to great results. Keep your space comfortable and safe with a level tile floor.