If your living room feels like a cave or your kitchen lacks natural light, a bump out window might be the single best upgrade you can make. It adds space, floods the room with sunlight, and completely changes the feel of a home — without requiring a full addition. But here’s the thing: the window itself is only half the battle. The framing is what holds everything together, and if it’s done wrong, you’re looking at structural damage, failed inspections, and a very expensive repair bill down the road.
This guide walks you through every step of bump out window framing — from understanding the structure to setting the final rough opening — in plain language that any homeowner can follow.
What Is a Bump Out Window and Why Does It Matter?
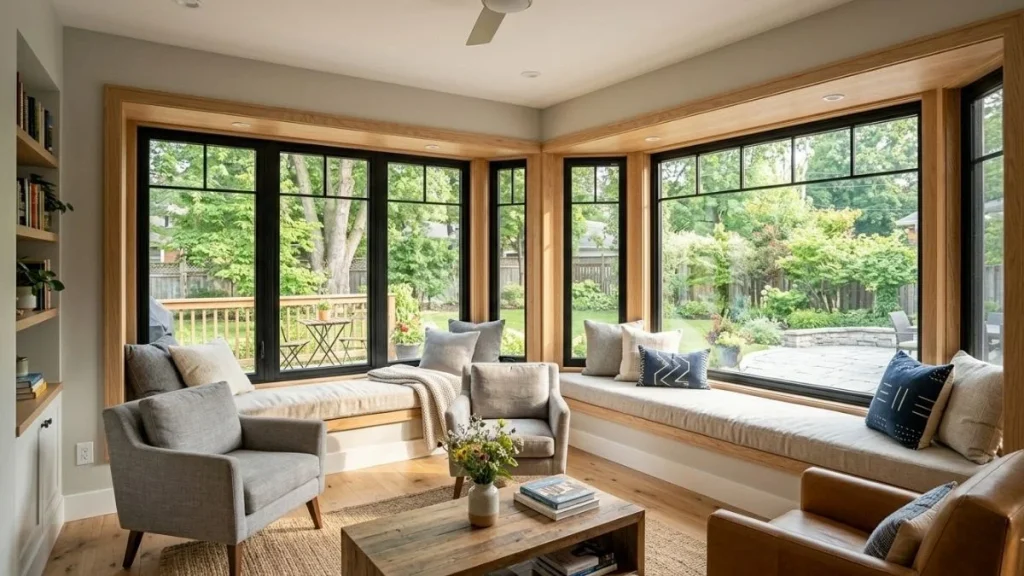
A bump out window is a window installation that projects outward beyond the plane of the exterior wall. Unlike a standard flat window that sits flush with the wall, a bump out creates a small recessed space inside the room — often used as a window seat, plant ledge, or breakfast nook area.
The most common types include bay windows, bow windows, garden windows, and box bay windows. Each one extends outward at different angles and depths, but all of them share one thing in common: they require proper structural framing to carry the load above the opening safely.
This is not a standard window swap. You’re cutting into a wall — possibly a load-bearing one — and that changes everything about how the project needs to be approached.
Benefits of Adding a Bump Out Window
Beyond the obvious visual appeal, bump out windows offer real, functional benefits that homeowners consistently rank among their top renovation decisions.
- More natural light — A projecting window captures light from multiple angles, not just straight ahead.
- Added interior space — Even a 12–18 inch projection creates usable square footage for seating or storage.
- Better ventilation — Side panels that open allow cross-ventilation that flat windows can’t match.
- Curb appeal and resale value — Bump out windows are a recognized selling point that adds character to any home’s exterior.
- Room feels larger — The extended sight line tricks the eye into perceiving more space.
According to Remodeling Magazine’s Cost vs. Value data, window-related projects consistently return between 60–75% of their cost at resale — making this one of the smarter remodeling investments available.
Is a Bump Out Window Right for Your Home?
Before you pick up a saw, you need to answer a few key questions. First, is the wall you’re working on load-bearing or non-load-bearing? Load-bearing walls carry the structural weight of floors and roof above them, and cutting into one without proper support can cause serious structural damage.
Second, check your local zoning rules and HOA regulations. Some communities restrict how far a window can project from the exterior wall. Third, consider the room. Kitchens, living rooms, bedrooms, and bathrooms all benefit from bump out windows, but each location has slightly different framing and weatherproofing requirements.
When in doubt about the structural side, a one-time consultation with a licensed structural engineer — usually $300–$600 — is money extremely well spent.
Planning Your Bump Out Window Framing Project
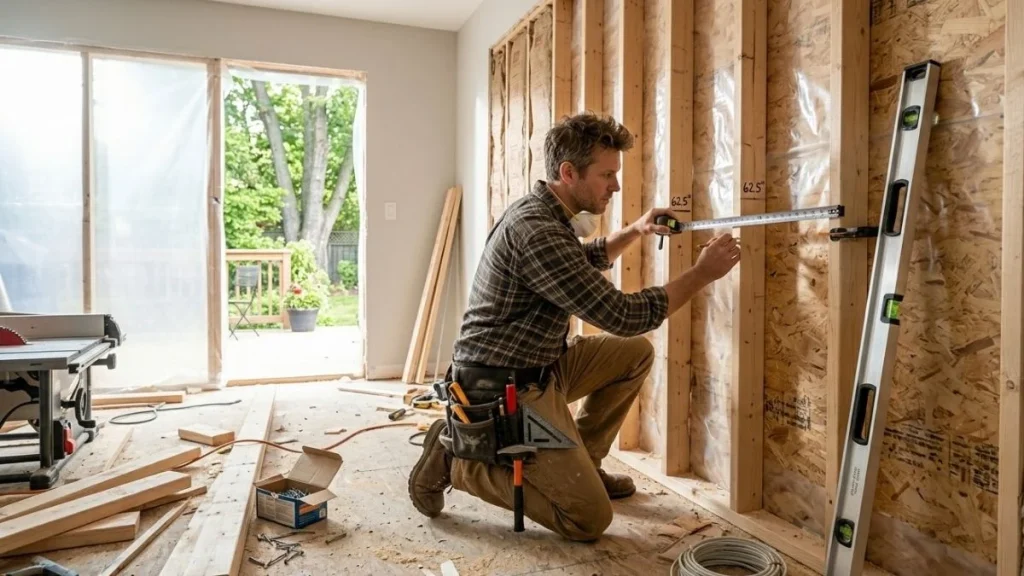
The most important pre-project task is figuring out what’s inside that wall. Load-bearing walls typically run perpendicular to the floor joists, sit above beams in the basement, and are often located near the center of the house or along exterior walls. Non-load-bearing walls run parallel to the joists and don’t carry structural weight.
If you’re uncertain, open up a small section of drywall or check the basement framing below. You’re also looking for electrical wiring, plumbing pipes, and HVAC ducts — all of which need to be rerouted before framing begins. Skipping this step is one of the most common (and costly) mistakes DIYers make.
Key Components of Bump Out Window Framing
Understanding the anatomy of a framed window opening will make every step of this project make sense.
| Framing Component | Function |
| King Studs | Full-height studs on each side of the opening; anchor the frame |
| Jack Studs (Trimmers) | Shorter studs that directly support the header beam |
| Header Beam | Horizontal beam spanning the top of the opening; carries load above |
| Rough Sill | Horizontal member at the bottom of the window opening |
| Cripple Studs | Short studs above the header and below the sill; fill structural gaps |
| Top & Bottom Plates | Horizontal members that tie the entire wall assembly together |
Each component plays a specific structural role. Miss one, or size it incorrectly, and the entire framed opening is compromised.
How to Calculate the Rough Opening Size
The rough opening is the framed hole in the wall where the window unit will sit. It needs to be slightly larger than the actual window to allow for shimming and leveling.
The standard formula is:
- Width: Window width + 2 inches
- Height: Window height + 2.5 inches
For example, a 36″ x 48″ window requires a rough opening of approximately 38″ x 50.5″. Always confirm with the window manufacturer’s installation specs, as some units have specific rough opening requirements that differ from the standard formula.
Permits and Building Codes
Here’s something many DIYers try to skip — and almost always regret. Any time you’re altering a structural wall or adding a new window opening, a building permit is required in most jurisdictions. The permit process exists to protect you: it ensures the work is inspected and meets local building codes based on IRC (International Residential Code) standards.
Skipping permits can result in fines, forced removal of the work, and serious complications when you try to sell your home. Pull the permit. It typically costs $50–$200 and is absolutely worth it.
Tools and Materials You’ll Need
Essential Tools
You don’t need a contractor’s full arsenal, but you do need the right tools before you start.
- Circular saw and reciprocating saw
- Framing nailer or hammer
- Speed square, level, and tape measure
- Stud finder and chalk line
- Pry bar and utility knife
- Safety gear: safety glasses, work gloves, dust mask
Framing Materials and Lumber
For standard 2×4 walls, use construction-grade 2×4 Douglas fir or Southern Yellow Pine for studs. For wider openings (over 4 feet), headers should be built from doubled 2×10 or 2×12 lumber with a ½” OSB spacer in between — or better yet, use an engineered LVL (Laminated Veneer Lumber) beam, which handles heavier spans with less depth.
For exterior walls, OSB or plywood sheathing is required on the bump out framing, along with a weather-resistant barrier (housewrap) before the window is installed.
Estimated material cost: $300–$900 depending on window size and lumber prices in your area.
Step-by-Step Bump Out Window Framing Process
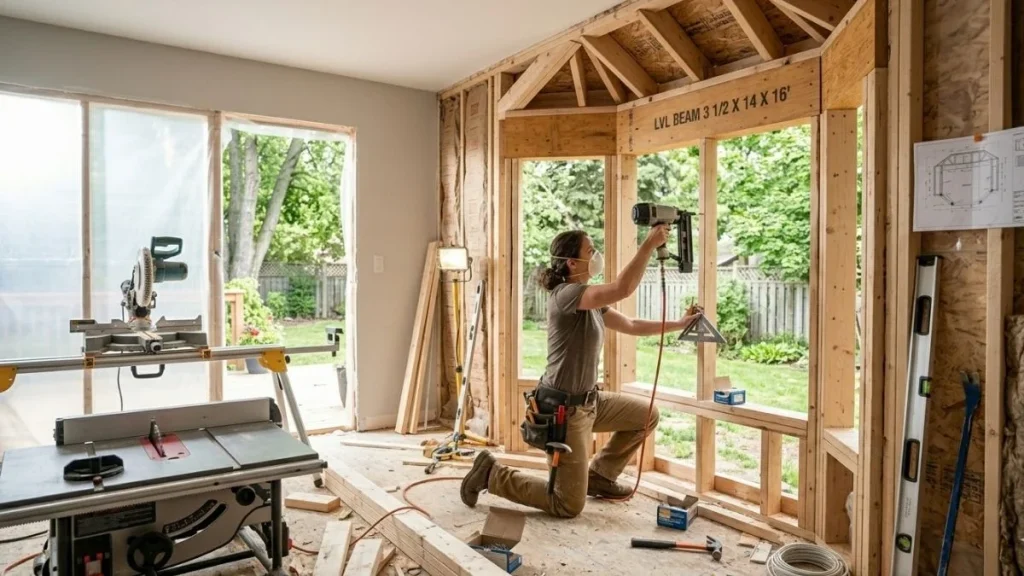
Start by marking the rough opening dimensions on the interior wall surface. Use a stud finder to locate existing studs and mark them clearly. Shut off the electrical circuit that serves the work area at the breaker panel — never assume a wall is clear until you’ve confirmed it. Lay drop cloths to protect flooring and set up adequate lighting in the work zone.
Remove Interior Wall Material
Score the drywall along your marked lines with a utility knife before cutting to reduce cracking. Cut along the lines with a drywall saw or oscillating tool and carefully remove the panels. Once the framing cavity is exposed, inspect for wiring, plumbing, or ductwork. If any of these are present, they must be rerouted by a licensed electrician or plumber before proceeding.
Install Temporary Support Wall (Load-Bearing Walls Only)
If you’re working on a load-bearing wall, this step is non-negotiable. Build a temporary stud wall parallel to the work wall, set back about 2 feet, using 2×4 lumber and a doubled top plate. This wall carries the load above while you cut and reframe the permanent opening. Removing load-bearing studs without this support can cause the ceiling — or worse — to drop.
Cut and Remove Existing Studs
Mark the studs that fall within the rough opening width for removal. Using a reciprocating saw, cut each stud at both the top and bottom plates. Remove the cut sections carefully. Clean out the opening and inspect the remaining framing for any damage, rot, or pest activity before moving forward.
Install King Studs and Jack Studs
Cut two king studs to the full wall height and nail them into the top and bottom plates at the outer edges of the rough opening. These are your anchors. Next, cut two jack studs (trimmers) to the correct height — from the bottom plate to the underside of the header — and nail them flush against the inside face of each king stud. Check both for plumb with your level before nailing off completely.
Size and Install the Header Beam
Header sizing is critical and often misunderstood. A common rule of thumb: for every foot of span, use one inch of header depth. A 4-foot opening typically needs a 4x header — but always reference your local IRC span tables or consult a structural engineer for load-bearing applications.
Build a built-up header by sandwiching a ½” OSB spacer between two pieces of dimensional lumber so the total thickness matches your wall width. Set the header on top of the jack studs and nail through the king studs on each side. Verify it’s level before proceeding — a sloped header causes window installation problems every time.
Install the Rough Sill and Cripple Studs
Measure and cut the rough sill to fit between the two jack studs and nail it at the correct height for the bottom of your window opening. Install cripple studs below the rough sill, spaced 16 inches on center, running from the bottom plate up to the underside of the sill. Install additional cripple studs above the header, running from the top of the header to the top plate — same 16-inch spacing.
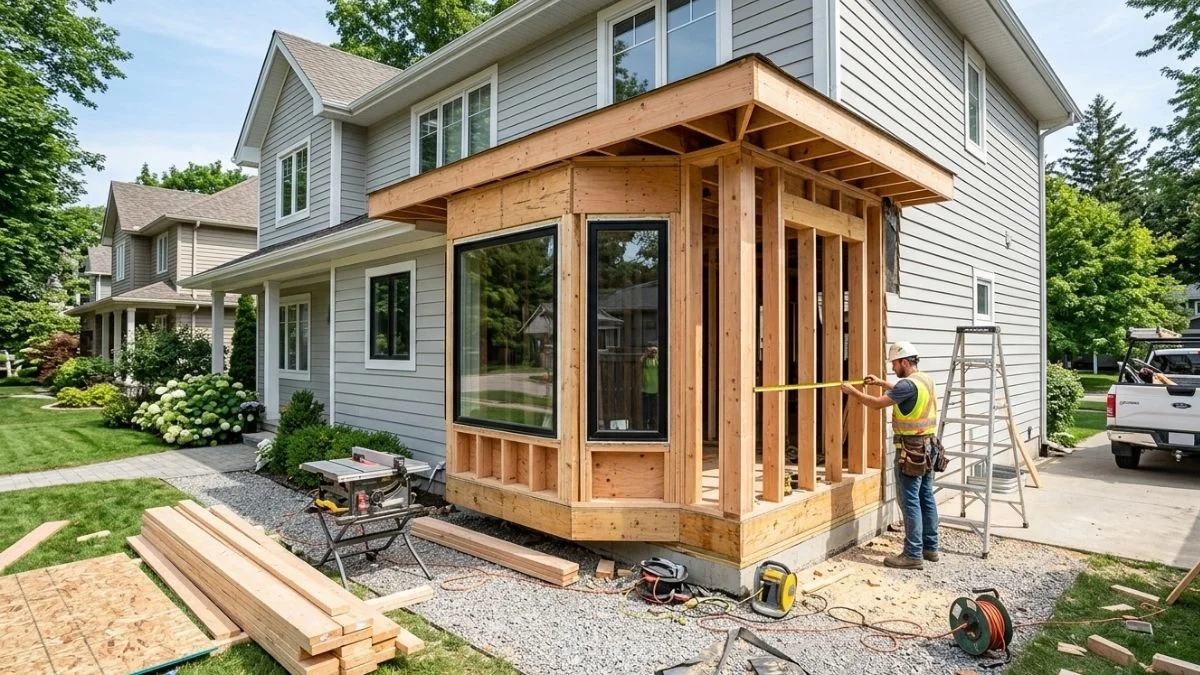
Frame the Exterior Bump Out Structure
For a true bump out, you’ll need to extend framing outward from the house. This involves cutting through the exterior sheathing, extending the floor framing (or installing a cantilevered platform), framing the side walls of the bump out box, and framing a small roof structure to shed water. Install exterior sheathing (OSB or plywood) over the new framing and wrap everything with housewrap, lapping it over the existing wrap to create a continuous moisture barrier.
Verify the Rough Opening and Prep for Window Installation
Before calling the rough framing done, take final measurements of the rough opening in multiple spots — top, middle, and bottom for width; left, center, and right for height. Check that the opening is square by measuring corner to corner diagonally (both measurements should match). Install sill pan flashing at the base of the rough opening to direct any water that gets past the window to the outside. The rough opening is now ready for the window unit.
Common Bump Out Window Framing Mistakes to Avoid
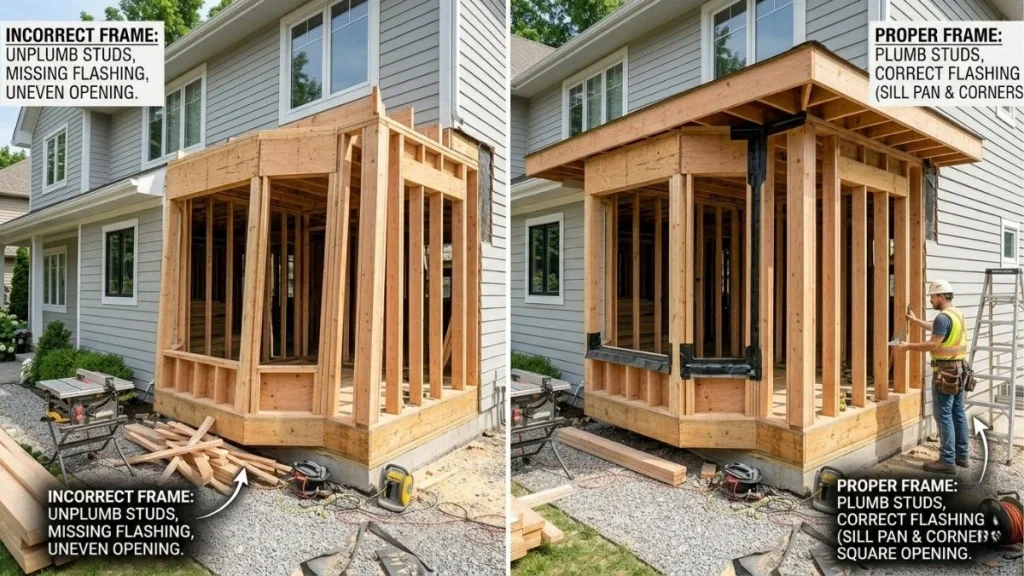
Even experienced DIYers make preventable errors on window framing projects. Here are the ones that show up most often — and how to avoid them.
- Undersizing the header — This is the most dangerous mistake. When in doubt, go larger or use an engineered beam.
- Skipping the temporary support wall — Never cut load-bearing studs without shoring up the load first.
- Wrong rough opening size — Measure twice, cut once. A rough opening that’s too small means re-framing; too large means gaps and air infiltration.
- Not checking plumb and level — An out-of-plumb frame leads to a window that won’t operate correctly.
- Forgetting flashing — No flashing means water infiltration, rot, and mold behind the wall.
- Ignoring permits — The financial and legal risk far outweighs the time saved.
Bump Out Window Framing Cost Breakdown
DIY vs. Hiring a Professional
DIY framing makes sense if you have basic carpentry skills, the right tools, and — critically — a non-load-bearing wall situation. If the wall is load-bearing, most homeowners are better served hiring a professional framing carpenter or general contractor for at least the structural portion of the work.
Professional labor for window framing typically runs $500–$2,500 depending on complexity, location, and whether structural work is involved. Add in permit fees, potential engineer costs, drywall repair, and exterior finishing, and the full installed cost for a bump out window project generally falls between $1,500 and $6,000+.
Getting at least three quotes from licensed contractors ensures you’re paying a fair market price and gives you leverage to negotiate.
Read Also: Filling Gaps Around Window Frames
Conclusion
Bump out window framing is one of those projects where getting the details right makes all the difference. From sizing the header correctly to installing proper flashing, every step has a reason — and every shortcut has a consequence. Follow the process laid out in this guide, pull your permits, and don’t hesitate to bring in a pro for the structural work if the situation calls for it.
Done right, a bump out window adds lasting beauty, real function, and genuine value to your home. And with a solid understanding of the framing process behind it, you’ll approach the project with the confidence it deserves.