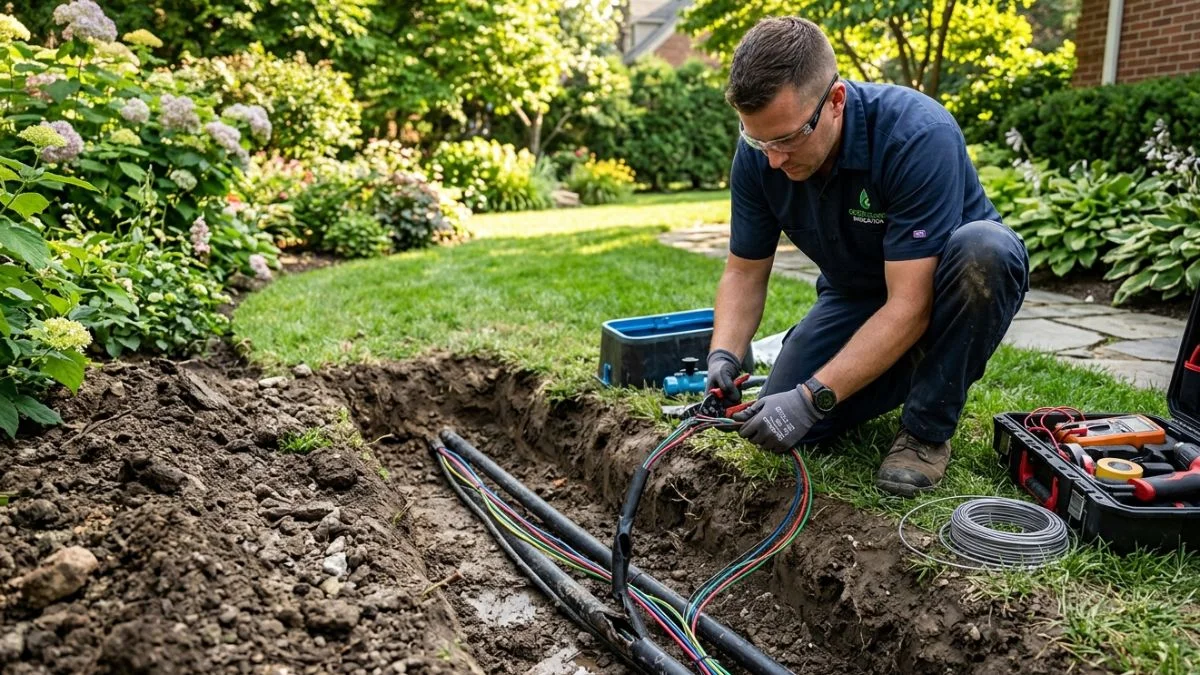
Is your lawn sprinkler acting up, leaving parts of your yard dry and patchy? The problem might be a broken underground sprinkler wire.
When these wires get damaged, your system can’t deliver water where it’s needed most. Fixing it quickly is key to keeping your lawn healthy and green. You’ll discover simple and effective ways to identify, troubleshoot, and repair underground sprinkler wires—saving you time, money, and frustration.
Common Causes Of Wire Damage
Underground sprinkler systems rely heavily on wiring to deliver signals from the controller to the sprinkler valves. These wires run beneath the soil, making them vulnerable to various types of damage. Understanding the common causes of wire damage helps homeowners and landscapers identify problems quickly and perform timely repairs.
Broken or damaged wires can lead to sprinkler zones not activating or watering unevenly, causing frustration and wasted water. The most frequent causes of wire damage include physical cuts, rodent activity, and corrosion over time. Recognizing these issues can extend the life of your sprinkler system and maintain efficient watering.
Physical Cuts And Breaks
Physical cuts and breaks in underground sprinkler wires often happen during yard work or construction. Lawn mowers, shovels, and other digging tools can accidentally slice through wires buried just a few inches below the surface. These cuts stop the electrical signal, causing the sprinkler valve to fail. Physical damage is the easiest problem to spot because the sprinkler system will not work in the affected zone.
Common causes of physical cuts include:
- Digging trenches or planting trees near sprinkler lines
- Using sharp tools close to sprinkler wire paths
- Installing new irrigation parts without checking wire locations
- Accidental damage from lawn mowers or weed trimmers
To avoid physical cuts, mark the wire paths clearly before digging. Use a wire locator tool to find exact wire locations under the soil. Repairing physical cuts usually involves stripping the damaged wire ends and connecting them with waterproof wire connectors or splice kits.
Rodent Damage
Rodents like mice and squirrels often chew on underground sprinkler wires. They see the wires as easy gnawing material. This chewing can expose the copper inside, breaking the electrical connection. Rodent damage is sneaky because the wire may look intact from the surface but fail to conduct electricity.
Signs of rodent damage include:
- Sprinkler zones that turn on and off unexpectedly
- Visible bite marks or stripped wire insulation
- Frequent need to repair the same wire section
Rodents prefer areas with loose soil or mulch. Reducing mulch thickness near wires and sealing entry points into your yard can help. Wrapping wires with protective conduit or metal tape offers a strong barrier against chewing. Regular inspections catch damage early, preventing larger system failures.
| Rodent Type | Damage Pattern | Protection Method |
| Mice | Small bites, frequent | Metal conduit, trapping |
| Squirrels | Larger gnaw marks | Wire wrap, repellents |
Corrosion And Wear
Corrosion happens when moisture and soil chemicals slowly eat away at the wire’s metal parts. Even wires with good insulation can suffer over time. Corrosion reduces the wire’s ability to conduct electricity and causes sprinkler valves to malfunction. This damage develops quietly and worsens without visible signs until failure occurs.
Factors increasing corrosion risk:
- Acidic or alkaline soil
- High moisture levels or poor drainage
- Use of metal connectors that rust
- Old or low-quality wire materials
Prevent corrosion by using wires rated for underground use and waterproof connectors. Test your sprinkler system regularly to catch early signs like weak zone activation. Replacing corroded wires with high-quality, corrosion-resistant cable extends system life and improves reliability.
| Cause | Effect on Wire | Prevention |
| Soil chemicals | Metal corrosion, loss of conductivity | Use corrosion-resistant wire |
| Moisture | Rust on connectors, insulation damage | Waterproof connectors, good drainage |
Locating The Faulty Wire
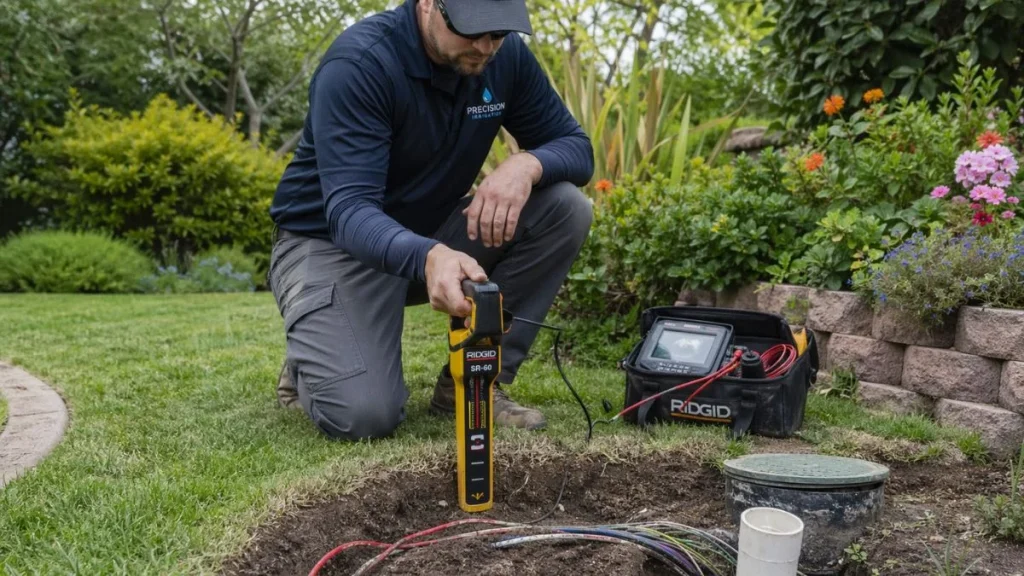
Locating the faulty wire in an underground sprinkler system is the first crucial step in repairing it. A damaged wire can cause zones to stop working or valves to fail, leading to uneven watering. Finding the exact spot of the problem helps save time and money. It also prevents unnecessary digging and further damage.
Using A Multimeter
A multimeter is a handy tool to check the condition of underground sprinkler wires. It measures electrical resistance, voltage, and continuity. This helps detect where the wire is broken or shorted.
Follow these steps to use a multimeter for wire testing:
- Turn off the sprinkler system to avoid electric shock.
- Set the multimeter to the ohms (Ω) or continuity mode.
- Disconnect the wire from the controller or valve.
- Touch the multimeter probes to both ends of the wire.
Reading the results:
- Low resistance means the wire is intact.
- High resistance or infinite means there is a break.
- A continuity beep shows the wire is continuous.
| Multimeter Reading | Meaning |
| 0 to 5 ohms | Good wire, no breaks |
| More than 5 ohms | Possible damage or corrosion |
| Infinite or OL (open line) | Broken wire or open circuit |
Using a multimeter is safe and accurate for finding wire faults underground. It helps narrow down the problem to a specific wire or section.
Tracing Wire Paths
Tracing wire paths is important to understand where the wires run beneath the ground. Knowing the wire route prevents unnecessary digging and helps pinpoint problem areas.
Here are ways to trace sprinkler wire paths:
- Use the original installation map: Many systems come with a wiring diagram or layout.
- Follow the wire physically: Look for wire markers or small access points.
- Use a wire tracer tool: This device sends a signal through the wire and detects its path above ground.
Wire tracers work by:
- Connecting the transmitter to the wire.
- Moving the receiver above the ground to follow the signal.
- Marking the detected wire path with flags or paint.
Benefits of tracing wire paths:
- Pinpoints exact wire locations.
- Reduces damage to landscaping.
- Prepares for targeted repairs.
Tracing wire paths is a practical step that saves time and prevents costly mistakes during underground sprinkler wire repair.
Identifying Break Points
Finding the exact break point in a sprinkler wire is key to fixing it correctly. Breaks cause open circuits, stopping current flow to valves. Identifying these spots avoids replacing entire wire runs.
Methods to locate break points include:
- Visual inspection: Check for damaged or exposed wires at valve boxes and junctions.
- Resistance testing: Measure resistance in sections of the wire to isolate the break.
- Time-domain reflectometer (TDR): A specialized tool that sends signals and measures reflection times to find breaks.
Simple step-by-step process:
- Disconnect the wire at both ends.
- Cut the wire into smaller sections.
- Test each section with a multimeter for continuity.
- Repeat until the faulty section is found.
Mark the break point clearly. Repair by splicing wires with waterproof connectors or replacing the damaged segment. Properly sealing the repair prevents future failures.
Accurate break point identification minimizes repair costs and restores sprinkler system function quickly.
Step-by-step Repair Process
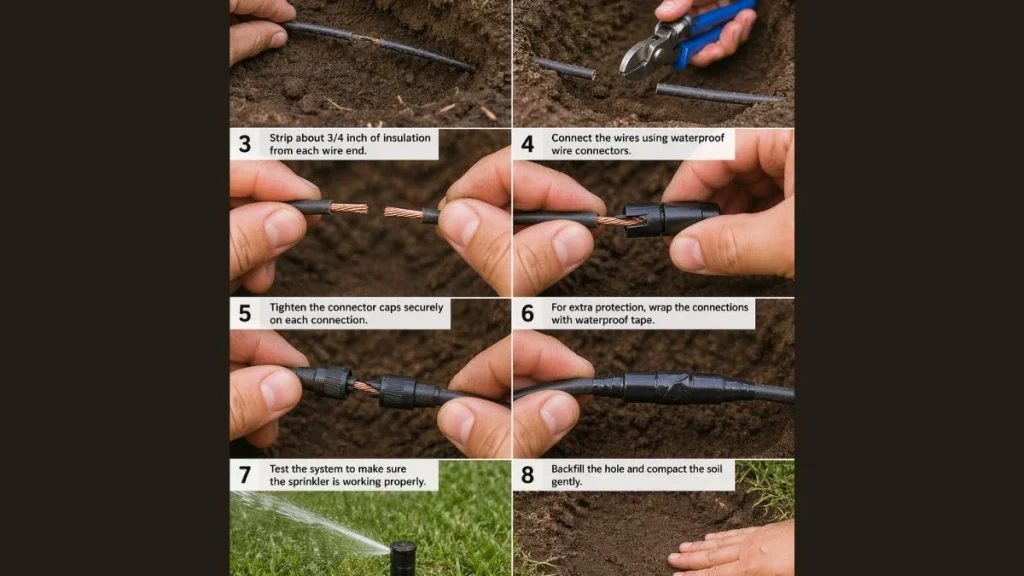
Underground sprinkler wire repair is a crucial task for maintaining an efficient irrigation system. Damaged wires can cause zones to stop working or water to spray unevenly. This guide breaks down the repair into clear, simple steps anyone can follow.
Shutting Off The Water And Power
Start by turning off the water supply to the sprinkler system. This step prevents water from spraying while you work. Next, switch off the power to the sprinkler controller. Cutting power avoids electrical shock and protects the controller from damage during repair.
- Locate the main water valve and turn it clockwise to close.
- Find the electrical panel or controller and switch off the breaker for the sprinkler system.
Double-check to ensure the sprinkler system does not activate by manually testing the zones. This safety step is essential before digging or touching any wires.
| Step | Reason |
| Turn off water | Stops water flow to avoid spraying during repair |
| Turn off power | Prevents electric shock and device damage |
Exposing The Damaged Wire
Next, find the section where the wire is damaged. Look for signs such as broken insulation, cuts, or rodent damage. Use a flat shovel or trenching tool to carefully dig around the suspected area. Digging slowly protects other wires and pipes from harm.
Clear dirt gently until the wire is fully visible. Use a flashlight if the area is dark. Avoid pulling or yanking the wire to prevent further damage.
- Mark the damaged spot with a flag or marker for easy location.
- Expose about 6 to 8 inches of wire on both sides of the damage.
- Remove any debris or dirt from the wire surface using a dry cloth.
Careful excavation is vital. It allows a clean repair and reduces the chance of repeated damage.
Stripping And Preparing Wires
Once the damaged wire is exposed, prepare it for repair. Use a wire stripper to remove about 1 inch of insulation from each wire end. Be careful not to cut the copper inside.
Check the copper wire for corrosion or breaks. If any part looks weak, cut back further until the wire is solid and shiny. Clean the exposed wire with fine sandpaper or steel wool to improve connection.
- Use wire strippers sized for the wire gauge.
- Twist the copper strands gently after stripping to keep them tight.
- Make sure both wires are equal in length for a balanced join.
Prepared wires ensure a strong electrical connection and good conductivity. This step prevents future failures.
Making Secure Connections
Join the wires using waterproof wire connectors or wire nuts designed for outdoor use. Slide the connector over one wire end, then add the other wire and twist the connector clockwise until tight.
For best results, use connectors with built-in seals or gel to block moisture. Confirm the wires are secure by gently pulling each one. No wire should slip out.
- Use connectors rated for underground or irrigation systems.
- Wrap the joined wires with electrical tape for extra security.
- Test the connection with a multimeter for continuity before sealing.
Secure connections prevent shorts and signal loss. They keep the sprinkler system running smoothly.
Sealing And Protecting The Repair
After connecting wires, protect the repair from water and dirt. Wrap the joint with self-fusing silicone tape. This tape sticks tightly and forms a waterproof seal.
Place the taped connection inside a waterproof wire splice kit or use heat shrink tubing. Heat the tubing evenly to shrink it around the wires, creating a durable barrier.
Finally, cover the repaired area with soil and compact it firmly. Avoid sharp rocks or debris near the wire. This layer protects the wire from physical damage.
- Use waterproof tape designed for outdoor electrical repairs.
- Consider adding a warning tape above the wire before backfilling.
- Check for leaks or loose connections after reactivating the system.
Proper sealing extends wire life and prevents moisture-related failures. It keeps your sprinkler system reliable for years.
Testing The Repair
After repairing underground sprinkler wires, testing the repair is essential. It confirms the system works properly and prevents future problems. Testing helps find any remaining faults or weak spots in the wiring. It ensures the sprinkler system delivers water efficiently to your lawn or garden. Taking time to test now saves money and effort later.
Powering The System
Start testing by powering on the sprinkler system. Make sure the controller has power and is connected correctly. Follow these steps:
- Check the main power switch or circuit breaker.
- Verify the controller display lights up.
- Confirm all wires are securely connected to the controller terminals.
- Ensure any battery backup is working, if present.
If the controller does not power on, inspect the power source first. Use a multimeter to check voltage at the controller input. A lack of power can mimic wiring issues, so rule out power failure early.
Once powered, set the controller to manual mode. This lets you activate each zone individually. Testing zones one by one helps isolate any faulty repairs or wires. Use this table as a quick checklist:
| Step | Action | Expected Result |
| 1 | Turn power on | Controller display lights up |
| 2 | Switch to manual mode | Zones can be activated individually |
| 3 | Activate each zone | Sprinklers in that zone turn on |
Checking Sprinkler Operation
After powering the system, check each sprinkler zone. Watch for proper water spray and coverage. Follow these tips:
- Activate one zone at a time from the controller.
- Look for leaks or weak spray areas.
- Listen for unusual sounds like clicking or buzzing.
- Note any sprinklers that do not turn on.
Mark zones with problems for further inspection. Sprinklers that stay on too long or do not shut off signal wiring or valve issues. Check the valve wiring connections and solenoid function.
Use this checklist to verify sprinkler operation:
- Zone activates when selected.
- Sprinklers spray water evenly.
- No water leaks or pooling near heads.
- Sprinklers turn off when the zone is deactivated.
Troubleshooting Persistent Issues
Some problems persist after repair. Troubleshoot by isolating the fault. Use these methods:
- Test wire continuity with a multimeter.
- Check for wire shorts or breaks along the repaired section.
- Inspect valve solenoids for damage or dirt.
- Swap wires between zones to identify controller or wiring faults.
Common issues and fixes appear in this table:
| Issue | Possible Cause | Fix |
| Zone won’t activate | Broken wire or loose connection | Repair or replace damaged wire |
| Sprinkler stays on | Faulty solenoid or stuck valve | Clean or replace solenoid/valve |
| Uneven water spray | Clogged or damaged sprinkler head | Clean or replace sprinkler head |
Testing and troubleshooting take patience. Repeat tests after each fix to confirm the system works fully. Proper repair and testing ensure a healthy, green lawn.
You May Read Also: How to Run Wire Through First Floor Ceiling
Conclusion
Fixing underground sprinkler wires keeps your system running well. Small breaks or cuts stop water from reaching plants. Finding and repairing these wires saves time and money. Use simple tools and check the wire carefully. Regular checks help catch problems early.
A working sprinkler means a healthy, green lawn. Taking care of wires is a smart step for every garden. Keep your system ready for any season. Your plants will thank you for steady watering.