

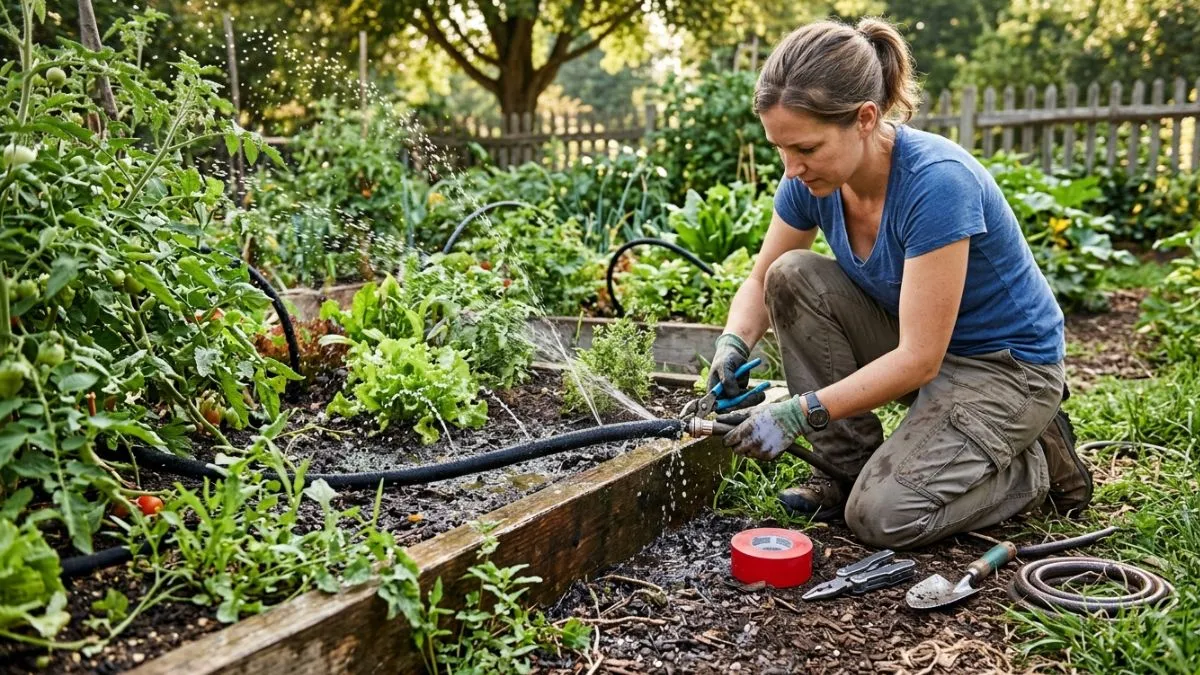
Is your sprinkler soaker hose leaking or not working like it used to? You rely on it to keep your garden healthy and your lawn green.
When it breaks, it can be frustrating and costly to replace. But what if you could fix it yourself quickly and easily?
You’ll learn simple repair tips that save you time and money. Keep reading to discover how to get your soaker hose back in action without any hassle.
Common Hose Problems
Sprinkler soaker hoses are great for watering gardens evenly and saving water. Yet, they face problems after regular use. Common hose problems can stop water flow or cause leaks. Knowing these issues helps fix the hose quickly. This keeps plants healthy and saves money. Below are frequent problems found in soaker hoses and how to spot them.
Leaks And Cracks
Leaks and cracks reduce water pressure and waste water. They happen due to wear, sun damage, or freezing weather. Small cracks may look like tiny splits, but they can grow bigger fast.
- Causes of leaks and cracks:
- Exposure to sunlight (UV rays)
- Freezing and thawing cycles
- Bending or twisting the hose sharply
- Old age and material fatigue
- Signs to check:
- Wet spots along the hose
- Visible splits or holes
- Drop in water pressure
- Unusual puddles near the hose
Repairing leaks is simple and saves water. Use waterproof tape for small cracks or patch kits for bigger holes. For extensive damage, replacing the hose section works best.
| Type of Damage | Repair Method | Cost | Durability |
| Small Crack | Waterproof Tape | Low | Short-term |
| Medium Hole | Patch Kit | Medium | Medium-term |
| Large Tear | Replace Hose Section | Higher | Long-term |
Clogged Nozzles
Clogged nozzles block water flow and reduce spraying power. Dirt, sand, and mineral deposits cause clogs. This problem affects how well the hose waters plants.
Check nozzles regularly for signs of clogging. Water may drip slowly or spray unevenly. Cleaning nozzles restores good water flow.
- Remove the nozzle carefully.
- Soak it in vinegar for 30 minutes to dissolve minerals.
- Use a small brush or toothpick to clear debris.
- Rinse with water and reinstall.
Prevent clogs by using a filter at the water source. This stops dirt and sand from entering the hose. Also, drain the hose after use to avoid buildup.
| Cleaning Step | Purpose |
| Soaking in Vinegar | Remove mineral deposits |
| Brushing | Clear dirt and debris |
| Rinsing | Flush out loosened particles |
Connector Issues
Connectors join hose sections or attach the hose to water supplies. Problems with connectors cause leaks or hose detachment. Loose or damaged connectors stop water flow and waste water.
Common connector problems include:
- Worn rubber washers
- Cracked plastic parts
- Improper fitting size
- Loose connections
Fix connectors by replacing worn washers or damaged parts. Tighten loose fittings by hand or with a wrench, but avoid overtightening.
Using the right connector size is key. Connectors come in various diameters. Check the hose size before buying connectors.
| Connector Problem | Fix | Tip |
| Worn Washer | Replace Washer | Keep spare washers handy |
| Cracked Part | Replace Connector | Use durable plastic or metal |
| Loose Fit | Tighten or use Hose Clamp | Check size compatibility |
Step-by-step Repair Process
Repairing a sprinkler soaker hose keeps your garden healthy and saves water. A clear step-by-step process helps fix leaks quickly and efficiently. This guide walks through each stage, ensuring your hose works well again. Follow the steps carefully to restore proper watering and avoid wasting water.
Locating The Leak
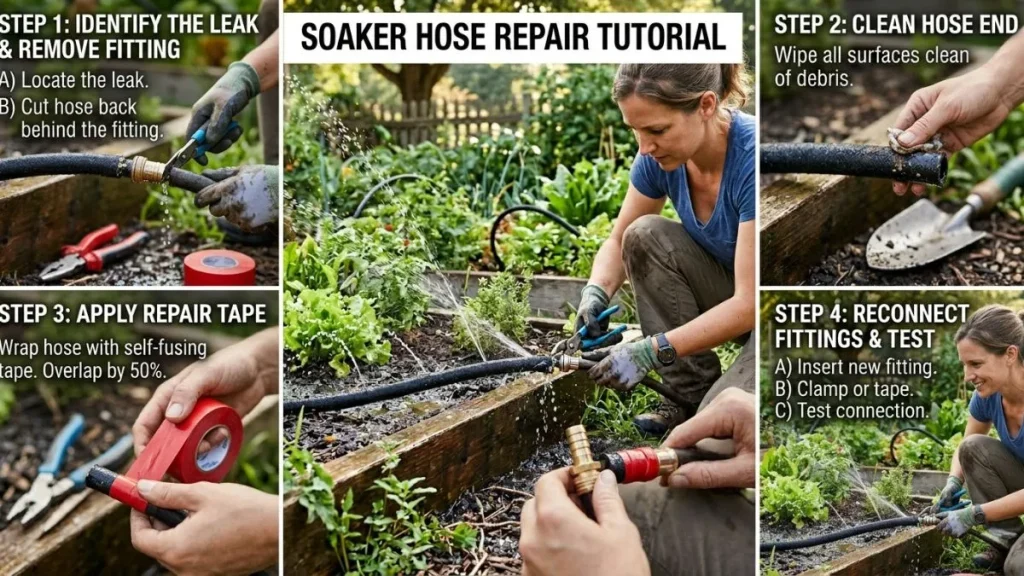
Finding the leak is the first and most important step. Start by turning on the water supply to the hose. Watch closely for any wet spots or water spraying out. Leaks often appear as small holes or cracks on the hose surface. Walk along the hose slowly and look for these signs.
- Check connections and joints carefully as leaks often occur there.
- Use your hand to feel for moisture or water pressure along the hose.
- Listen for hissing sounds that indicate escaping water.
If the leak is hard to see, try this simple test:
- Turn off the water supply.
- Dry the hose completely with a cloth.
- Turn the water back on and watch closely for new wet spots.
Document the exact location of the leak to make repairs easier. A small mark with a waterproof pen or tape works well. This prevents confusion and speeds up the repair process.
Cleaning The Area
Cleaning the damaged area prepares it for a strong repair. Dirt, mud, and grime reduce the patch or tape’s ability to stick properly. Start by wiping the hose with a dry cloth to remove loose dirt.
- Use warm soapy water and a soft brush to clean the area thoroughly.
- Rinse with clean water to remove soap residue.
- Dry the hose completely using a towel or let it air dry.
Ensure the hose surface is smooth and dry before applying any patch or tape. Any moisture or debris can cause the repair to fail. Take your time with this step for a lasting fix.
Keep cleaning supplies ready for quick access during future repairs. A small bucket with soap, water, and cloths works well to have nearby.
Applying Patch Or Tape
Applying a patch or tape seals the leak and stops water loss. Choose a repair kit made for soaker hoses or waterproof tape. Follow these steps for a secure application:
- Cut a patch that covers the leak plus 1-2 inches around it.
- Peel off the backing if using a self-adhesive patch.
- Press the patch firmly over the clean, dry area.
- Wrap waterproof tape tightly around the patch for extra strength.
Use multiple layers of tape if the leak is large. Overlap the tape edges to prevent water from seeping through.
Tips for best results:
- Apply patch and tape while the hose is dry and not under pressure.
- Press down firmly to remove air bubbles and ensure good contact.
- Allow the patch to set for a few hours before turning the water back on.
Replacing Damaged Sections
Sometimes the damage is too severe for a patch. Replacing a section of the soaker hose restores full function. You need a replacement hose piece and connectors or couplers.
Follow these steps to replace the section:
- Turn off the water supply and drain the hose.
- Cut out the damaged section using sharp scissors or a utility knife.
- Cut a new hose piece to match the removed length.
- Attach connectors to each end of the new section.
- Connect the new piece between the cut ends of the existing hose.
- Make sure all connections are tight and secure.
Helpful hints for replacing hose sections:
| Tool or Material | Purpose |
| Sharp scissors or utility knife | Cut damaged hose and replacement piece cleanly |
| Connectors or couplers | Join new hose section securely |
| Waterproof tape | Seal connectors to prevent leaks |
Check for leaks by slowly turning the water back on. Tighten connections if needed. Replacing sections keeps the hose working like new for years.
When To Replace The Hose
Sprinkler soaker hoses help keep gardens green and soil moist. Over time, these hoses may wear out or get damaged. Knowing when to replace the hose saves water, time, and money. It avoids problems like uneven watering or leaks. Checking the hose often helps spot issues early.
Signs Of Irreparable Damage
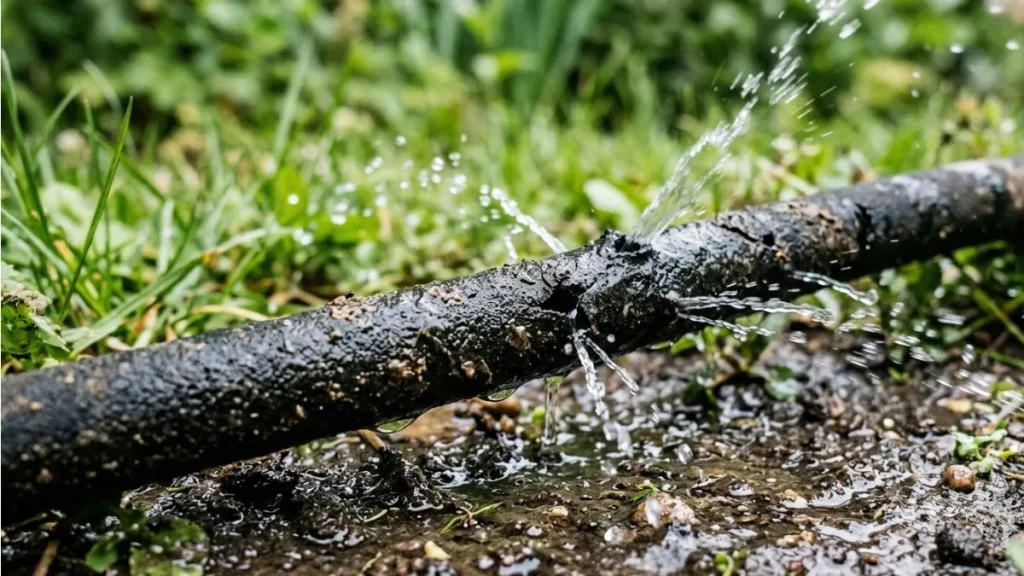
Some damage to soaker hoses can be fixed, but some cannot. Here are clear signs that a hose needs replacement:
- Large cracks or holes: Holes bigger than a quarter inch cause big leaks.
- Multiple leaks: Several leaks along the hose make patching difficult.
- Hard, brittle texture: The hose feels stiff or cracks when bent.
- Warped or melted sections: Heat damage changes hose shape and weakens it.
- Clogged pores: Tiny holes that water flows through get blocked and won’t soak.
Some damage types:
| Damage Type | Repairable? | Notes |
| Small pinholes | Yes | Use patches or sealant |
| Single small cut | Yes | Can splice or tape |
| Large cracks or many holes | No | Leaks too much water |
| Hose hardened or brittle | No | Risk of bursting |
Check the hose carefully. If damage matches the “No” repair column, replacement is best. A broken hose wastes water and harms plants.
Cost Vs. Repair Analysis
Deciding to repair or replace needs a simple cost check. Repairing might save money short-term. But many repairs add up fast. Sometimes, buying a new hose is cheaper and lasts longer.
Consider these points:
- Repair kit cost: Patches, sealants, and tape usually cost $5 to $15.
- Time and effort: Repairs take time and may not be permanent.
- New hose price: A new soaker hose ranges from $20 to $50 for 50 feet.
- Water waste: Leaks increase water bills and harm plants.
- Longevity: New hoses last 3 to 5 years or more.
Here is a simple table to compare:
| Factor | Repair | Replace |
| Initial Cost | Low ($5–$15) | Higher ($20–$50) |
| Durability | Short-term | Long-term |
| Water Efficiency | Lower (may leak) | Higher (no leaks) |
| Time Spent | More (multiple fixes) | Less (one-time) |
Choose replacement if repairs are many or leaks grow back. Replacement saves water and effort. Repair only if damage is small and few. This keeps your garden healthy and your wallet happy.
Conclusion
Fixing your sprinkler soaker hose saves water and money. Small leaks or holes do not need full replacement. Use simple tools and materials for quick repairs. Check hoses regularly to keep your garden healthy. Clean water flows better and reaches plants evenly.
A little effort keeps your irrigation system working well. Stay patient and watch your plants thrive with steady watering. Keep your garden green and growing, one repair at a time.

