
A properly waterproofed shower is crucial for preventing moisture damage, mold growth, and costly repairs. One of the most overlooked yet essential steps in shower construction is waterproofing the gap between the cement board and the shower pan. Without proper sealing, water can seep through small gaps, leading to structural issues and long-term damage.
This guide explains why waterproofing this junction is critical, the best waterproofing methods, and step-by-step instructions to ensure a watertight seal. Whether you’re a DIY enthusiast or a contractor, understanding the right techniques and materials will help you create a durable, moisture-resistant shower that lasts for years.
The Role of Cement Board and Shower Pan in Waterproofing
Effective waterproofing in a shower starts with a strong foundation. Two essential components that play a crucial role in this process are cement board and the shower pan. These elements work together to provide a durable and water-resistant surface that prevents leaks and structural damage. However, without proper waterproofing between them, moisture can penetrate, leading to mold growth and costly repairs.
What is Cement Board and Why is It Used?
Cement board is a durable, moisture-resistant backer made of cement and fibers, providing a stable surface for tile installation in wet areas like showers and backsplashes. Unlike drywall, it resists mold and water damage but still requires a waterproofing membrane to prevent moisture penetration.
Proper installation includes securing it with corrosion-resistant screws, leaving gaps for expansion, and sealing seams with mesh tape and thin-set mortar. Waterproofing the joint between the cement board and shower pan is crucial to prevent leaks.
What is a Shower Pan and Its Importance in Waterproofing?
A shower pan is the base that directs water to the drain, protecting the subfloor from leaks. Made of materials like acrylic, fiberglass, or tile over a mortar bed, it must be properly sloped for drainage.
The connection between the shower pan and cement board is a critical waterproofing point. Using membranes and sealants prevents water from seeping behind walls, reducing mold and structural damage. Together, a well-installed cement board and shower pan create a long-lasting, waterproof shower system.
Key Challenges in Waterproofing Between Cement Board and Shower Pan
Waterproofing the junction between the cement board and shower pan is one of the most critical aspects of shower installation. This area is particularly vulnerable to water infiltration, which can lead to structural damage if not properly sealed.
Many homeowners and even some contractors overlook key details, leading to leaks, mold growth, and costly repairs. Understanding the common challenges and potential risks of inadequate waterproofing is essential for building a long-lasting, leak-free shower.

Common Waterproofing Mistakes to Avoid
One of the most frequent mistakes in waterproofing showers is assuming that cement board alone is waterproof. While it is water-resistant, it is still porous and can absorb moisture. If left unsealed, water can penetrate the board, reaching the studs and subfloor. This is why applying a proper waterproofing membrane is necessary to create a barrier against moisture.
Another common issue is improper sealing between the cement board and the shower pan. Many installers rely solely on caulk at this critical joint, but caulk alone is not sufficient.
Over time, caulk shrinks, cracks, and allows water to seep through. The correct approach is to use a waterproofing membrane that overlaps the seam, combined with high-quality sealants designed for wet environments.
Misalignment between the cement board and the shower pan flange is another frequent problem. The cement board should sit just above the pan’s raised flange, not over it or directly touching the pan base.
When the board is improperly positioned, it creates gaps where water can collect, leading to leaks behind the walls. Proper spacing and sealing at this connection point ensure that water flows into the shower pan instead of behind the walls.
Failing to properly seal screw holes, seams, and corners is another major mistake. When securing cement board, the screws create small punctures that can allow moisture to penetrate if they are not adequately covered.
Using alkali-resistant mesh tape with thin-set mortar on seams and applying a waterproofing membrane over screw heads ensures a completely sealed surface.
Risks of Inadequate Waterproofing
If waterproofing between the cement board and shower pan is not done correctly, water can infiltrate the walls and subfloor, leading to serious structural issues. One of the most immediate risks is mold and mildew growth.
Moist environments are ideal breeding grounds for mold, which can spread rapidly behind shower walls and pose health risks, especially for individuals with allergies or respiratory conditions.
Another major consequence is wood rot and weakening of structural components. Water-damaged studs and subfloors can compromise the integrity of the entire bathroom. Over time, this can lead to warped floors, sagging walls, and even major renovations to replace rotted materials.
Improper waterproofing can also result in tile damage and grout failure. Water that seeps behind the tiles can loosen the adhesive, causing tiles to crack, shift, or fall off entirely. Additionally, grout lines can deteriorate, allowing even more moisture to penetrate the underlying cement board and causing further damage.
If leaks are left undetected for too long, they can also increase water bills and lead to significant repair costs. Water dripping into unseen areas creates hidden damage that can go unnoticed until major problems arise.
In severe cases, homeowners may need to completely tear out and redo their shower, costing thousands of dollars in repairs.
Ensuring proper waterproofing techniques and materials are used during installation prevents these costly and damaging consequences. A well-sealed connection between the cement board and shower pan is essential for maintaining a durable, water-resistant, and long-lasting shower system.
How to Waterproof Between Cement Board and Shower Pan
Ensuring a watertight seal between the cement board and shower pan is crucial to preventing leaks, mold, and structural damage. Proper waterproofing involves using the right materials, applying an effective sealant, and ensuring seamless integration between these two components. Follow this step-by-step guide to achieve a long-lasting and waterproof shower installation.
Gathering Materials & Tools
Before beginning the waterproofing process, it is essential to have the necessary materials and tools ready. Using high-quality waterproofing products ensures durability and prevents future issues.
For this project, you will need:
- Waterproofing membrane – Either a liquid-applied membrane (such as RedGard or AquaDefense) or a sheet membrane (like Kerdi or Hydro Ban)
- Alkali-resistant fiberglass mesh tape – To reinforce seams between cement board panels
- Thin-set mortar – Used to embed the mesh tape and strengthen the joints
- Silicone or polyurethane sealant – To seal the gap between the cement board and shower pan
- Paintbrush or roller – For applying liquid waterproofing membrane
- Notched trowel – For spreading thin-set mortar
- Utility knife – For cutting mesh tape and sheet membranes
- Caulking gun – For precise sealant application
- Sponge and bucket – To clean excess materials during application
Having all materials prepared in advance ensures a smooth installation process without interruptions.
Preparing the Cement Board and Shower Pan for Waterproofing
Proper preparation of the cement board and shower pan lays the foundation for a leak-free installation. Begin by ensuring the cement board is securely fastened to the wall studs with appropriate screws.
The bottom edge of the cement board should be positioned slightly above the shower pan’s flange, leaving a small gap of about 1/8 inch to prevent wicking.
Next, clean the surface of the cement board and the top of the shower pan flange to remove dust, debris, or adhesive residue. Any moisture, dirt, or grease can prevent sealants and waterproofing materials from adhering properly. A damp sponge can be used to wipe down surfaces, followed by allowing them to dry completely before proceeding.
If the shower pan has a factory-applied waterproof flange, inspect it for cracks or imperfections. Any gaps or damage should be patched with a waterproof sealant before proceeding. Ensuring a clean, dry, and smooth surface will allow for better adhesion of the waterproofing layers.
Sealing the Seam Between Cement Board and Shower Pan
The seam where the cement board meets the shower pan is one of the most vulnerable areas for water infiltration. To properly seal this joint, follow these steps:
- Apply a Bead of Sealant – Using a high-quality 100% silicone or polyurethane-based sealant, fill the small gap between the cement board and shower pan flange. This creates an initial water barrier and flexibility to accommodate movement over time. Smooth the sealant using a gloved finger or a caulking tool to ensure full coverage.
- Embed Alkali-Resistant Mesh Tape – Place alkali-resistant fiberglass mesh tape over the seam where the cement board meets the pan. The mesh tape reinforces the connection and helps prevent cracks that could allow water to seep through.
- Apply Thin-Set Mortar Over the Tape – Using a notched trowel, spread a thin layer of thin-set mortar over the taped seam. This step helps strengthen the joint while maintaining a flat and smooth surface for subsequent waterproofing layers. Allow the mortar to dry completely as per the manufacturer’s instructions.
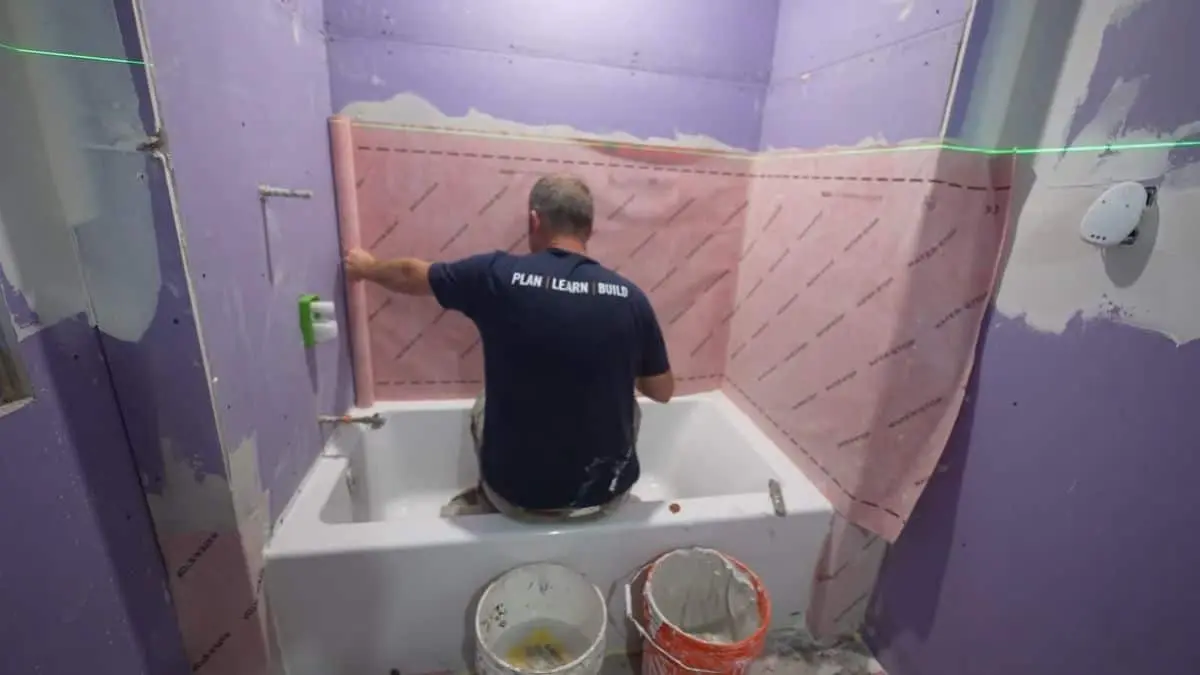
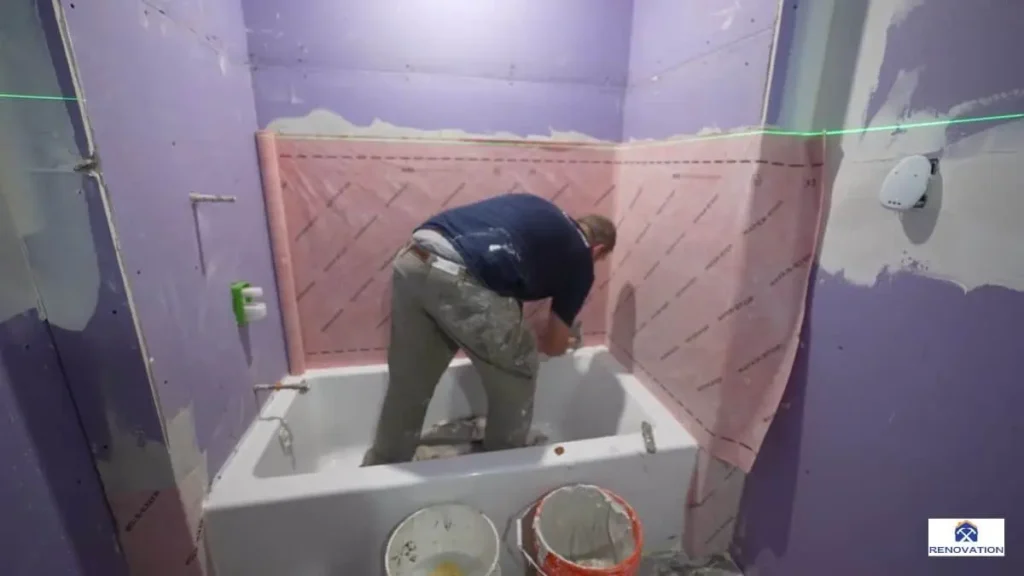
- Apply Waterproofing Membrane – Once the mortar is dry, apply a liquid waterproofing membrane or a sheet membrane system over the seam and the surrounding cement board surface.
- For liquid membranes (such as RedGard or AquaDefense), use a paintbrush or roller to apply an even coat over the seam, extending at least 6 inches up the cement board and onto the shower pan flange. Let the first coat dry before applying a second coat for full coverage.
- For sheet membranes (like Kerdi or Hydro Ban), cut a strip that fits over the seam and adheres using thin-set mortar. Press it firmly into place, ensuring a watertight seal with no air pockets or gaps.
- Final Inspection and Touch-Ups – After the waterproofing membrane has dried, inspect the area for any missed spots or inconsistencies. If necessary, apply additional layers to reinforce corners, seams, and screw holes.
Once the waterproofing is fully dry and cured, the shower is ready for tile installation. Proper waterproofing at this critical junction ensures that water flows into the drain as intended, protecting the subfloor and walls from long-term damage.
Recommended Read: Install Shower Pan Over Existing Tile Floor
Best Practices for Long-Lasting Waterproofing
Ensuring a long-lasting and effective waterproofing system between the cement board and shower pan is essential to prevent leaks, mold growth, and structural damage.
Even a small mistake in the waterproofing process can lead to significant problems over time. Following best practices ensures a durable and watertight shower installation that can withstand moisture exposure for years.

Choosing the Right Waterproofing Method for Your Shower
Selecting the appropriate waterproofing method depends on the shower’s design, material compatibility, and installation process. There are two primary approaches: liquid waterproofing membranes and sheet membranes.
Liquid waterproofing membranes, such as RedGard or AquaDefense, create a flexible, seamless barrier when applied over cement board.
They are easy to apply with a brush or roller and work well for irregular shower layouts where a custom fit is needed. Multiple coats ensure thorough coverage, and the material bonds directly to the cement board, preventing water infiltration.
Sheet membranes, like Schluter Kerdi or Laticrete Hydro Ban, offer a pre-fabricated waterproof layer that is mechanically bonded to the surface with thin-set mortar.
These membranes provide a stronger and more reliable waterproofing solution but require precise installation to avoid gaps or misalignment. When properly installed, they create an impermeable barrier that lasts for decades.
For long-term performance, it is important to choose a method that integrates well with the shower pan’s waterproofing system. Using a mix-and-match approach—such as combining liquid membranes with sheet membranes—can lead to adhesion issues or weak points. Always follow manufacturer recommendations to ensure compatibility between waterproofing products.
Proper Overlap Between Cement Board and Shower Pan
A proper overlap between the cement board and shower pan is critical for effective water drainage. The cement board should be installed slightly above the shower pan flange, with a 1/8-inch gap to prevent direct water exposure and wicking.
This small space is then sealed with silicone or polyurethane-based sealant, which remains flexible and accommodates expansion and contraction over time.
If using a sheet membrane, it should extend several inches beyond the seam where the cement board meets the shower pan. This overlap ensures that water running down the walls is directed into the pan instead of seeping into the subfloor.
Proper adhesion with thin-set mortar is crucial to prevent water from getting behind the membrane.
For liquid waterproofing membranes, it is necessary to apply multiple coats over the seam to build a thick and watertight layer. Extending the membrane at least 6 inches up the cement board and onto the shower pan flange ensures full protection. Allowing each coat to dry properly before applying the next is essential to prevent weak spots.
A common mistake is embedding the cement board inside the shower pan or placing it directly against the pan surface. This can trap moisture and lead to long-term water damage. The correct method involves leaving a small gap, sealing it properly, and ensuring a watertight overlap between the materials.
FAQs: Answering Common Questions
Proper waterproofing between the cement board and shower pan is essential to prevent leaks and structural damage. Below are answers to some of the most commonly asked questions, optimized for clarity and featured snippets.
Should Cement Board Overlap the Shower Pan?
No, cement board should not overlap or sit inside the shower pan. Instead, it should be installed just above the shower pan flange, leaving a 1/8-inch gap. This prevents moisture wicking and allows space for proper sealing with waterproofing membrane or sealant.
Can You Use Regular Drywall Instead of Cement Board in a Shower?
No, regular drywall should never be used in a wet area like a shower. Unlike cement board, drywall is not water-resistant and will quickly absorb moisture, leading to mold growth and structural failure. Always use cement board or a waterproof backer board.
Do You Need a Vapor Barrier Behind Cement Board in a Shower?
A vapor barrier is only necessary if you are not applying a waterproofing membrane on top of the cement board. If using liquid or sheet waterproofing, a separate vapor barrier behind the cement board is not required and can even trap moisture, causing long-term damage.
What’s the Best Sealant for Cement Board and Shower Pan Joints?
A 100% silicone or polyurethane-based sealant is recommended. These sealants are flexible, waterproof, and mold-resistant, making them ideal for sealing gaps between the cement board and shower pan.
Should You Waterproof the Entire Shower or Just the Seams?
The entire shower area, including walls and seams, should be waterproofed. Water can penetrate through grout lines and corners, so applying a full waterproofing membrane ensures long-term durability.
Conclusion
Waterproofing between the cement board and shower pan is a crucial step in ensuring a leak-free, long-lasting shower. Proper installation, sealing, and the use of high-quality waterproofing materials help prevent moisture damage, mold growth, and costly repairs.
Avoid common mistakes like overlapping cement board inside the shower pan or skipping a waterproofing membrane. Always seal seams properly, choose the right waterproofing method, and perform final checks before tiling to ensure durability.

