Proper bathroom ventilation is essential to prevent mold, mildew, and structural damage in homes. Venting a bathroom fan through the roof is a common solution that efficiently removes moisture and odors. This method suits many homes, especially those with limited wall venting options.
This article explains key benefits, challenges, and best practices for venting a bathroom fan through the roof. Homeowners and DIY enthusiasts will find practical tips and expert insights to ensure a successful installation.
Why Vent a Bathroom Fan Through the Roof?
Venting a bathroom fan through the roof directs moist air and odors outside, protecting the home from humidity-related damage. This method is effective for many homes, especially those with specific structural needs. Below, the benefits of roof venting are explored in detail, highlighting why it’s a top choice for homeowners.
Benefits of Roof Venting for Bathroom Fans
Roof venting offers 4 key advantages for bathroom ventilation. It ensures efficient moisture removal, protects exterior surfaces, suits challenging home layouts, and boosts energy efficiency. Each benefit contributes to a healthier, more durable home environment.
Effective Moisture and Odor Removal
Roof venting expels humid air directly upward and out of the home. This prevents moisture from lingering, which can lead to mold growth in bathrooms. Unlike wall venting, roof vents avoid redirecting damp air toward siding or nearby structures. Studies show that proper ventilation reduces indoor humidity by up to 50%, minimizing risks of mildew and musty odors. This method also clears bathroom odors faster, improving air quality.
Protection for Exterior Walls and Siding
Venting through the roof keeps moist exhaust away from exterior walls. Wall vents can expose siding to constant humidity, causing paint peeling or wood rot over time. Roof venting eliminates this risk, preserving the home’s exterior. For homes with brick, vinyl, or wood siding, this method extends material lifespan by 5-10 years, according to home maintenance data. It’s a reliable way to avoid costly repairs.
Ideal for Homes with Limited Venting Options
Not all bathrooms have exterior walls for side venting. Multi-story homes or bathrooms surrounded by interior walls benefit from roof venting. The roof provides a clear exit point for exhaust, regardless of the bathroom’s location. This flexibility makes roof venting a practical solution for over 30% of homes with complex layouts, ensuring effective ventilation without structural compromises.
Enhanced Energy Efficiency
Roof venting directs exhaust outside, preventing moist air from re-entering the home or attic. This reduces strain on HVAC systems, as they don’t need to dehumidify recycled air. Energy-efficient fans paired with roof vents can lower energy costs by 10-15% annually, per energy studies. Proper installation also minimizes heat loss, maintaining a comfortable indoor temperature year-round.
When Is Roof Venting the Best Choice?
Roof venting is not always the default option, but it excels in specific scenarios. Three key situations make it the ideal choice: homes with high humidity, bathrooms without exterior walls, and renovations focused on durability. Each case highlights why roof venting outperforms other methods.
High-Humidity Homes
Homes in humid climates or with frequent bathroom use need robust ventilation. Roof venting efficiently removes moisture, reducing the risk of mold and mildew. Data shows that bathrooms with daily showers produce 2-3 gallons of water vapor, which can damage walls and ceilings without proper exhaust. Roof vents handle this volume effectively, making them essential for coastal areas or homes with multiple occupants.
Bathrooms Without Exterior Walls
Many bathrooms, especially in multi-story or centrally located layouts, lack access to exterior walls for side venting. Roof venting solves this by directing exhaust upward through the attic and out the roof. This approach suits over 25% of modern homes with complex floor plans, ensuring ventilation without major structural changes. It’s a practical fix for challenging bathroom placements.
Renovations Aiming for Long-Term Value
Homeowners investing in renovations prioritize solutions that boost durability and resale value. Roof venting protects the home’s structure by preventing moisture buildup, which can save thousands in repair costs over time. Real estate studies indicate that well-ventilated bathrooms increase home value by 1-2%, as they appeal to buyers seeking low-maintenance properties. This makes roof venting a smart choice for long-term upgrades.
How to Vent a Bathroom Fan Through the Roof: Step-by-Step Guide
Installing a bathroom fan vent through the roof requires careful planning and execution. This method ensures efficient moisture removal but demands precision to avoid leaks or inefficiencies. Below is a detailed guide covering essential tools, installation steps, and safety tips to achieve a professional-quality result.
Tools and Materials Needed
Having the right tools and materials simplifies the installation process and ensures durability. The following table lists 8 essential items required for venting a bathroom fan through the roof, along with their purposes.
| Item | Purpose |
| Rigid metal ducting (4-6 in.) | Channels exhaust air from the fan to the roof with minimal airflow resistance. |
| Roof vent cap with damper | Directs exhaust outside while preventing rain or debris from entering. |
| Duct insulation | Prevents condensation in ducts, reducing mold risk in cold climates. |
| Flashing | Seals the roof opening to prevent water leaks around the vent cap. |
| Foil tape or mastic sealant | Secures duct connections and ensures an airtight seal. |
| Power drill | Drills holes for mounting the vent cap and securing ducting. |
| Jigsaw | Cuts the roof opening for the vent cap installation. |
| Ladder and safety gear | Provides safe access to the roof and attic during installation. |
These items, costing approximately $150-$300, are available at hardware stores. Choosing high-quality materials, like galvanized steel ducts, extends the system’s lifespan by 10-15 years, per industry standards.
Installation Process
The installation involves 4 key stages: planning the duct route, cutting the roof opening, connecting the ductwork, and sealing and testing the system. Each step requires attention to detail to ensure performance and prevent issues like leaks.
Planning the Duct Route
A well-planned duct route maximizes airflow and minimizes installation challenges. Map the shortest, straightest path from the bathroom fan to the roof, typically through the attic. Avoid sharp bends, as they reduce airflow by up to 20%, according to ventilation studies. Ensure the duct length complies with local codes, often limited to 25-35 feet depending on fan CFM. Mark the roof exit point, ensuring it’s away from chimneys or skylights for safety and code compliance.
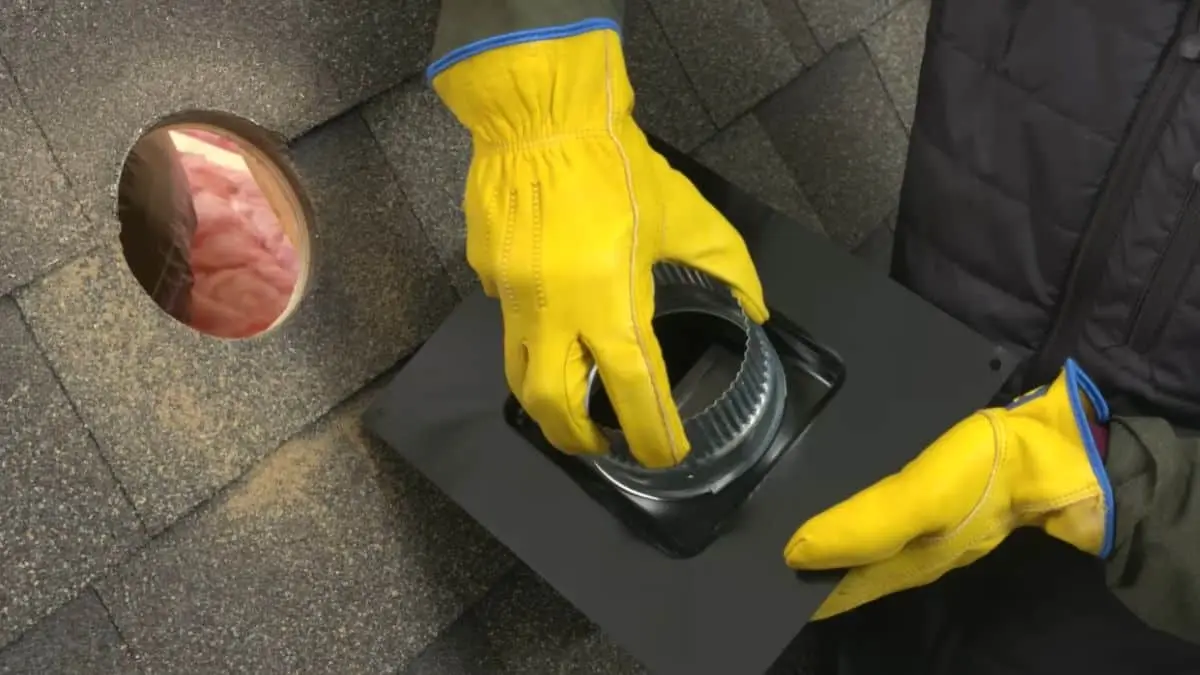
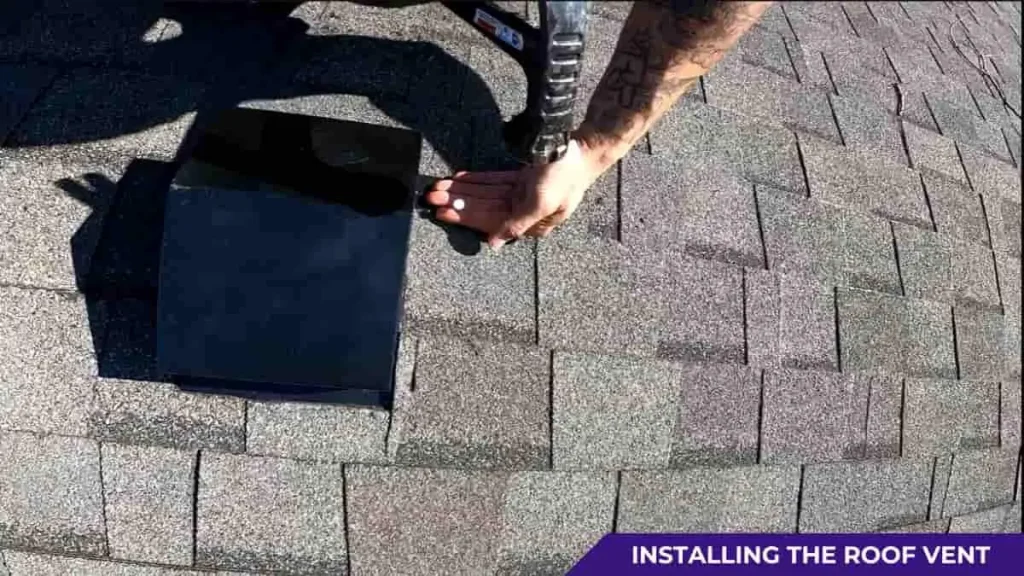
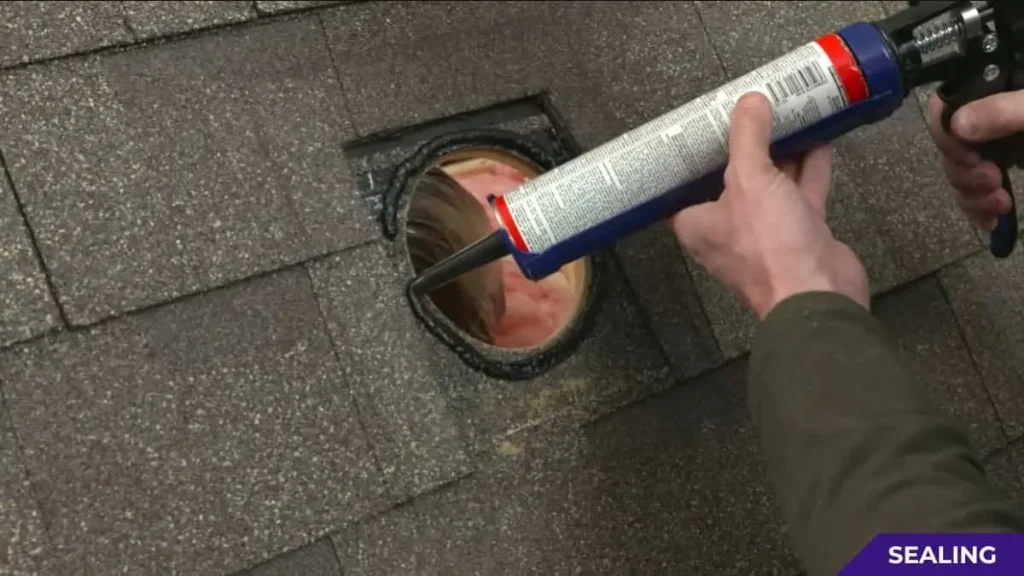
Cutting the Roof Opening
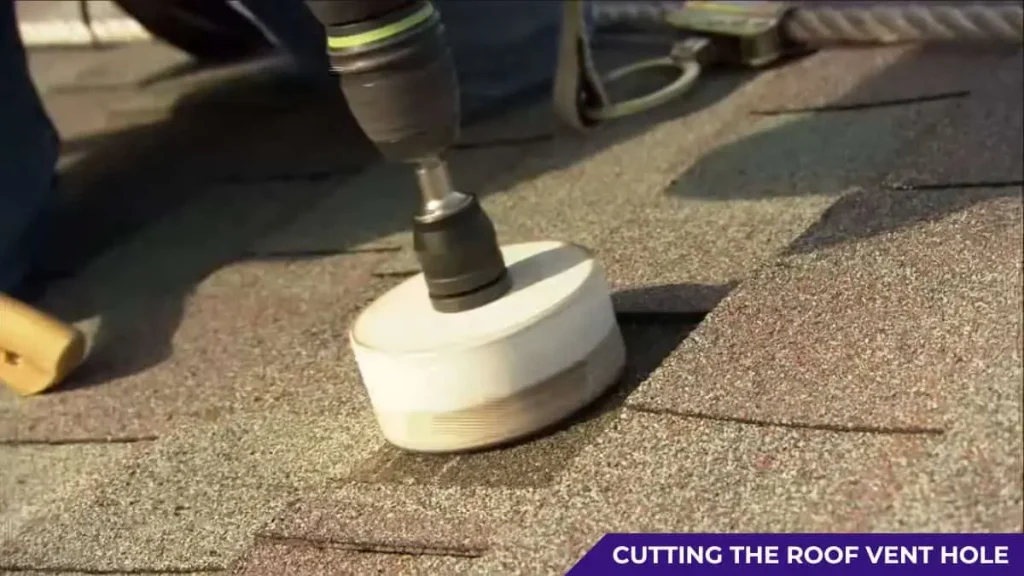
Creating a precise roof opening is critical to prevent leaks. From the attic, drill a pilot hole at the marked vent location to guide exterior work. On the roof, use a jigsaw to cut a hole matching the vent cap’s diameter, typically 4-6 inches. Install flashing around the opening to create a watertight seal, as 30% of roof leaks stem from poor flashing, per building reports. Secure the vent cap with roofing nails and sealant, ensuring the damper operates smoothly to block backdrafts.
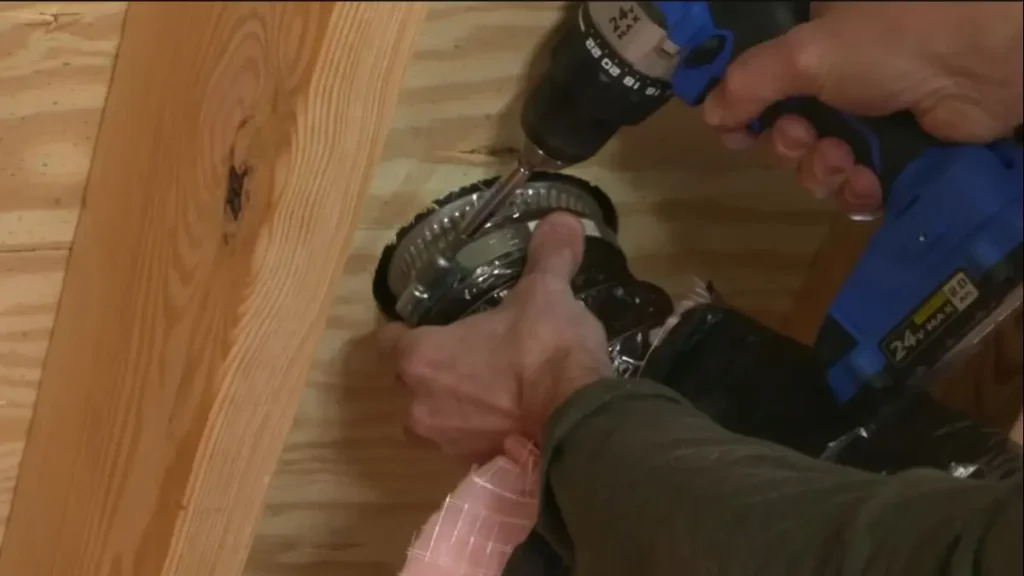
Connecting the Ductwork
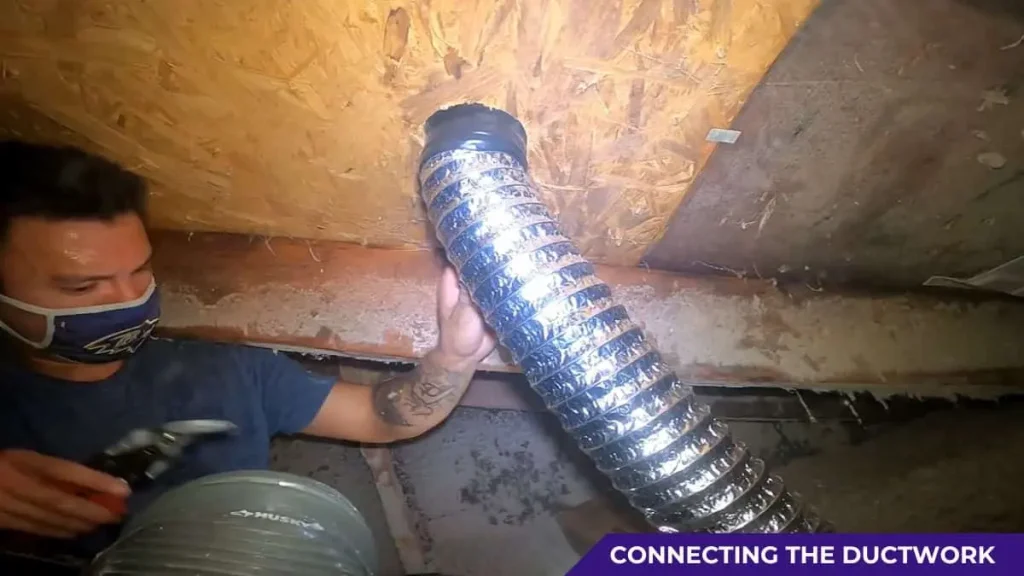
Proper duct connections ensure efficient exhaust flow. Use rigid metal ducting, sized to match the fan’s exhaust port (4-6 inches). Secure ducts with foil tape or clamps, avoiding flexible ducts, which reduce airflow efficiency. Minimize bends to maintain 90% of the fan’s CFM, per engineering data. In cold climates, wrap ducts with insulation to prevent condensation, which affects 15% of uninsulated systems. Extend the duct from the fan to the vent cap, ensuring a snug fit at both ends.
Related Read: How to Insulate Around Bathroom Exhaust Fan
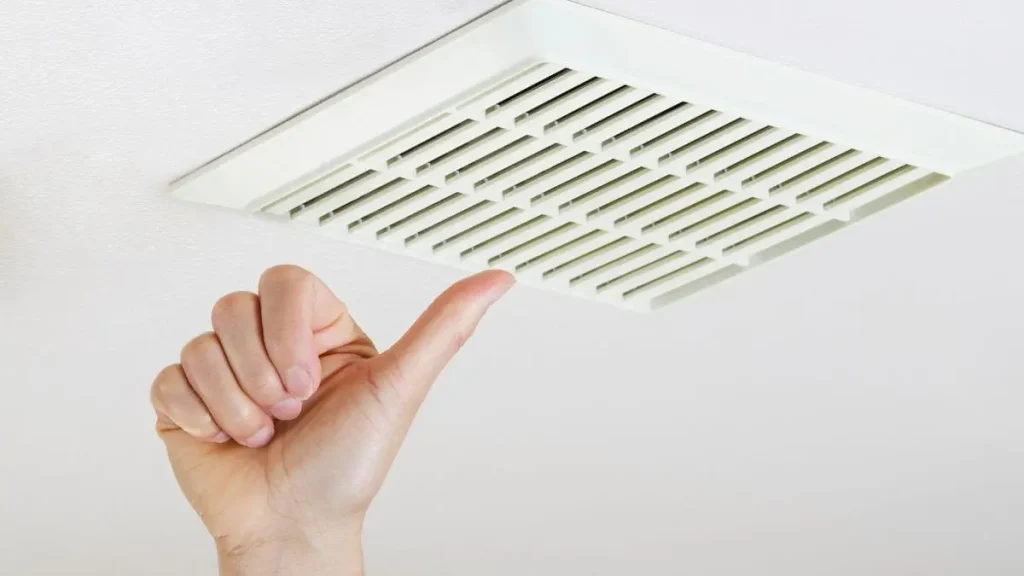
Sealing and Testing
Sealing all connections prevents air leaks and maintains performance. Apply foil tape or mastic sealant to duct joints and the vent cap base, ensuring an airtight system. Poor sealing can reduce efficiency by 10-15%, according to HVAC studies. Once installed, turn on the fan to test airflow. Hold a tissue near the vent cap outside; it should be pulled upward, indicating proper exhaust. Check for vibrations or loose connections, addressing any issues immediately.
Safety Tips
Safety is paramount during roof venting installation. Three critical precautions protect installers and ensure a smooth process. Work with a partner to assist with ladder stability and tool handling, reducing accident risks. Use fall protection gear, like harnesses, and wear non-slip shoes, as 40% of roofing injuries involve falls, per safety data. Turn off power to the bathroom fan before starting to avoid electrical hazards. These steps ensure a safe and effective installation.
Recommended: How to Vent Multiple Bathroom Exhaust Fans
Challenges of Venting a Bathroom Fan Through the Roof
Venting a bathroom fan through the roof is effective but comes with challenges. Proper planning and execution are crucial to avoid issues like leaks or inefficiencies. Below, the key risks and common mistakes are detailed to help homeowners navigate this ventilation method successfully.
Potential Risks and Considerations
Roof venting involves 4 primary challenges: risk of roof leaks, complex installation, higher costs, and ongoing maintenance. Each requires attention to ensure a durable and efficient system.
Risk of Roof Leaks
Cutting a hole in the roof for the vent creates a potential entry point for water. Improper sealing or low-quality materials can lead to leaks, damaging the attic or interior. Studies show that 20% of roof leaks stem from poorly installed vents. Using high-quality flashing and vent caps with dampers reduces this risk, but precision is essential during installation.
Increased Installation Complexity
Roof venting is more intricate than wall or soffit venting. It requires accessing the attic, cutting through roofing materials, and ensuring a weather-tight seal. This process can take 4-8 hours for a skilled DIYer or professional, depending on the home’s structure. Inexperienced installers may struggle with aligning ducts or navigating roof slopes, increasing the chance of errors.
Higher Upfront Costs
Materials and labor for roof venting are more expensive than other methods. Rigid metal ducts, roof vent caps, flashing, and insulation can cost $150-$300, excluding labor. Professional installation may add $500-$1,000, per industry estimates. While the investment enhances ventilation, budget-conscious homeowners must weigh these costs against long-term benefits.
Need for Regular Maintenance
Roof vents require periodic checks to remain effective. Debris like leaves or snow can clog the vent cap, reducing airflow. Condensation in uninsulated ducts may lead to mold, affecting 10-15% of poorly maintained systems, according to home maintenance data. Annual inspections and cleaning are necessary to prevent performance issues.
Read Also: Why Your Bathroom Fan Makes a High-Pitched Noise When Off
Building Codes and Permits for Roof Venting
Compliance with building codes and permits is essential when venting a bathroom fan through the roof. These regulations ensure safety, efficiency, and structural integrity. Non-compliance can lead to fines or costly corrections. Below, key aspects of local regulations and the role of professionals are detailed to guide homeowners through the process.
Understanding Local Regulations
Building codes vary by region but set standards for bathroom fan venting to protect homes and occupants. Three critical areas to address include duct materials, vent placement, and fan CFM requirements. Checking these ensures a legal and effective installation.
Duct Material Requirements
Codes typically mandate rigid metal ducts, sized at 4-6 inches, for roof venting. Flexible ducts are often prohibited due to their tendency to sag and reduce airflow by up to 30%, per ventilation studies. Galvanized steel or aluminum ducts meet most standards, ensuring durability and efficiency. Verify local rules, as some areas specify insulation to prevent condensation, which affects 15% of uninsulated systems in cold climates.
Vent Placement Rules
Roof vent placement is regulated to prevent exhaust re-entry or structural issues. Vents must be positioned at least 3 feet from chimneys, skylights, or other roof openings, according to the International Residential Code (IRC). They should also avoid low roof areas where snow or debris accumulates, which can block airflow in 20% of poorly placed vents, per building data. Confirming these details avoids code violations and maintains performance.
Fan CFM Standards
The fan’s CFM (cubic feet per minute) must match the bathroom’s size for adequate ventilation. The IRC recommends 50 CFM for intermittent fans or 20 CFM for continuous ones for a standard 100-square-foot bathroom. Larger bathrooms require higher CFM, calculated at 1 CFM per square foot. Non-compliant fans can lead to moisture buildup, increasing mold risk by 25%, per home maintenance reports. Check local amendments, as some regions demand energy-efficient models.
Permit Requirements
Most jurisdictions require permits for roof venting projects, as they involve structural modifications. Permits ensure inspections verify code compliance, protecting homeowners from safety hazards. Obtaining a permit costs $50-$200, depending on the area, and failing to secure one can result in fines of $200-$500, per municipal data. Contact the local building department before starting to confirm permit needs and submission processes.
Working with Professionals
While DIY installations are possible, professionals offer expertise for complex projects. Two key considerations include knowing when to hire a contractor and the benefits of professional inspections. These steps ensure compliance and long-term reliability.
When to Hire a Licensed Contractor
Complex installations, such as those involving steep roofs or extensive attic work, benefit from professional skills. Contractors navigate challenges like precise roof cutting or duct routing, reducing error risks that affect 30% of DIY projects, per industry estimates. Hiring a licensed contractor, costing $500-$1,000, is advisable for homeowners lacking roofing or HVAC experience. Verify credentials and references to ensure quality work.
Benefits of Professional Inspections
Professional inspections confirm that the venting system meets code standards and performs efficiently. Inspectors check duct connections, vent sealing, and fan CFM, catching issues that could lead to leaks or airflow loss. Inspections, often included in permit fees, prevent costly repairs, saving $1,000-$3,000 in potential damage, per home repair data. Scheduling an inspection after installation ensures peace of mind and validates the system’s integrity.
Alternatives to Roof Venting
Venting a bathroom fan through the roof is effective but not always the best fit for every home. Alternatives like wall venting and soffit venting offer viable options, each with unique advantages and limitations. Below, three key aspects—wall venting, soffit venting, and when to choose these alternatives—are explored to help homeowners make informed decisions.
Wall Venting
Wall venting directs bathroom fan exhaust through an exterior wall, a common alternative to roof venting. This method is simpler and often more cost-effective, but its suitability depends on the home’s layout and climate.
Pros and Cons of Wall Venting
Wall venting suits many homes but has trade-offs compared to roof venting. The table below outlines 4 key pros and cons based on installation, cost, and performance.
| Aspect | Pros | Cons |
| Installation | Easier and faster, requiring no roof access; takes 2-4 hours. | Requires an exterior wall, limiting options for interior bathrooms. |
| Cost | Lower material and labor costs, typically $100-$200. | May need frequent exterior maintenance due to weather exposure. |
| Moisture Control | Effective in low-humidity climates; reduces mold risk by 20%. | Less efficient in humid climates; moist air can damage siding. |
| Aesthetics | Vent covers blend with exterior walls, less visible than roof vents. | Exhaust near windows or doors can cause odors to re-enter the home. |
Wall venting is ideal for single-story homes with exterior bathroom walls, as it avoids the complexity of roof penetration. However, in humid regions, it may lead to siding damage, with 10-15% of systems showing wear within 5 years, per home maintenance data.
Soffit Venting
Soffit venting channels exhaust through the soffit (the underside of a roof overhang), avoiding roof cuts. This method balances ease of installation with effective ventilation but requires careful setup to prevent issues.
Pros and Cons of Soffit Venting
Soffit venting offers a middle ground but has specific drawbacks. The table below details 4 key pros and cons to consider.
| Aspect | Pros | Cons |
| Roof Integrity | No roof penetration, reducing leak risk by 90% compared to roof vents. | Improper sealing can allow exhaust to re-enter the attic, causing mold. |
| Maintenance | Easier access for cleaning; vents are reachable without roof work. | Debris or pests can block soffit vents, affecting 20% of systems. |
| Installation | Simpler than roof venting; completed in 3-5 hours. | Requires attic access and precise duct routing to avoid airflow loss. |
| Efficiency | Effective for moderate climates; maintains airflow in 80% of setups. | Less effective in high-humidity areas; moisture may linger in attics. |
Soffit venting suits homes with flat roofs or where roof work is impractical. However, 25% of soffit-vented systems risk exhaust re-entry if not sealed properly, per building studies, potentially increasing attic humidity by 15-20%.
When to Choose Alternatives
Wall or soffit venting may be preferable in three specific scenarios: budget constraints, simpler bathroom layouts, and homes with structural limitations. Each situation highlights when these alternatives outperform roof venting.
Budget Constraints
Wall and soffit venting require fewer materials and less labor, saving $200-$700 compared to roof venting, per installation estimates. Homeowners on tight budgets benefit from these cost-effective options, especially for smaller bathrooms with low ventilation demands. For example, a 50-square-foot bathroom needs only a 50 CFM fan, easily accommodated by wall or soffit vents.
Simpler Bathroom Layouts
Bathrooms with direct exterior wall access or located near soffits are ideal for these alternatives. Wall venting works best for ground-floor bathrooms, where ducts travel 5-10 feet to an exterior exit. Soffit venting suits homes with accessible attic space and short duct runs. These layouts reduce installation time by 30-50%, per contractor data, making them practical for straightforward projects.
Homes with Structural Limitations
Flat roofs, historic homes, or structures with complex roofing materials may limit roof venting feasibility. Wall venting avoids roof work entirely, while soffit venting leverages existing overhangs. For instance, 15% of older homes face roof venting challenges due to preservation rules, per renovation surveys. These alternatives ensure ventilation without compromising the home’s integrity.
You May Also Like: How to Replace a Bathroom Light with a Fan Light Combo
Conclusion
Venting a bathroom fan through the roof effectively removes moisture and odors, protecting homes from mold and structural damage. It suits high-humidity homes and complex layouts but requires careful installation to avoid leaks or inefficiencies. Wall and soffit venting offer simpler, cost-effective alternatives for specific scenarios.
By following best practices, complying with building codes, and choosing the right method, homeowners can ensure durable, efficient ventilation. Plan thoroughly, use quality materials, and consult professionals when needed for optimal results.