
To splice a floor joist, cut out the damaged section and replace it with a new piece of lumber of the same dimensions. This process reinforces the structural integrity of the floor.
When dealing with compromised floor joists, prompt action is crucial to prevent further damage and ensure the safety of the structure. By following proper splicing techniques, you can effectively repair the joist and maintain the stability of the floor.
We will discuss the steps involved in splicing a floor joist, highlighting the importance of this repair process in maintaining the overall integrity of a building.
Signs That a Floor Joist Needs to Be Spliced
When it comes to maintaining the structural integrity of your home, recognizing the signs of a compromised floor joist is crucial. Floor joists are a critical component of your home’s framework, supporting the weight of the floors and everything on them. Over time, these joists can weaken due to factors like age, moisture, pests, or improper installation. Splicing—a process where a damaged joist is reinforced or repaired by adding additional material—can often be the solution. Below are the key signs that indicate a floor joist may need to be spliced.
Sagging or Uneven Floors
One of the most noticeable indicators of a weakened floor joist is sagging or uneven floors. This occurs when the structural integrity of the joist is compromised, causing it to bow or sink under the weight it is meant to support. You might notice areas of the floor that feel soft, dip slightly when walked on, or appear visibly uneven. This problem should never be ignored, as it can worsen over time and lead to more significant structural damage.
Cracks in Walls or Ceilings
Another common sign that a floor joist needs attention is the appearance of cracks in nearby walls or ceilings. When a joist becomes weakened or damaged, it can create uneven pressure on the surrounding structure. This pressure may manifest as hairline cracks or more pronounced splits in drywall, plaster, or even ceiling finishes. These cracks often appear near doorways, windows, or corners of rooms, and they signal potential structural stress that requires immediate evaluation.
Tools And Materials Required For Splicing A Floor Joist
When it comes to splicing a floor joist, it’s crucial to have the right tools and materials on hand to ensure a safe and effective repair. By using the appropriate equipment, you can properly splice a floor joist and maintain the structural integrity of your flooring system.
Circular Saw
A circular saw is an essential tool for splicing a floor joist. It allows for precise and straight cuts, ensuring the new joist section fits seamlessly with the existing structure. Ensure the blade is sharp and suitable for cutting through the joist material without causing splintering or damage.
Sistering Boards
Quality sistering boards are necessary to reinforce the spliced area and distribute the load evenly. Choose boards that are of the same dimension and material as the existing joist for optimal support and stability. Properly aligning and securing the sistering boards is vital for a successful floor joist splice.
Nails Or Screws
When securing the sistering boards and spliced joist, using the appropriate fasteners is essential. High-quality nails or screws designed for structural applications will provide the necessary strength and stability. Ensure they are long enough to penetrate both the sistering boards and the original joist for a secure connection.
Preparing The Area For Splicing
Clearing the Workspace
Before you begin the repair process, it’s crucial to create a safe and organized work environment:
- Remove obstacles: Clear the area around the damaged floor joist, including furniture and other obstructions, to allow for easy access.
- Clean the area: Sweep away debris, dust, and any loose materials to ensure a tidy workspace. A clean area helps prevent accidents and ensures precision during the splicing process.
Measuring and Cutting Sistering Boards
Accurate measurements and clean cuts are essential for a seamless and sturdy splice.
- Measure the boards: Use a tape measure to determine the exact dimensions needed for the sistering boards. The sistering boards must align perfectly with the damaged joist.
- Cut the boards: Use a saw to cut the boards to the required length. Ensure the edges are smooth and straight to facilitate a secure connection during installation.
Step-by-Step Splicing Process
Repairing a floor joist with a splice involves attaching additional wood (sistering boards) to the damaged area and securing it for optimal strength. Follow these steps for a professional-grade repair:

1. Attaching Sistering Boards
- Choose the right material: Select sistering boards that match the size and dimension of the original joist. These boards will provide structural support and act as the base for the splice.
- Position the boards: Place the sistering boards on either side of the damaged section of the joist.
- Secure with adhesive and fasteners: Apply construction adhesive to the surface of the damaged joist, then attach the sistering boards using nails or screws. Ensure the boards are tightly fastened to prevent any movement during the repair process.
2. Securing the Splice
- Add the new section: Cut a replacement wood section that matches the original joist’s dimensions. Place this new piece over the damaged area, resting it on top of the sistering boards.
- Bolt the splice: Use bolts to secure the new section of wood to the sistering boards and the original joist. Stagger the bolts along the length of the splice for even weight distribution, keeping them no more than 16 inches apart. Tighten the bolts until the new wood is flush with the original joist.
3. Adding Reinforcement
To ensure the joist’s structural integrity, it’s important to provide additional support:
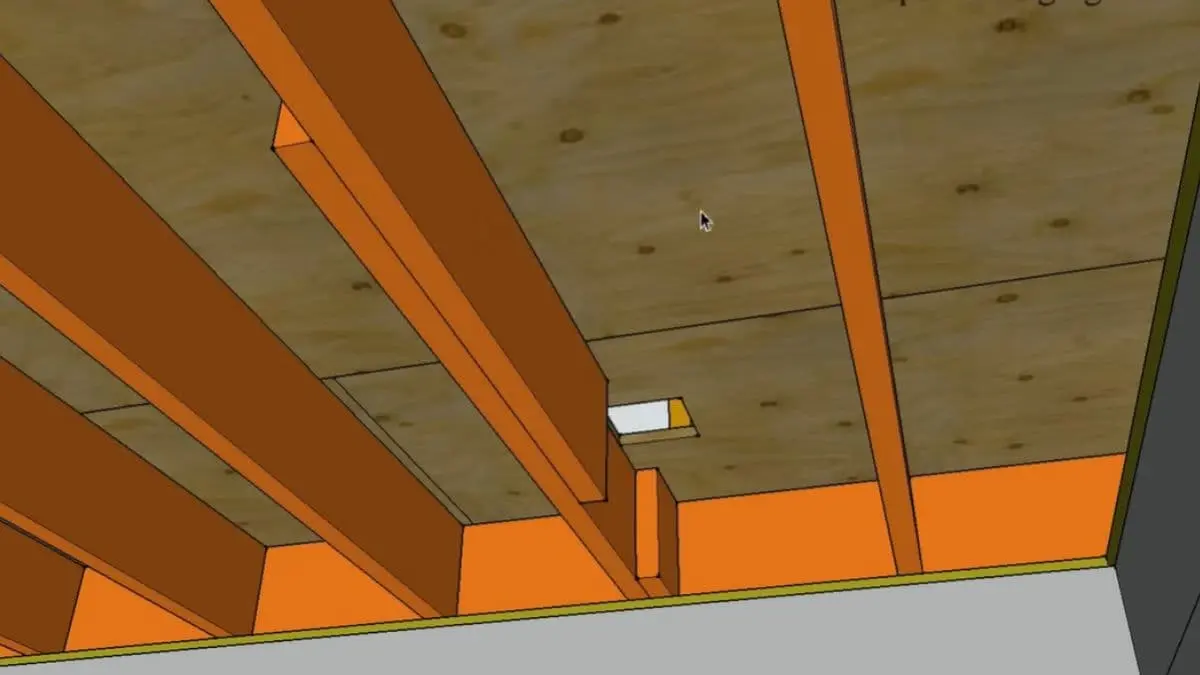
- Install blocking: Add blocking (small pieces of wood) between the joists to reinforce the repair and prevent lateral movement.
- Check for levelness: Use a level to ensure the repaired joist aligns perfectly with the surrounding joists. Make adjustments as needed to prevent sagging or elevation differences.
Final Touches and Maintenance
After completing the splice, inspect the repaired area thoroughly:
- Verify stability: Double-check all fasteners to ensure they are tight and secure.
- Clean up: Remove any leftover debris, tools, and materials from the workspace.
- Regular maintenance: Periodically inspect your floor joists for signs of wear or damage to address issues early and prolong their lifespan.
Recommended Read: How to Attach Floor Joists to Sill Plate
Ensuring Structural Integrity After Splicing
When splicing a floor joist, it is crucial to ensure that the structural integrity of the joist is maintained. Failure to do so could result in a weakened floor, which could be dangerous for anyone walking on it. Here are some steps to take to ensure the structural integrity of a spliced floor joist:
Checking For Level
One of the most important things to check after splicing a floor joist is whether the floor is level. If the floor is not level, it could indicate that the splicing was not done correctly, or that the joist has been weakened. To check for level, use a spirit level to measure the height of the floor at various points. If there are significant variations in height, it may be necessary to adjust the joist or add additional support.
Reinforcing With Additional Support
Adding additional support is another way to ensure the structural integrity of a spliced floor joist. One way to do this is to add a sister joist next to the original joist. The sister joist should be the same size as the original joist and should extend past the splice by at least 3 feet on either side. Another way to reinforce the joist is to add metal brackets or straps to the splice. These brackets or straps will help to hold the joist together and prevent it from separating over time.
Regular Maintenance
Regular maintenance is also important for ensuring the structural integrity of a spliced floor joist. This includes checking for any signs of damage or wear and tear, such as cracks or splits in the wood. It is also important to ensure that any additional support added to the joist is secure and in good condition. Regular maintenance can help to identify and address any issues before they become more serious. In conclusion, splicing a floor joist can be an effective way to repair a damaged joist.
However, it is important to take steps to ensure the structural integrity of the joist after splicing. This includes checking for level, reinforcing with additional support, and regular maintenance. By following these steps, you can ensure that your floor remains safe and stable for years to come.
Benefits Of Properly Spliced Floor Joists
Properly spliced floor joists can have a significant impact on the structural integrity and longevity of a building. Whether you are addressing existing damage or taking preventative measures, understanding the benefits of proper splicing is essential.

Preventing Further Damage
Splicing damaged floor joists effectively prevents further structural deterioration. By reinforcing weakened areas, the risk of subsequent issues such as sagging floors and wall cracks is minimized, ensuring the stability and safety of the building.
Maintaining Property Value
Investing in professional floor joist splicing not only safeguards the structural integrity of the property but also preserves its market value. By addressing issues promptly and effectively, property owners can avoid potential devaluation and attract discerning buyers or tenants.
Frequently Asked Questions
Can A Floor Joist Be Spliced?
Yes, a floor joist can be spliced for reinforcement or repair. However, the splice should be properly designed and installed to ensure structural integrity and safety. It’s essential to adhere to local building codes and consult a professional engineer for guidance.
How To Splice A Rotten Floor Joist?
To splice a rotten floor joist, cut out the damaged section, measure and cut a replacement piece, and secure it in place with joist hangers and screws. It’s essential to ensure the splice is level and properly supported for structural integrity.
How Do You Splice Joists Together?
To splice joists together, align the ends, use a metal splice plate, and secure with screws or bolts for added strength.
Can You Join Floor Joists Together?
Yes, you can join floor joists together using joist hangers or sistering them. This adds support and stability to the floor structure.
Conclusion
In short, splicing a floor joist is a crucial task for maintaining the structural integrity of a building. By following proper guidelines and seeking professional help if needed, you can ensure that the process is carried out effectively. Remember, safety should always be the top priority when working on any structural repairs.
With the right approach, you can ensure the longevity and stability of your building.

