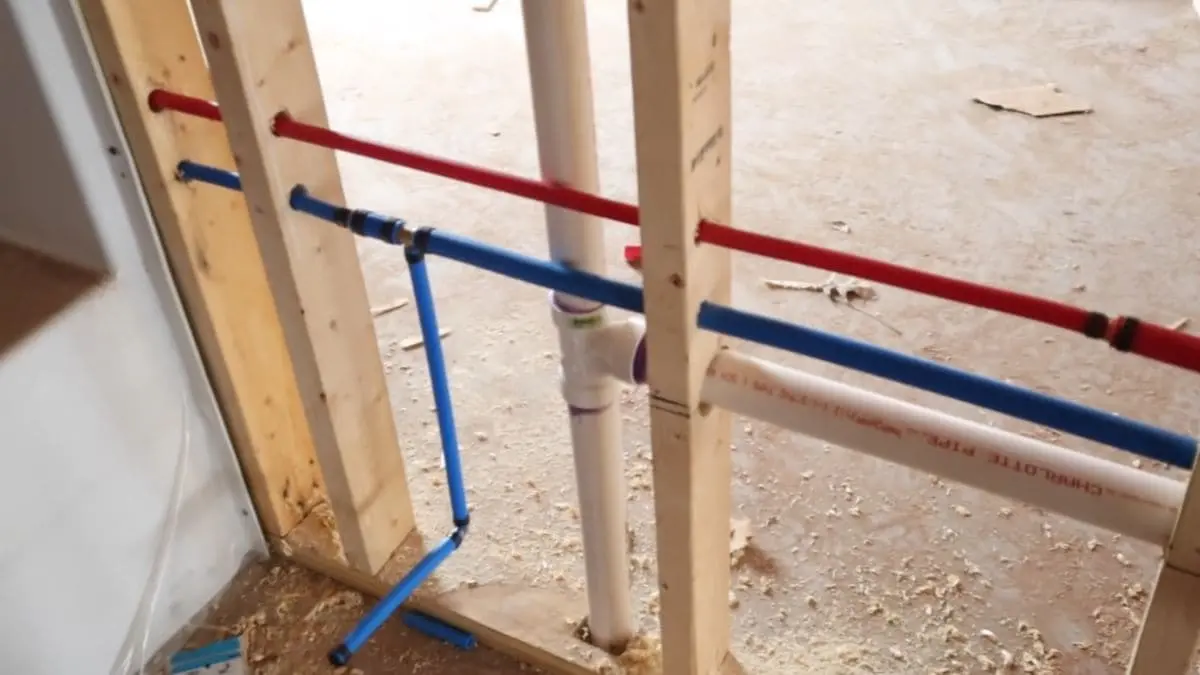
Drill holes in the center of the studs to run PEX tubing. Use protective grommets to prevent damage.
Running PEX through studs is a common practice in plumbing installations. This method ensures the tubing is securely and safely routed within walls. Drilling holes in the center of the studs minimizes the risk of structural damage. Using grommets at the entry and exit points of each stud hole protects the PEX tubing from potential abrasions.
Properly securing the PEX helps maintain the integrity of the plumbing system and prevents leaks. This approach is both efficient and effective, ensuring the longevity and reliability of the plumbing installation. Homeowners and professionals favor this method for its balance of safety and simplicity.
Benefits Of Running PEX Through Studs
Running PEX through studs can be a smart choice for plumbing projects. This method offers many benefits. It helps with durability, efficiency, and cost savings. Learn why this technique is popular among professionals.
Durability And Flexibility
PEX pipes are very durable. They resist corrosion and scaling. These pipes are also flexible. They can bend around corners easily. This reduces the need for extra fittings.
Fewer fittings mean fewer chances for leaks. This makes your plumbing system more reliable. PEX can also handle extreme temperatures. It works well in both hot and cold conditions.
Cost Savings
Using PEX can save money. The material is cheaper than copper. Installation is also quicker. This means lower labor costs. Fewer fittings and connectors are needed. This further reduces expenses.
Ease Of Installation
Installing PEX is easy. The pipes are lightweight. They are simple to cut and join. PEX can be run through studs with minimal effort. Special tools make the job even easier.
This ease of installation speeds up projects. It also reduces the chance of mistakes. Even beginners can handle PEX with some practice.
Noise Reduction
PEX pipes are quieter than metal pipes. They do not bang or clang. This makes for a quieter home environment. The flexibility of PEX helps absorb water hammer impacts. This reduces the noise even more.
Resistance To Freezing
PEX pipes can expand if they freeze. This reduces the risk of bursting. Metal pipes can crack or break when frozen. PEX returns to its original shape once thawed. This makes it ideal for cold climates.
Tools And Materials Needed
Running PEX through studs can be a simple task. It requires the right tools and materials. This guide will help you understand what you need. Let’s get started!
Drill And Hole Saw
You need a drill to make holes in the studs. A hole saw attachment is also necessary. This will help you create the right-sized holes for the PEX tubing.
PEX Tubing
Make sure you have enough PEX tubing for your project. Measure the distance you need to cover. Always get a little extra tubing just in case.
Measuring Tape
A measuring tape is essential. It helps you measure the distance between studs. Accurate measurements ensure a smooth installation.
Pipe Clamps And Supports
Pipe clamps and supports will hold the PEX tubing in place. Use them to secure the tubing to the studs. This prevents sagging and keeps everything neat.
Sharkbite Fittings
SharkBite fittings are useful for connecting PEX tubing. They are easy to use and don’t require special tools. They also provide a secure and leak-free connection.
Pipe Cutter
A pipe cutter is necessary to cut PEX tubing. It ensures clean and straight cuts. This makes connecting the tubing easier.
Safety Gear
Always wear safety gear like gloves and goggles. This protects your eyes and hands while working. Safety should always come first.
Stud Finder
A stud finder helps locate studs behind the wall. This is important for accurate drilling. It ensures you drill in the right spot.
Step-by-step Guide To Running PEX Through Studs
Running PEX tubing through studs is a common task in home plumbing projects. This guide will help you understand the steps involved in running PEX through studs. Follow these instructions to ensure a smooth and efficient installation.
Locating The Studs
First, find the studs in your wall. Use a stud finder tool for this task. Studs are usually 16 or 24 inches apart. Mark each stud with a pencil. This will help you know where to drill holes for the PEX tubing.
Here are the steps to locate studs:
- Turn on the stud finder.
- Move the stud finder along the wall.
- Mark each stud’s location with a pencil.
Make sure you mark the center of each stud. This will ensure your holes are properly aligned. Double-check your measurements before moving to the next step.
Planning The Route
Plan the route for your PEX tubing. This will help you avoid obstacles and make the installation easier. Sketch out the route on a piece of paper.
Consider these points when planning the route:
- Shortest distance between fixtures.
- Avoid electrical wires and outlets.
- Keep the tubing away from hot surfaces.
A well-planned route will save you time and effort. Double-check your plan before you start drilling.
Cutting And Preparing The PEX Tubing
Measure the length of PEX tubing you need. Use a measuring tape for accurate measurements. Cut the PEX tubing using a PEX cutter tool.
Follow these steps to cut and prepare the PEX tubing:
- Measure the required length of tubing.
- Mark the cutting point with a pencil.
- Use a PEX cutter to make a clean cut.
Ensure the cut is smooth and even. This will help with secure connections later. If the cut is jagged, use sandpaper to smooth it out.
Securing The PEX Tubing
Secure the PEX tubing to the studs using clamps. This will prevent the tubing from moving. Make sure the clamps are evenly spaced.
Here’s how to secure the PEX tubing:
- Place a clamp around the tubing.
- Screw the clamp into the stud.
- Repeat every 2-3 feet along the tubing.
Use enough clamps to keep the tubing secure. Avoid overtightening the clamps as it may damage the tubing.
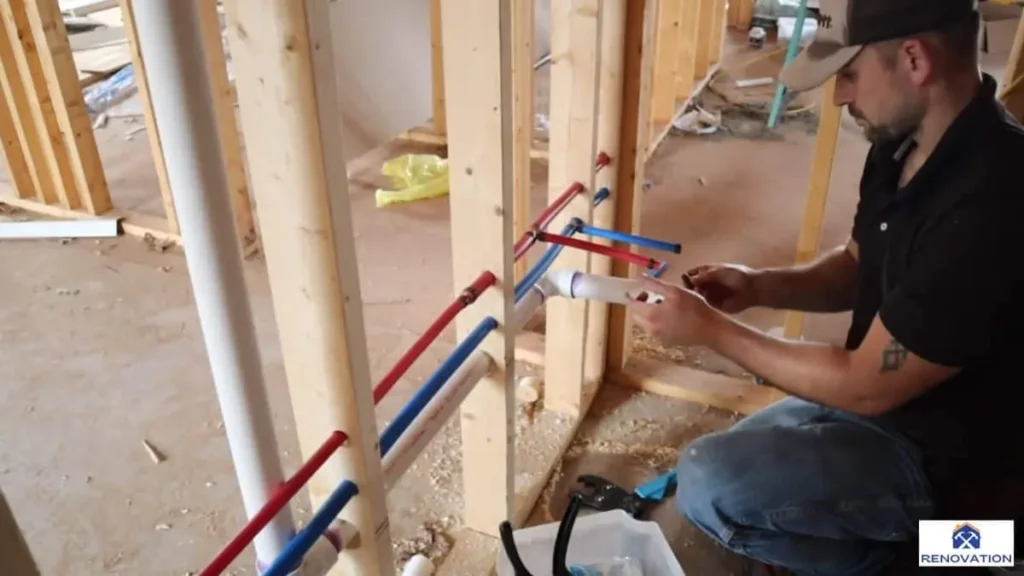
Connecting The PEX Tubing To Fixtures
Connect the PEX tubing to your fixtures. Use the appropriate fittings and connectors. Make sure the connections are tight and secure.
Follow these steps to connect the PEX tubing:
- Slide a crimp ring onto the tubing.
- Insert the fitting into the tubing.
- Use a crimping tool to secure the ring.
Double-check each connection to ensure there are no leaks. Proper connections are crucial for a successful installation.
Testing For Leaks
Once all connections are made, test the system for leaks. Turn on the water supply and check each connection point.
Steps to test for leaks:
- Turn on the main water supply.
- Inspect each connection for drips.
- Tighten any loose fittings.
It’s important to ensure there are no leaks. A leak-free system will provide long-lasting performance. Make any necessary adjustments and retest if needed.
Recommended Post: How to Reinforce Floor Joists for Plumbing
Tips For Running PEX Through Studs
Running PEX pipes through studs can be tricky. But with the right tips, you can do it easily. PEX is a flexible and durable piping material. It’s perfect for plumbing projects. Follow these tips to make your work smoother and safer.

Plan Your Route
Planning your route is the first step. Decide where the pipes will go. Mark the studs where you will drill. This will help you avoid mistakes.
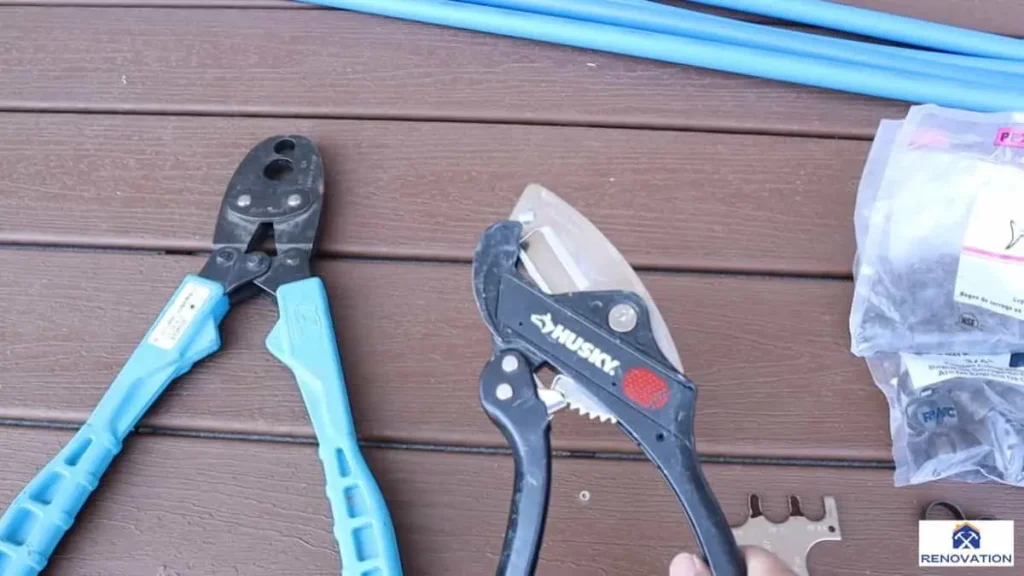
Use The Right Tools
Using the right tools is very important. You will need a drill and a hole saw. Choose the right size for your PEX pipes. This will make the job easier.
Drill Holes Carefully
Drill holes carefully through the studs. Make sure the holes are straight. This will help the PEX pipes fit well. Take your time to avoid splitting the wood.
Protect The PEX Pipes
Protect the PEX pipes from sharp edges. Use grommets or sleeves. This will prevent damage to the pipes. It will also make the installation last longer.
Secure The Pipes
Secure the pipes to the studs with clamps. This will keep them in place. Make sure the clamps are tight but not too tight. This prevents movement and noise.
Test The System
Test the system after installation. Turn on the water and check for leaks. Fix any problems right away. This ensures everything works well.
Common Mistakes To Avoid
Running PEX through studs is a common practice in plumbing. PEX, or cross-linked polyethylene, is flexible and resistant to scale and chlorine. It’s a great choice for both professional plumbers and DIY enthusiasts. But, there are common mistakes that can lead to problems down the line. Avoiding these mistakes will save you time, money, and headaches.
Not Properly Supporting The PEX Tubing
Proper support is crucial for PEX tubing. Without it, the tubing can sag or kink. Sagging can cause water flow issues, while kinking can damage the tubing. Here are some tips to avoid this mistake:
- Use support brackets every 32 inches horizontally.
- Install vertical supports every 4 feet.
- Ensure support clips are snug but not tight.
Support brackets and clips are easy to install. They ensure the tubing stays in place. This helps maintain water pressure and flow. It’s a small step that makes a big difference.
Incorrectly Measuring And Cutting The Tubing
Accurate measuring and cutting are vital. Incorrect measurements can lead to waste or leaks. Here’s how to measure and cut PEX tubing correctly:
- Always measure twice before cutting.
- Use a sharp PEX cutter for clean cuts.
- Ensure the cut is square and smooth.
Using the right tools is essential. A dull cutter can crush the tubing. Always use a cutter designed for PEX. Clean cuts ensure tight, leak-free connections.
Using Incorrect PEX Fittings
Using the right fittings is crucial. Incorrect fittings can lead to leaks and system failure. Here are some key points to consider:
- Ensure fittings are compatible with your PEX type.
- Use crimp rings or cinch clamps for secure connections.
- Check for manufacturer recommendations on fittings.
There are different types of PEX, and each has specific fittings. Using the wrong fitting can cause major issues. Always double-check compatibility before installation.
Neglecting To Test For Leaks
Testing for leaks is a crucial step. Skipping this can lead to water damage and costly repairs. Here are the steps for testing:
- Pressurize the system to check for leaks.
- Use a pressure gauge to monitor pressure.
- Check all connections and joints for signs of leaks.
Testing can identify potential issues early. It’s a simple step that prevents future problems. Always test your system before finishing your project.
Read Also: Running Romex Through Floor Joists
PEX Vs. Traditional Copper Pipes
Running PEX through studs is a modern plumbing solution. PEX, or cross-linked polyethylene, offers many advantages over traditional copper pipes. This blog compares PEX and copper in terms of cost, installation time, durability, and resistance to corrosion. Understanding these factors helps in making an informed decision for your plumbing needs.

Cost
PEX pipes are usually cheaper than copper pipes. This can be a significant factor when budgeting for a plumbing project. Here’s a comparison:
| Material | Cost per foot |
| PEX | $0.50 |
| Copper | $2.00 |
Besides the cost of materials, the cost of installation also differs. PEX is flexible and requires fewer fittings. This reduces the labor cost. Copper, being rigid, needs more fittings and soldering. This increases both material and labor costs.
- PEX: Less costly overall
- Copper: Higher material and labor costs
Installation Time
PEX can be installed faster than copper. Its flexibility allows it to be easily navigated through studs and around obstacles. This reduces the time needed for installation. Copper pipes require precise measurements and soldering, which is time-consuming.
Here’s a quick comparison:
- PEX: Flexible, fewer fittings, quick installation
- Copper: Rigid, more fittings, slower installation
In new construction or remodeling projects, the speed of PEX installation can save both time and money. Its flexibility allows for fewer breaks in the line, making the process smoother.
Durability
PEX pipes are known for their durability. They are resistant to scale and chlorine, which can affect copper pipes over time. This makes PEX a reliable choice for long-term use.
Copper pipes are also durable but can corrode over time. This is especially true in areas with acidic water. Here’s a comparison of durability:
- PEX: Resistant to scale and chlorine, long-lasting
- Copper: Durable but can corrode over time
Both materials have their strengths, but PEX’s resistance to common water issues gives it an edge in many situations.
Resistance To Corrosion
PEX pipes are highly resistant to corrosion. This makes them a good choice for areas with water quality issues. Copper pipes, on the other hand, can corrode, especially in acidic environments.
Here’s a detailed comparison:
- PEX: No corrosion, suitable for all water types
- Copper: Can corrode, especially with acidic water
Using PEX means fewer worries about corrosion, leading to fewer maintenance issues. This is a significant advantage for long-term plumbing solutions.
Related Read: Raised Floor Bathroom Plumbing
Conclusion
Running PEX through studs can simplify your plumbing projects. It ensures efficient water flow and reduces risks of leaks. With proper tools and techniques, the installation becomes straightforward. Follow safety guidelines and local codes. By doing so, you’ll enjoy a reliable and durable plumbing system.
Happy plumbing!