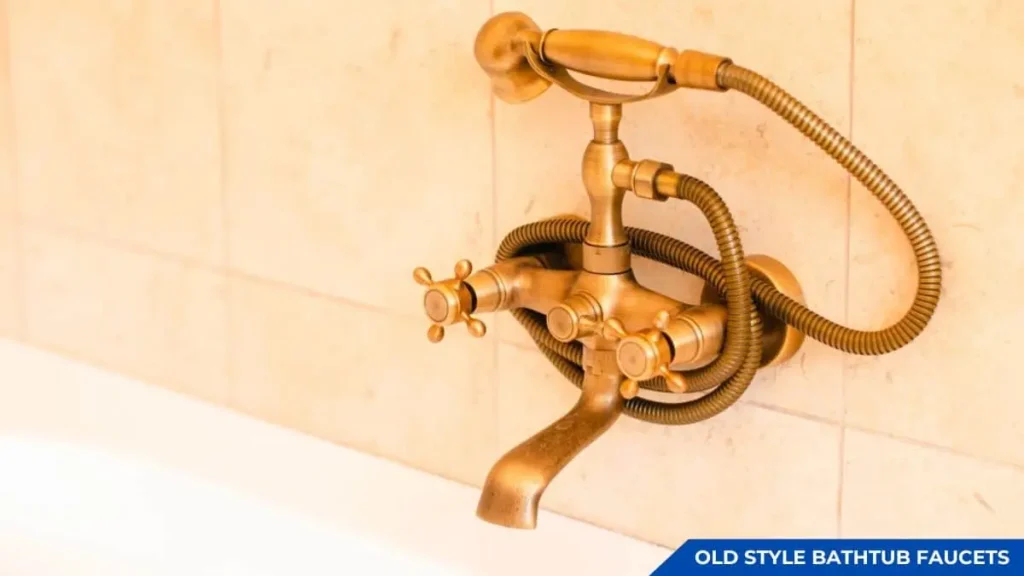
Old-style bathtub faucets add a vintage charm to bathrooms, but over time, they can develop issues like leaks, low water pressure, and stiff handles. Repairing an old-style bathtub faucet can extend its lifespan, prevent water waste, and maintain the classic aesthetic without the need for a full replacement.
Faucet problems often stem from worn-out washers, corroded valve seats, or mineral buildup. Fixing these issues is usually straightforward with the right tools and replacement parts. Whether the faucet is dripping continuously or is difficult to turn, addressing the problem early can prevent further damage.
This guide provides a step-by-step approach to diagnosing and repairing common issues in old-style bathtub faucets. It also covers essential tools, troubleshooting tips, and when to call a professional if the damage is beyond repair.
Common Issues with Old Style Bathtub Faucets
Old-style bathtub faucets are known for their durability, but like any plumbing fixture, they can develop problems over time. Leaks, reduced water pressure, and stiff handles are among the most common issues homeowners face. These problems are often caused by worn-out components, mineral deposits, or internal corrosion. Addressing these issues promptly can prevent further damage and extend the life of the faucet.
Leaky Faucet
A leaking bathtub faucet wastes water and increases utility bills. Even a small drip can result in significant water loss over time. The most common cause of leaks in old-style faucets is a worn-out washer. Compression-style faucets, which rely on rubber washers to seal the water flow, tend to wear down over time, allowing water to seep through even when the handle is fully closed.
Another common cause is a damaged O-ring—a small rubber ring inside the faucet stem that helps create a watertight seal. If the O-ring deteriorates or cracks, water can leak around the base of the handle or from the spout. Additionally, a corroded or pitted valve seat, which connects the faucet to the spout, can prevent a proper seal, causing continuous dripping.
If replacing the washer and O-ring does not stop the leak, the valve seat may need to be resurfaced or replaced. Mineral deposits and corrosion can erode the valve seat, preventing a tight seal. A valve seat wrench or seat-dressing tool can be used to smooth out rough spots and restore a proper fit.
Low Water Pressure
Weak water flow from an old bathtub faucet can be frustrating, especially when filling a tub takes longer than usual. Mineral buildup inside the faucet or pipes is a frequent cause of low water pressure. Over time, calcium and lime deposits from hard water can clog the aerator or restrict water flow inside the faucet body.
A faulty diverter valve can also reduce water pressure. In bathtub and shower combinations, the diverter valve controls the flow of water between the tub spout and the showerhead. If the diverter becomes clogged or stuck, it can partially block water flow, reducing pressure.
In some cases, low water pressure may be caused by partially closed shut-off valves or old galvanized pipes with internal corrosion. If cleaning the aerator and replacing the diverter valve do not improve the water flow, it may be necessary to check the home’s plumbing system for blockages or pipe corrosion.
Related Read: Low Water Pressure in Kitchen Sink After Replacing Water Heater
Difficulty Turning Handles
Stiff or hard-to-turn handles are another common issue with old-style bathtub faucets. This problem is often caused by a buildup of mineral deposits inside the faucet stem, restricting movement. Over time, the stem’s packing or washers can dry out, harden, or disintegrate, making it difficult to turn the handles smoothly.
Rust and corrosion inside the faucet stem can also cause resistance. If moisture seeps into the metal components, it can lead to oxidation, making the handle stiff or even stuck. Applying plumber’s grease to the faucet stem can help lubricate the internal parts and restore smooth operation.
Another possible cause is a stripped stem or handle. In compression-style faucets, repeated use can wear down the threading inside the handle or the stem itself. If the handle turns without controlling the water flow, the stem may need to be replaced.
If the handle is completely stuck, it may require a handle puller tool to remove it without damaging the fixture. Soaking the faucet components in vinegar or a lime remover can help dissolve any hardened mineral deposits, restoring movement.
Tools & Materials Needed for Repair
Repairing an old-style bathtub faucet requires a few essential tools and replacement parts. Having the right materials on hand makes the process smoother and ensures a durable fix. Most repairs involve replacing washers, O-rings, or valve seats, so a basic plumbing toolkit is usually sufficient.
Essential Tools
- Adjustable Wrench – Used to loosen and tighten faucet components, such as nuts and fittings.
- Phillips & Flathead Screwdrivers – Necessary for removing faucet handles and securing screws.
- Pipe Wrench – Helps with stubborn or larger fittings that require extra torque.
- Allen Wrench (Hex Key Set) – Needed for some faucet handle screws that use hex fasteners.
- Faucet Handle Puller – Helps remove stuck or corroded handles without damaging them.
- Plumber’s Grease – Lubricates internal components to ensure smooth operation.
- Seat Wrench – Removes and replaces worn-out valve seats inside the faucet.
- Needle-Nose Pliers – Useful for gripping and removing small parts like washers and O-rings.
- Utility Knife – Helps remove old gaskets, seals, or excess plumber’s tape.
Replacement Parts & Materials
- Washers & O-Rings – Common causes of leaks; replacements should match the faucet model.
- Valve Seat – If the existing seat is pitted or corroded, a new one ensures a proper seal.
- Packing or Stem Seal – Prevents leaks around the handle area and helps maintain smooth operation.
- Plumber’s Tape (Teflon Tape) – Seals threaded connections to prevent leaks.
- White Vinegar or Lime Remover – Dissolves mineral deposits that cause blockages or stiff handles.
- Replacement Faucet Stem (if needed) – Required if the existing stem is damaged or stripped.
Step-by-Step Guide to Repairing an Old-Style Bathtub Faucet
Repairing an old-style bathtub faucet requires patience and attention to detail. Whether the faucet is leaking, difficult to turn, or has low water pressure, most issues can be fixed by replacing worn components. This step-by-step guide will help you restore the faucet’s functionality and prevent further damage.

Step-1. Turn Off the Water Supply
Before starting any repair, the water supply must be turned off to prevent leaks and water damage. Most bathtubs have shutoff valves located near the pipes, typically behind an access panel. If individual shutoff valves are not present, the main water supply for the house should be turned off.
Once the water is off, open the bathtub faucet to release any remaining water in the pipes. This will relieve pressure and prevent excess water from spilling when disassembling the faucet. If possible, place a towel or bucket under the work area to catch any drips.
Step-2. Disassemble the Faucet Handles
Removing the faucet handles is the first step in accessing the internal components. Most old-style faucets have a screw securing the handle, typically hidden under a decorative cap. Use a flathead screwdriver to carefully pry off the cap, then unscrew the handle screw using a Phillips screwdriver or Allen wrench.
If the handle is stuck due to corrosion or mineral buildup, apply a penetrating lubricant or use a handle puller tool to remove it without damage. Once the handle is off, the stem assembly or cartridge will be visible. Using an adjustable wrench, carefully unscrew and remove the packing nut holding the stem in place.
Slowly pull out the faucet stem, being mindful of any washers or O-rings that may come loose. Inspect the stem for wear, corrosion, or mineral deposits that could be affecting performance. If the stem is damaged or heavily corroded, it may need to be replaced entirely.
Step-3. Inspect & Replace Washers and O-Rings
Washers and O-rings are the most common causes of leaks in old-style bathtub faucets. Compression-style faucets rely on rubber washers to seal the water flow, and over time, these components can wear out or harden.
At the base of the faucet stem, locate the rubber washer secured by a screw. If the washer appears worn, cracked, or deformed, replace it with a new one of the same size. Use needle-nose pliers to remove the old washer if it is stuck.
Similarly, inspect the O-ring, which is typically located around the stem. A cracked or dried-out O-ring can cause leaks around the handle area. Replace it with a properly sized O-ring and apply a thin layer of plumber’s grease to ensure a watertight seal.
Reassemble the stem with the new washer and O-ring in place, securing it tightly to prevent future leaks. If the leak persists after replacing these components, the valve seat may be the underlying problem.
Step-4. Check and Repair the Valve Seat
The valve seat is a critical component that forms the seal between the faucet stem and the spout. Over time, mineral deposits and corrosion can wear down the valve seat, creating small pits or rough surfaces that prevent a proper seal.
To inspect the valve seat, use a flashlight to look inside the faucet body where the stem was removed. If the surface appears rough or damaged, a valve seat wrench can be used to remove it. Once removed, inspect it for wear and replace it if necessary.
If replacing the valve seat is not an option, a seat-dressing tool (seat grinder) can be used to smooth out the surface, allowing for a better seal. After cleaning or replacing the valve seat, reinsert it securely before reinstalling the faucet stem.
Step-5. Reassemble & Test the Faucet
Once all necessary repairs are made, reassemble the faucet by reinserting the stem into the faucet body. Tighten the packing nut securely but avoid over-tightening, as this can cause damage to the threads. Reattach the faucet handle and secure it with the screw before replacing the decorative cap.
Turn the water supply back on and slowly open the faucet to check for leaks. Allow the water to run for a few minutes to flush out any debris or air trapped in the pipes. If the faucet operates smoothly and no leaks are present, the repair is complete.
If any leaks persist, double-check that all washers, O-rings, and the valve seat are properly installed. Regular maintenance, such as cleaning mineral deposits and lubricating faucet stems, can help prevent future issues and keep an old-style bathtub faucet in optimal condition.
If you’re dealing with a vintage faucet, a 1950s bathtub faucet shares many similarities with other older models. The process of replacing washers, O-rings, and valve seats is common across various eras of faucet designs. To ensure a smooth repair, understanding the specific features of a 1950s model can help you avoid issues such as leaks or low water pressure. For more detailed insights on repairing faucets from this time period, check out our comprehensive guide on 1950s bathtub faucet repair.
Troubleshooting Common Issues After Repair
Even after carefully repairing an old-style bathtub faucet, some issues may persist. Leaks, tight or loose handles, and weak water flow are common post-repair problems that require additional troubleshooting. Addressing these concerns ensures the faucet functions correctly and prevents further damage.

Faucet Still Leaking?
If the faucet continues to leak after replacing washers and O-rings, the issue could be due to improper installation, a worn valve seat, or a faulty stem. First, ensure the stem and packing nut are tightened securely but not over-tightened, as this can damage the threads or cause unnecessary pressure on internal components.
Another common cause of persistent leaks is a misaligned or improperly seated washer. If the washer is not the correct size or is not positioned flat against the valve seat, water can still seep through. Remove the stem again and double-check that the washer fits snugly in place. If necessary, try a slightly thicker washer to create a better seal.
If the leak is coming from the spout even when the faucet is turned off, the valve seat may be the culprit. Inspect it again for pits, cracks, or rough surfaces that prevent a watertight seal. If the valve seat is damaged, replacing it or smoothing it out with a seat grinder should resolve the issue.
Handles Too Tight or Loose?
After reassembling the faucet, the handles should turn smoothly. If the handles feel too tight, they may have been over-tightened during installation. Loosen the packing nut slightly and test the handles again. Applying a small amount of plumber’s grease to the stem threads can also help improve movement.
If the handles are too loose and do not turn off the water completely, check the stem packing. The packing material around the stem helps create a seal and allows smooth operation. If it is worn or missing, water may leak around the handle, or the handle may feel wobbly. Replacing the packing or tightening the packing nut should resolve this problem.
In some cases, mineral deposits can cause stiffness in the handle movement. If the faucet was not thoroughly cleaned during the repair, remove the stem again and soak it in white vinegar to dissolve any calcium or lime buildup. Rinse it thoroughly before reinstalling.
Water Flow Still Weak?
If the water pressure remains low after completing the repair, there may be an obstruction in the faucet or supply lines. Begin troubleshooting by removing the faucet spout and checking for debris or mineral buildup inside. A clogged aerator is a common reason for reduced water flow. If present, unscrew it, rinse it under running water, and scrub away any deposits using a small brush or vinegar soak.
Another potential cause is a partially clogged valve seat. Even if the valve seat appears intact, mineral buildup inside the faucet body can restrict water flow. Use a small wire brush or a vinegar soak to clean the area before reassembling the faucet.
If the issue persists, inspect the water supply valves. Sometimes, shutoff valves are not fully opened after a repair, leading to weak water flow. Ensure both hot and cold water valves are turned on completely. If the home has older plumbing, sediment buildup in the supply pipes could also be restricting water flow, requiring further plumbing work.
When to Call a Professional Plumber
While many issues with old-style bathtub faucets can be fixed with DIY repairs, some situations require the expertise of a professional plumber. Knowing when to seek professional help can prevent further damage, costly mistakes, and potential water damage to your home.
Persistent Leaks Despite Repairs
If the faucet continues to leak after replacing washers, O-rings, and even the valve seat, there may be a deeper issue within the plumbing system. A worn-out faucet body, corroded pipes, or hidden leaks behind the wall can be difficult to diagnose without specialized tools. A plumber can perform a thorough inspection to identify the root cause and provide a long-term solution.
Low Water Pressure Throughout the Bathroom
If weak water flow is not limited to the bathtub faucet but affects other fixtures in the bathroom, the problem may be within the plumbing lines. Corroded pipes, partial blockages, or issues with the main water supply could be restricting water pressure. A plumber can determine if pipe replacements, pressure adjustments, or deeper plumbing work is needed.
Stripped or Broken Faucet Components
Over time, faucet stems, valve seats, and other internal parts can become stripped or too damaged to function properly. If threads are worn out or corroded beyond repair, replacement may be the only option. A professional plumber can assess whether it’s best to replace individual parts or install an entirely new faucet.
Hidden Leaks Behind Walls
If water is pooling around the bathtub, dripping into adjacent rooms, or causing signs of water damage like mold or peeling paint, there may be a hidden leak behind the wall. Diagnosing and repairing hidden leaks requires cutting into drywall and possibly replacing pipes. A plumber has the experience and tools to handle these types of complex repairs safely and effectively.
Major Plumbing System Issues
If the bathtub faucet problem is linked to larger plumbing issues—such as outdated galvanized pipes, inconsistent water temperature, or sewage backups—a professional plumber should be called. Addressing these problems may require replacing old pipes, upgrading water lines, or adjusting water pressure regulators, which are best handled by an expert.
You May Also Like:
FAQs About Old Style Bathtub Faucet Repair
Why does my bathtub faucet still drip after replacing the washer?
If your bathtub faucet still drips after replacing the washer, the valve seat may be damaged or corroded. Mineral buildup or pitting on the valve seat can prevent a proper seal, causing leaks. Use a valve seat wrench to remove and replace it or smooth it out with a seat grinder.
What causes low water pressure in an old bathtub faucet?
Low water pressure in an old bathtub faucet can be caused by mineral buildup in the faucet, clogged aerators, partially closed shutoff valves, or aging pipes. Cleaning the faucet components, flushing the pipes, or checking the main water supply can help restore proper water flow.
How do I remove mineral deposits from my bathtub faucet?
To remove mineral deposits, soak the affected parts in white vinegar for 30–60 minutes, then scrub them with a soft brush. For stubborn buildup, use a mixture of vinegar and baking soda or a commercial descaler to break down limescale and rust.
What tools do I need to repair an old-style bathtub faucet?
Common tools for repairing an old-style bathtub faucet include an adjustable wrench, screwdriver, plumber’s grease, replacement washers, O-rings, and a valve seat wrench. Having these tools ensures a smooth repair process.
When should I replace my old bathtub faucet instead of repairing it?
If your faucet has severe corrosion, stripped threads, frequent leaks, or outdated plumbing connections, replacing it may be more cost-effective. Upgrading to a modern faucet can improve water efficiency and functionality.