
Kitchen islands are a focal point in modern kitchens, providing additional workspace, storage, and seating. However, one often-overlooked detail that enhances both the functionality and aesthetics of a kitchen island is baseboard trim. This finishing touch not only gives the island a polished look but also protects the base from scuffs, dents, and daily wear.
Choosing the right kitchen island baseboard trim involves considering materials, design styles, and installation techniques. From classic wood moldings to sleek modern finishes, the right trim can seamlessly blend with your kitchen’s decor while improving durability.
This guide covers everything you need to know about kitchen island baseboard trim, including its benefits, design options, installation methods, and expert tips for achieving a professional finish. Whether you’re planning a DIY project or hiring a professional, this article will help you make the best choice for your kitchen.
What Is Kitchen Island Baseboard Trim?
Kitchen island baseboard trim is a decorative and protective molding installed at the base of a kitchen island. It serves both aesthetic and functional purposes by covering gaps, hiding uneven flooring, and preventing damage from foot traffic, chairs, and kitchen activities.
Key Functions of Baseboard Trim:
- Enhances Appearance: Adds a finished, built-in look to the kitchen island.
- Protects the Base: Shields the lower part of the island from scuffs, dents, and moisture.
- Covers Gaps: Conceals imperfections where the island meets the floor.
- Creates Design Cohesion: Helps the island blend seamlessly with kitchen cabinetry and flooring.
Kitchen island baseboard trim comes in various materials, including wood, MDF, PVC, and composite options, each offering different levels of durability and style. The choice of trim depends on the kitchen’s overall design, budget, and maintenance preferences.
Types of Kitchen Island Baseboard Trim
Kitchen island baseboard trim comes in various styles, each offering a unique look and functionality. The right trim choice depends on the overall kitchen design, budget, and maintenance preferences. Here’s a closer look at the most common types of baseboard trim used for kitchen islands.
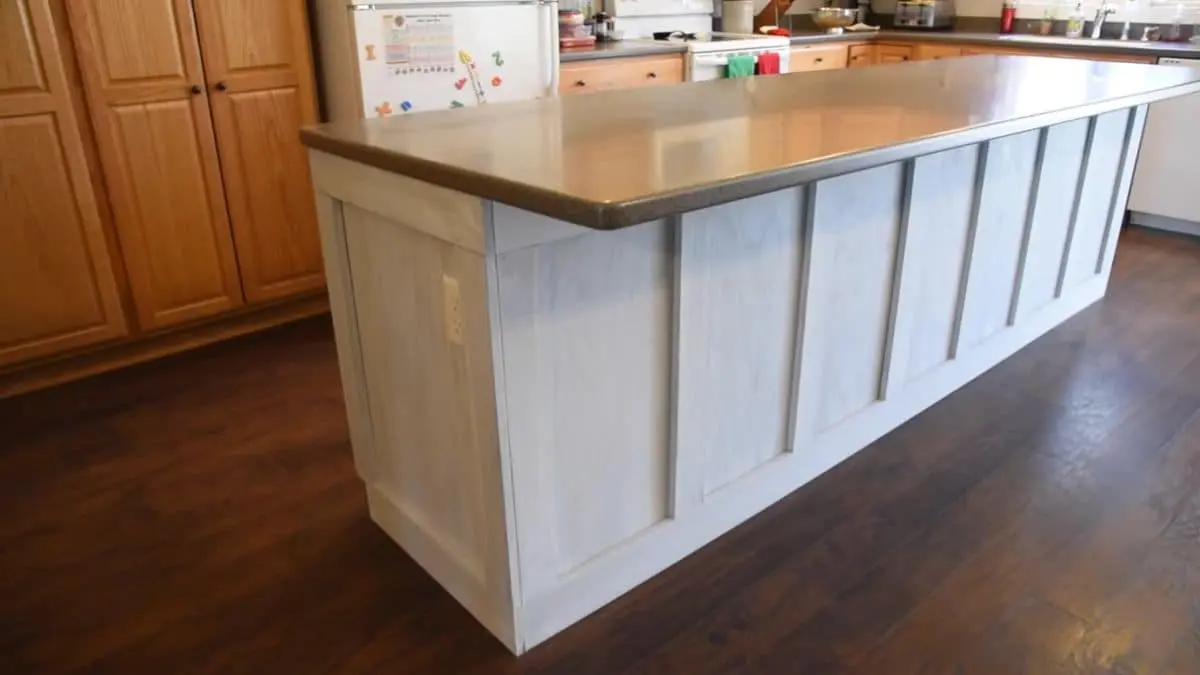
1. Traditional Baseboard Trim
Traditional baseboard trim is one of the most common choices for kitchen islands. It features a simple yet elegant design that seamlessly blends with standard kitchen cabinetry and flooring. Typically made from wood, MDF, or PVC, this trim runs along the base of the island to provide a polished look while covering any gaps between the island and the floor.
A key advantage of traditional baseboard trim is its versatility. It comes in various heights and profiles, from simple flat boards to more detailed designs with beveled or curved edges. Homeowners can also paint or stain it to match the cabinetry or create contrast for a visually striking effect.
Installation is relatively straightforward, as the trim is usually attached with adhesive and finishing nails. However, it requires precise cutting to ensure seamless corner joints, especially in kitchen layouts with intricate designs.
2. Decorative Molding Trim
For those looking to elevate their kitchen island’s aesthetic appeal, decorative molding trim is an excellent choice. This style includes ornate moldings, such as ogee, beaded, or dentil designs, that add architectural character and sophistication. It works particularly well in traditional, farmhouse, or classical kitchen settings.
Decorative molding trim is often used to make a kitchen island look more like a furniture piece rather than a built-in fixture. Homeowners can choose from prefabricated molding options or have custom trim designed to match existing cabinetry. Popular materials for this type of trim include hardwoods, MDF, and polyurethane moldings, which offer durability while allowing for intricate detailing.
The installation process requires more precision than traditional baseboard trim, especially when aligning patterns and mitering corners. Additionally, maintaining detailed molding may require more effort, as dust and grime can accumulate in crevices.
3. Flush Trim or Toe Kick Trim
Flush trim, also known as toe kick trim, is a minimalist option designed for a sleek, modern kitchen look. Unlike traditional baseboards that extend slightly outward, flush trim sits level with the island base, creating a seamless transition between the cabinetry and the floor.
This type of trim is especially popular in contemporary and modern kitchen designs, where clean lines and simplicity take priority. Toe kick trim also serves a functional purpose—it allows for comfortable foot placement when standing at the island, reducing strain on the legs and back.
Common materials used for flush trim include laminate, stainless steel, and painted wood, providing a streamlined appearance. The installation process involves precise measurement and cutting to ensure the trim aligns perfectly with the island base. Some homeowners also opt for recessed lighting within toe kick trim to add a stylish accent to the kitchen.
4. Custom and Built-In Trim Designs
For a fully customized kitchen island, built-in trim designs offer endless possibilities. These designs are tailored to match specific kitchen aesthetics and functional needs, incorporating unique materials, shapes, and finishes.
Some homeowners choose to integrate storage solutions within the baseboard trim, such as hidden drawers or panels that blend seamlessly with the island. Others opt for a combination of trim styles, such as combining decorative molding with toe kick trim for a mix of elegance and practicality.
Built-in trim designs are ideal for high-end kitchens where attention to detail is a priority. However, they require professional craftsmanship to ensure precision and durability. The customization process may also involve higher costs, but the result is a one-of-a-kind kitchen island that enhances both aesthetics and functionality.
How to Choose the Right Baseboard Trim for Your Kitchen Island
Selecting the right baseboard trim for a kitchen island is crucial for achieving a cohesive and polished look. The trim not only enhances aesthetics but also protects the base of the island from scuffs, moisture, and everyday wear. To make the best choice, homeowners must consider design harmony, material durability, and color coordination. Below are the key factors to evaluate when selecting kitchen island baseboard trim.

Match the Kitchen Aesthetic
The baseboard trim should seamlessly blend with the kitchen’s overall design theme. Whether the kitchen has a modern, traditional, farmhouse, or industrial style, the trim should enhance rather than clash with the existing decor.
For a traditional kitchen, opt for detailed molding trim, such as ogee or beaded designs, which add elegance and depth. These trims work well with raised-panel cabinetry and classic color palettes like white, cream, or deep wood tones.
In a modern or minimalist kitchen, flush trim or toe kick trim is the best choice. A sleek, clean-lined design in neutral or bold contrast colors helps maintain a streamlined appearance without unnecessary ornamentation.
For farmhouse or rustic kitchens, wooden trims with a distressed or stained finish can complement natural materials like butcher block countertops and shiplap walls.
If the kitchen leans towards an industrial look, consider using metal or dark-stained wood trims, which pair well with exposed brick walls, concrete floors, and black cabinetry.
Ensuring consistency in design elements across the kitchen helps create a cohesive look, making the island an integral part of the space rather than a separate feature.
Selecting the Right Material
The choice of material for the baseboard trim significantly affects its durability, maintenance, and appearance. Since kitchen islands are high-traffic areas, the trim must withstand scuffs, spills, and moisture exposure.
- Wood: A popular choice for traditional and farmhouse kitchens, wood baseboard trim offers warmth and versatility. It can be stained, painted, or distressed to match cabinetry and flooring. However, it requires sealing to prevent moisture damage and warping over time.
- MDF (Medium-Density Fiberboard): This budget-friendly option mimics wood but is more resistant to warping and cracking. However, MDF is less durable against moisture and may swell if exposed to prolonged humidity.
- PVC or Vinyl: An excellent choice for kitchens prone to moisture, PVC trim is waterproof, easy to clean, and resistant to mold. It is ideal for households that require low-maintenance solutions.
- Metal or Stainless Steel: Often used in contemporary and industrial-style kitchens, metal trim is sleek, durable, and resistant to wear. It adds a modern edge but may not suit all design styles.
- Tile or Stone: For a high-end and unique look, some homeowners opt for baseboard trim made from tile or stone to match backsplashes or flooring. While durable, these materials require professional installation and may be costlier.
Selecting a material that balances aesthetics with durability ensures long-lasting results and minimal maintenance efforts.
Color and Finish Considerations
Color and finish play a crucial role in determining how well the baseboard trim complements the kitchen island and surrounding decor.
A matching trim color—such as painting it the same shade as the island cabinetry—creates a seamless, built-in look. This is ideal for minimalist kitchens that prioritize clean lines and uniformity.
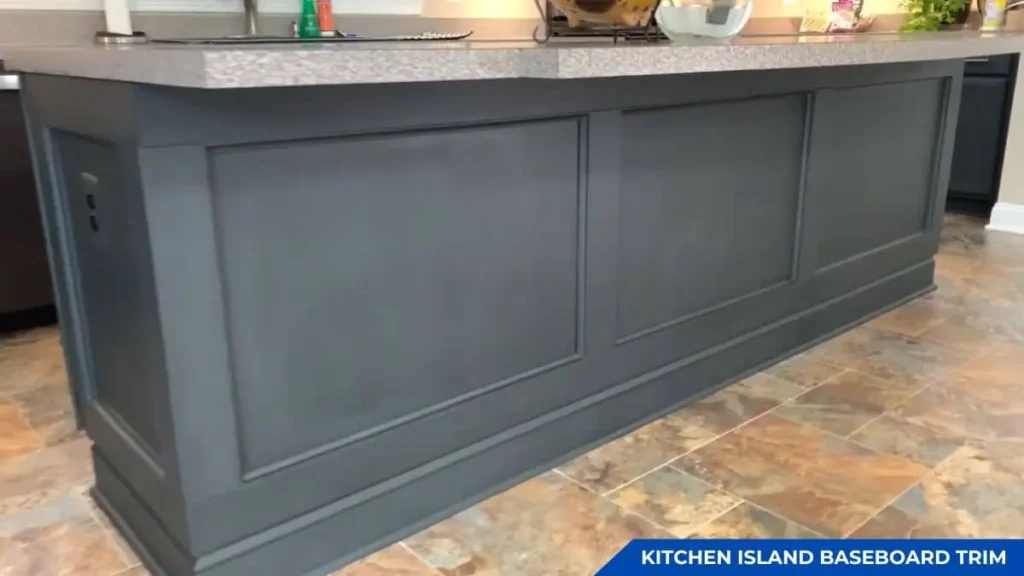
Choosing a contrasting color can make the baseboard trim a design statement. For instance, a dark-stained wood trim against white cabinetry creates a striking contrast that draws attention to the island. Similarly, black or deep gray trims can add depth to lighter kitchen palettes.
The finish of the trim also affects the overall look:
- Glossy finishes reflect light and make the space feel more open, but they may highlight scuffs and fingerprints more easily.
- Matte or satin finishes provide a subtle elegance while minimizing the visibility of dust and wear.
- Distressed or weathered finishes work well in rustic or farmhouse kitchens, adding character and texture.
Additionally, homeowners should consider coordinating the trim color with flooring, countertop materials, and cabinet hardware to maintain a balanced look.
Installing Kitchen Island Baseboard Trim: Step-by-Step
Adding baseboard trim to a kitchen island enhances its appearance and protects against scuffs and wear. A well-installed trim gives the island a finished, built-in look while complementing the kitchen’s overall design.

Tools and Materials Needed
Before starting, ensure you have all the necessary tools and materials to complete the installation efficiently.
Tools:
- Measuring tape
- Miter saw or circular saw
- Nail gun or hammer with finishing nails
- Level
- Wood glue or construction adhesive
- Sandpaper (120–220 grit)
- Caulking gun
- Painter’s tape
Materials:
- Baseboard trim (wood, MDF, PVC, or other material of choice)
- Wood filler or spackle
- Paint or stain (if needed)
- Caulk (for sealing gaps)
Having these items ready will streamline the installation process and ensure a professional-looking result.
Measuring and Cutting the Trim
Accurate measurements are crucial to ensuring the trim fits seamlessly around the kitchen island.
Start by measuring each side of the island where the trim will be installed. Note the lengths and mark them on the trim pieces before cutting. If the island has corners, use a miter saw to cut the trim at a 45-degree angle for a precise joint. For straight edges, a butt joint (square cut) is sufficient.
After cutting the trim, test-fit each piece around the island to check for gaps or misalignment. If needed, sand the edges slightly for a snug fit. Ensuring all pieces align properly before attaching them helps avoid unnecessary adjustments later.
Attaching the Trim
Once the trim is cut to size, it’s time to secure it to the kitchen island.
- Apply Adhesive (Optional): If working with MDF or lightweight trim, applying a thin layer of construction adhesive to the back can provide additional support. This is particularly useful if the trim will be exposed to frequent foot traffic.
- Position and Secure: Place the trim against the island, ensuring it aligns with the floor and surrounding cabinetry. Use a level to check for straightness before securing it.
- Nail the Trim in Place: Using a nail gun (or a hammer with finishing nails), fasten the trim at regular intervals along its length. Nail placement should be close to the edges and spaced about 12–16 inches apart to prevent warping.
- Check for Gaps: If slight gaps appear between trim pieces, use wood glue or caulk to seal them before proceeding to the finishing stage.
Proper attachment ensures the trim remains secure and aligned for a polished look.
Finishing Touches
The final step is to enhance the appearance and durability of the trim.
- Fill Nail Holes: Use wood filler or spackle to cover any nail holes or small gaps. Once dry, sand the filled areas smooth for an even surface.
- Caulk the Edges: Apply a thin bead of caulk along the top edge where the trim meets the island. This prevents dust buildup and creates a seamless transition between materials.
- Paint or Stain: If the trim is unfinished, apply primer, paint, or stain to match the kitchen decor. A protective finish helps prevent wear and tear over time.
- Final Inspection: After the paint dries, check for any rough spots, uneven areas, or missed caulking, making final touch-ups as needed.
Once the finishing touches are complete, the kitchen island will have a professionally installed baseboard trim that enhances both its style and durability.
Cost Considerations: Budgeting for Kitchen Island Trim
Adding baseboard trim to a kitchen island is a small but impactful upgrade. However, understanding the cost implications helps ensure you stay within budget while achieving a high-quality finish. Several factors influence the total expense, including material choice, installation method, and additional finishing costs.
Cost of Materials
The material you choose for your kitchen island baseboard trim significantly affects the total cost. Prices vary depending on durability, style, and finish. Here’s a breakdown of the most common trim materials:
- MDF (Medium-Density Fiberboard): One of the most budget-friendly options, MDF trim typically costs $0.50 to $3 per linear foot. It is easy to paint and install but less resistant to moisture.
- Pine Wood: A slightly more durable yet affordable option, pine trim costs between $1 to $5 per linear foot. It offers a natural wood-grain appearance and can be stained or painted.
- Hardwood (Oak, Maple, Cherry): Premium hardwood trims range from $5 to $15 per linear foot. They provide excellent durability and an elegant finish but are more expensive.
- PVC or Composite Trim: This moisture-resistant option costs around $3 to $8 per linear foot. It’s ideal for high-humidity kitchens and requires minimal maintenance.
- Decorative Moldings: More intricate trim designs, such as crown molding or beadboard, can range from $5 to $20 per linear foot, depending on the complexity of the design.
In addition to the trim itself, don’t forget to budget for finishing supplies, including paint or stain ($15–$50 per can), caulk ($5–$10), and adhesive or nails ($10–$20).
DIY vs. Professional Installation
Deciding between a DIY installation and hiring a professional can significantly impact your overall budget.
DIY Installation Costs and Considerations
Many homeowners choose to install kitchen island baseboard trim themselves to save money. The primary costs for a DIY project include:
- Materials: As outlined above, costs depend on the trim type selected.
- Tools: If you don’t already own them, expect to spend around $50 to $200 for essentials like a miter saw, nail gun, measuring tape, and level.
- Time Investment: Installing trim requires careful measuring, cutting, and finishing. A DIY project may take 4–8 hours, depending on experience.
While DIY installation reduces labor costs, errors in measuring or cutting can lead to wasted materials and additional expenses.
Professional Installation Costs and Considerations
Hiring a carpenter or contractor ensures a high-quality finish but comes at a higher cost.
- Labor Costs: Professionals typically charge $4 to $10 per linear foot for installation, depending on the complexity of the project.
- Additional Fees: Some professionals may charge extra for removing old trim, painting, or custom modifications. Expect to pay an additional $50 to $200 for these services.
- Time Efficiency: A professional can complete the job in 2–4 hours, ensuring precision and durability.
Overall, a DIY installation may cost between $50 to $300, while professional installation ranges from $300 to $1,000, depending on materials and labor.
Expert Tips for a High-End Look
A well-executed kitchen island baseboard trim enhances the overall aesthetic of your kitchen. To achieve a polished, high-end look, attention to detail and the right techniques are essential. From choosing the perfect trim style to ensuring seamless installation, these expert tips will elevate the appearance of your kitchen island.
Choose High-Quality Materials
The material you select for the baseboard trim significantly impacts both durability and visual appeal. Hardwood options like oak, maple, or cherry offer a rich, sophisticated look that lasts for years. For a modern touch, consider MDF with a high-gloss paint finish. If your kitchen experiences high moisture levels, PVC or composite trim provides a sleek appearance while being water-resistant.
Prioritize Precision in Measurements and Cuts
A high-end finish depends on precise measurements and clean cuts. Even slight misalignments can create visible gaps that reduce the quality of the final result. Use a miter saw to ensure sharp, accurate angles, especially for corners and transitions. Before attaching the trim, dry-fit each piece to confirm it aligns perfectly.
Seamless Joints for a Flawless Finish
Visible seams and gaps can make even expensive trim look cheap. To avoid this, use wood filler or caulk to seal any small gaps between joints and along the edges where the trim meets the island. Sand the surface smoothly before painting or staining for a seamless blend.
Select the Right Paint or Stain
The finish of your baseboard trim should complement the kitchen’s overall color scheme. If you prefer a classic and elegant appearance, opt for a semi-gloss or satin paint that highlights the trim while offering easy maintenance. Stained wood trim works beautifully in traditional or farmhouse kitchens, enhancing the natural grain of the wood. Always use high-quality paint or stain to prevent chipping and fading over time.
Enhance with Decorative Molding
For a luxurious touch, layering different types of molding can create depth and sophistication. Adding a small quarter-round or shoe molding at the base of the trim provides a finished look. If your kitchen has ornate cabinetry or crown molding, matching the design elements ensures consistency throughout the space.
You May Also Like: Kitchen Island Plumbing Concrete Floor
FAQs About Kitchen Island Baseboard Trim
What is the purpose of baseboard trim on a kitchen island?
Baseboard trim on a kitchen island serves both functional and aesthetic purposes. It covers gaps between the island and the floor, protects against scuffs and damage, and adds a polished, finished look to the kitchen design.
What materials are best for kitchen island baseboard trim?
The best materials for kitchen island baseboard trim include hardwood, MDF, PVC, and composite wood. Hardwood, such as oak or maple, offers durability and a high-end look, while MDF is cost-effective and easy to paint. PVC and composite materials are ideal for moisture-prone kitchens due to their water resistance.
How do I match baseboard trim with my kitchen design?
To match baseboard trim with your kitchen design, consider style, color, and material. Traditional kitchens pair well with decorative molding, while modern kitchens benefit from sleek, minimalist trim. Matching the trim color with cabinetry or existing baseboards ensures a cohesive look.
How much does it cost to install baseboard trim on a kitchen island?
The cost varies based on materials and labor. DIY installation may cost between $50 to $150, depending on the type of trim. Professional installation can range from $200 to $500, especially for custom designs or premium materials.
Should baseboard trim match the kitchen cabinets or flooring?
Baseboard trim can match either kitchen cabinets or flooring, depending on the design goal. Matching cabinets creates a unified look, while coordinating with flooring blends the island seamlessly into the room. Contrasting trim can also add visual interest.

