Vinyl siding is a durable, cost-effective way to enhance a home’s exterior, offering weather resistance and aesthetic appeal. However, installing vinyl siding on uneven walls can be challenging, leading to potential issues like poor alignment, gaps, or warping. Uneven surfaces can result from structural settling, old siding removal, or imperfect framing.
To ensure a professional finish, proper preparation and installation techniques are essential. This guide covers step-by-step instructions, expert tips, and solutions to help you achieve a smooth and visually appealing vinyl siding installation, even on uneven walls.
The Challenges of Uneven Walls
Installing vinyl siding on uneven walls presents several challenges that can impact both the appearance and durability of the siding. Uneven surfaces can cause gaps, warping, and improper alignment, leading to long-term structural and aesthetic issues.
Why Uneven Walls Are a Problem for Vinyl Siding
Vinyl siding is designed to be installed on a flat, even surface to ensure a seamless fit and secure attachment. When walls are uneven, several issues can arise:
- Poor Aesthetic Appeal: Gaps, bulges, or misaligned panels can make the siding look unprofessional and uneven.
- Compromised Weather Resistance: Vinyl siding acts as a protective layer against moisture, wind, and temperature changes. Gaps caused by uneven walls can allow water infiltration, leading to mold, rot, and structural damage.
- Difficulty in Proper Fastening: Uneven walls prevent siding panels from sitting flush against the surface, making it challenging to secure nails or fasteners correctly. This can result in loose panels that shift over time.
- Increased Risk of Warping and Buckling: If siding is forced onto an uneven surface, it may bend or warp over time, reducing its lifespan and effectiveness.
Common Causes of Uneven Walls
Several factors can contribute to wall irregularities, making siding installation more challenging:
- Foundation Settling: Over time, a building’s foundation can shift due to soil movement, leading to uneven walls. This is especially common in older homes.
- Framing Issues: Poor construction practices, such as incorrect stud placement or improper framing techniques, can create wall inconsistencies.
- Water Damage and Rot: Prolonged exposure to moisture can cause wooden wall structures to deteriorate, leading to soft spots and uneven surfaces.
- Previous Renovations: If past renovations were done without proper leveling, existing walls may have varying thicknesses or misaligned sections.
- Structural Shifts: Natural events like earthquakes, temperature fluctuations, or high winds can gradually distort a building’s framework, leading to wall irregularities.
Recognizing these issues before installing vinyl siding allows for better preparation and corrective measures, ensuring a smoother and more durable application.
Preparing Your Walls for Vinyl Siding Installation
Proper preparation is key to ensuring that vinyl siding adheres correctly and lasts for years, even on uneven walls. Before installation, the surface must be thoroughly inspected, measured, and corrected to create a stable foundation. Neglecting these steps can lead to long-term issues such as moisture infiltration, warping, or siding detachment.
Inspecting and Measuring the Surface
The first step in preparation is assessing the condition of the walls. A detailed inspection helps identify irregularities, damage, or potential problem areas that need to be addressed.
Start by visually examining the walls for noticeable bulges, depressions, or warped sections. Run a long, straight edge or level across different areas of the wall to check for inconsistencies.
Any gaps between the wall and the level indicate uneven sections that need correction. Measuring the depth of these variations will help determine whether minor adjustments or extensive repairs are necessary.
Pay close attention to areas where moisture may have caused damage, such as near the foundation, windows, or roofline. Soft spots or discoloration could indicate rot or mold, which must be addressed before siding installation.
If the building has existing siding, inspect it for signs of warping, loose panels, or decay. Removing old, damaged siding is essential to ensure a clean and stable surface for the new installation.
Repairing or Leveling the Wall Surface
Once the problem areas have been identified, the next step is to create a level and stable surface for the siding. The approach to repair or leveling depends on the extent of the unevenness.
For minor irregularities, furring strips are often the best solution. These thin wooden or PVC strips are attached to the wall to create a flat surface for the siding. By spacing them evenly and adjusting their thickness as needed, they help compensate for uneven areas.
If the wall has significant structural issues, more extensive repairs may be required. Damaged or rotting wood should be replaced to prevent future deterioration. If foundation settling has caused noticeable shifts, professional intervention may be needed to correct the underlying structural problems.
Applying exterior-grade sheathing or foam insulation board can also help smooth out moderate inconsistencies while improving the wall’s energy efficiency.
Sealing any cracks or gaps is also crucial before installing the siding. Caulking around windows, doors, and wall joints prevents moisture from seeping in, reducing the risk of future damage. Additionally, installing a weather-resistant barrier over the wall adds another layer of protection, enhancing the durability of the siding.
Step-by-Step Guide to Installing Vinyl Siding on Uneven Walls
Installing vinyl siding on uneven walls requires careful planning and precise execution to ensure a smooth, professional-looking finish. The key is to create a level surface before attaching the siding to prevent gaps, buckling, or misalignment over time. This guide walks through each step of the process, from preparation to final touches.
Tools and Materials You’ll Need
A successful installation begins with having the right tools and materials on hand. Essential tools include a tape measure, level, chalk line, utility knife, circular saw, hammer, and a power drill. For fastening, corrosion-resistant nails or screws are necessary to secure components properly.
Materials include vinyl siding panels, furring strips, backer board or insulation (if required), a starter strip, corner posts, J-channels, and trim pieces. A weather-resistant barrier is also recommended to protect the wall from moisture.
Install Furring Strips to Create a Level Surface
Since uneven walls can cause siding panels to warp or buckle, the first step is to create a flat, even surface using furring strips. These wooden or PVC strips act as a base for the siding, correcting any irregularities in the wall.
Start by determining the thickness needed for the strips, ensuring they compensate for the largest wall deviations. Use a level to position the furring strips vertically, spacing them 16 to 24 inches apart, depending on the siding manufacturer’s recommendations. Secure them with galvanized nails or screws, ensuring they are firmly attached and provide a uniform surface. Double-check alignment with a level before moving forward.
Add Insulation or Backer Board (If Needed)
If additional insulation or structural reinforcement is required, this is the stage to install it. Foam backer boards help create a more even surface while improving energy efficiency by reducing heat loss. Rigid foam insulation panels can also be placed between or over furring strips for added insulation.
Secure insulation panels with construction adhesive or fasteners to prevent movement. If installing over furring strips, ensure the panels lie flush with them to maintain a smooth base for the siding.
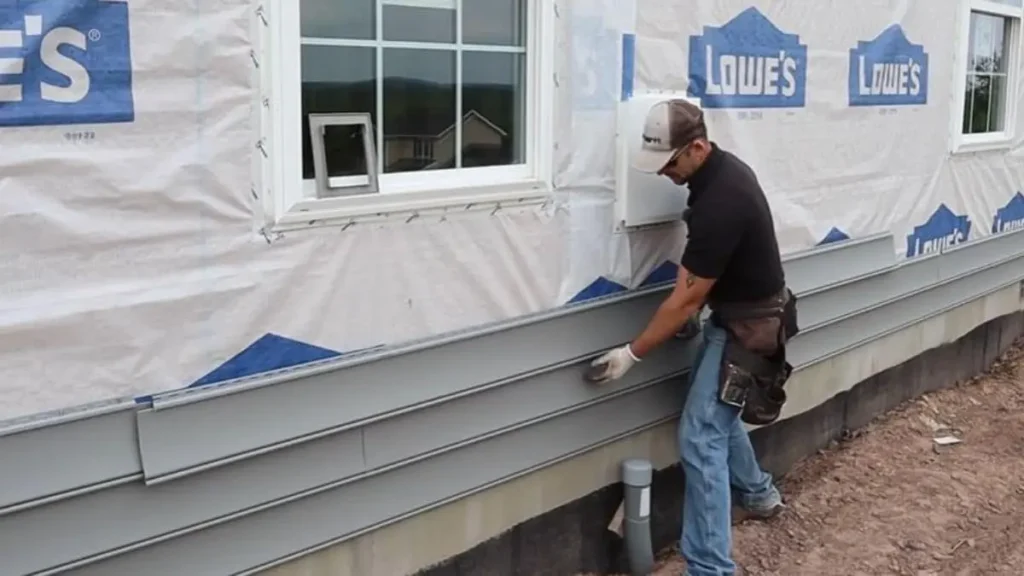
Install the Starter Strip and Corner Posts
The starter strip serves as the foundation for the siding panels, ensuring they align properly along the bottom edge of the wall. Position the starter strip level along the base of the wall, approximately ¼ inch above the lowest point of the furring strips or insulation. Secure it with nails or screws, leaving small gaps between fasteners to allow for expansion.
Next, install corner posts at each exterior corner of the wall. These vertical components anchor the siding panels and provide a finished look. Ensure they are plumb (perfectly vertical) before securing them, as misalignment can affect the entire siding installation. Leave a slight gap at the top to allow for expansion.
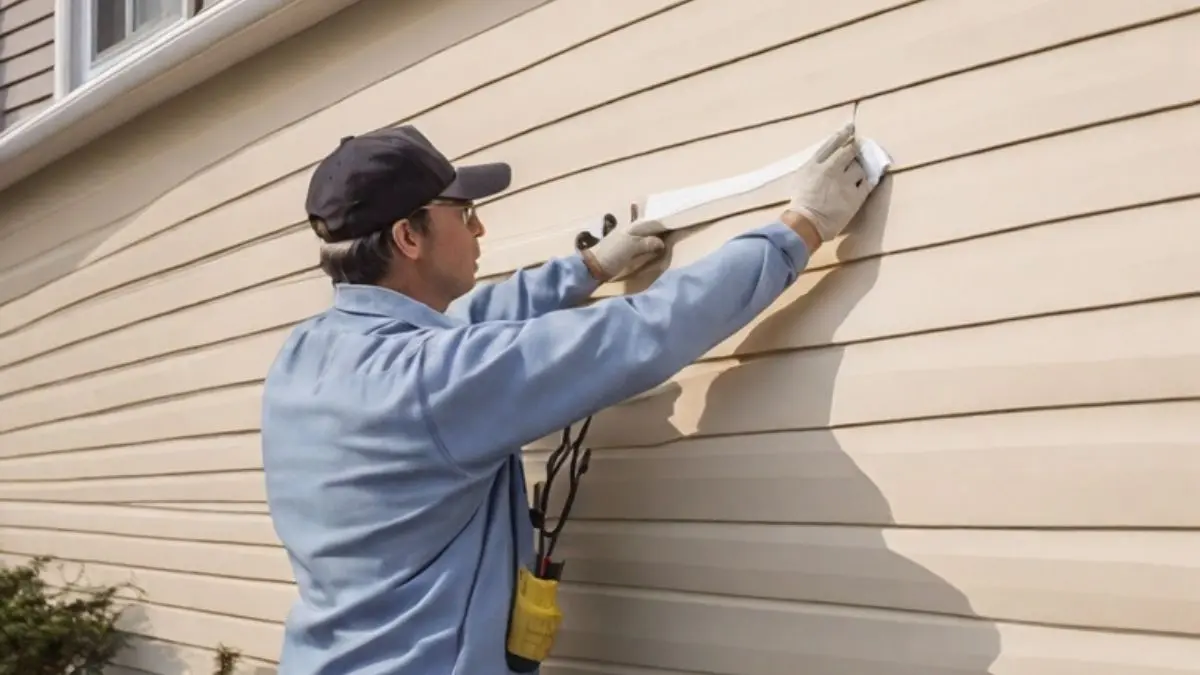
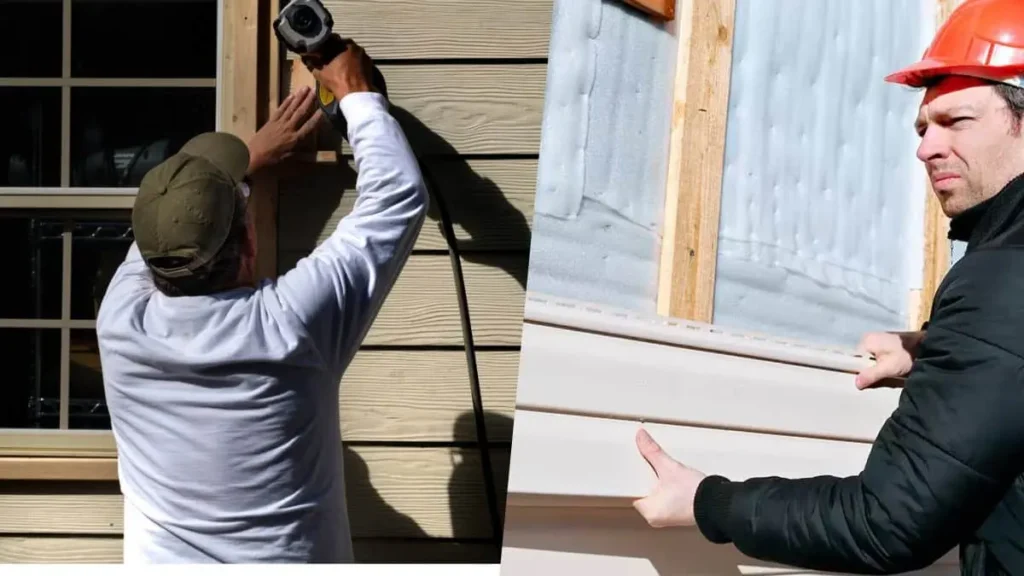
Attach the Vinyl Siding Panels Securely
With the base in place, start attaching the siding panels. Begin at one corner, locking the first panel into the starter strip and securing it to the furring strips or backer board with nails. Avoid driving nails too tightly—siding needs room to expand and contract with temperature changes. Leave approximately 1/32 inch of space between the nail head and the siding to allow movement.
Work your way across the wall, overlapping each panel according to the manufacturer’s specifications. Check alignment frequently to ensure the panels remain straight. Adjustments may be needed to accommodate uneven surfaces, particularly around windows, doors, or eaves.
Finishing Touches & Trim Installation
To complete the installation, install J-channels around windows, doors, and eaves to secure siding edges and provide a finished look. Attach soffit and fascia trim as needed to cover exposed edges and enhance durability.
Inspect the entire installation, ensuring all panels are securely fastened and properly aligned. Check for any gaps, misalignments, or loose panels that could lead to future issues. Clean the siding to remove any dust or debris from the installation process.
Expert Tips to Ensure a Smooth Installation
Proper installation of vinyl siding on uneven walls requires careful attention to detail. While the main steps ensure structural stability and visual appeal, certain expert techniques can further enhance the installation’s durability and overall finish. The following professional tips can help prevent common issues and achieve the best results.
Use a Level and Chalk Line for Accuracy
Precision is key when installing vinyl siding, especially on uneven walls. Using a chalk line ensures straight, even panel placement. Before securing any components, mark reference lines on the furring strips or backer board. Regularly check alignment with a level as you progress to prevent subtle shifts that could lead to misalignment or buckling.
Leave Room for Expansion and Contraction
Vinyl siding expands and contracts with temperature changes. Overlooking this can cause warping or cracking over time. When securing panels, avoid driving nails too tightly. Leave approximately 1/32 inch of space between the nail head and the siding. Similarly, allow a small gap between panels and trim components to accommodate movement without compromising stability.
Secure Furring Strips Properly for Long-Term Stability
Furring strips serve as the foundation for the siding. If they are not securely fastened, the siding may shift or become uneven over time. Use corrosion-resistant nails or screws to anchor them firmly to the wall, ensuring they remain level and aligned. Double-check spacing and thickness to ensure a smooth surface before proceeding with the siding installation.
Opt for High-Quality Backer Board or Insulation
If the wall surface is highly uneven, a high-quality backer board or rigid foam insulation can help create a more uniform base. This not only enhances the siding’s appearance but also improves insulation and moisture resistance. Choose materials that are compatible with vinyl siding and provide adequate support.
Check for Moisture Protection
Vinyl siding alone is not waterproof; it is designed to shed water rather than create a complete barrier. Ensure a weather-resistant barrier, such as house wrap or moisture-resistant sheathing, is installed beneath the siding to protect against water infiltration. Proper flashing around windows, doors, and joints also prevents moisture damage and mold growth.
Make Adjustments for Openings and Obstructions
Windows, doors, and other architectural features require precise trimming and alignment. Measure accurately and cut panels carefully to fit around these areas. Use J-channels and trim pieces to create a clean finish while allowing for natural expansion. Double-check these areas to ensure a snug but flexible fit.
Perform a Final Inspection Before Completion
Once installation is complete, inspect the siding for any gaps, misaligned panels, or loose fasteners. Check corners, edges, and overlaps to ensure a uniform appearance. If any sections seem off, make adjustments before finalizing the project. Proper finishing ensures the siding remains secure and visually appealing for years to come.
Recommended Post: How to Update Vinyl Siding
Common Mistakes to Avoid
Installing vinyl siding on uneven walls requires precision and attention to detail. Even small errors can lead to structural issues, poor aesthetics, or reduced durability. Understanding the most common mistakes helps prevent costly repairs and ensures a professional-looking finish.
Skipping Proper Wall Preparation
One of the biggest mistakes is installing vinyl siding directly over an uneven surface without addressing the underlying issues. Walls with dips, bumps, or gaps can cause the siding to appear wavy or lead to poor panel alignment.
Failing to install furring strips or a backer board results in an unstable base, making the siding prone to shifting over time. A level surface is essential for a smooth and long-lasting installation.
Nailing Siding Too Tightly
Vinyl siding expands and contracts with temperature fluctuations. If panels are nailed too tightly, they lack the flexibility needed for thermal movement, which can cause warping, cracking, or buckling. The correct technique is to leave a small gap (about 1/32 inch) between the nail head and the siding, allowing the panels to move freely without pulling or distorting.
Ignoring Expansion Gaps
Not leaving proper expansion gaps between panels and trim components is another common mistake. Without enough space, siding panels may push against each other in hot weather, leading to distortion.
This is particularly important around windows, doors, and corners, where tight fittings can create pressure points. Properly spaced expansion gaps help maintain a uniform appearance.
Overlooking Moisture Protection
Vinyl siding is designed to repel water but is not a completely waterproof barrier. Neglecting to install a house wrap or water-resistant barrier underneath can allow moisture to seep into the wall structure, leading to mold, rot, or insulation damage.
Proper flashing around windows, doors, and seams is also necessary to direct water away from vulnerable areas and prevent long-term issues.
Misaligned or Uneven Panels
Failing to use a chalk line or level while installing siding can result in panels that appear crooked or misaligned. This not only affects the home’s curb appeal but also compromises the structural integrity of the siding.
Panels should be installed in a straight, uniform manner, ensuring that each row aligns correctly with the previous one. Double-checking measurements and using a level throughout the process prevents this issue.
Not Accounting for Temperature During Installation
Vinyl siding expands in warm temperatures and contracts in colder conditions. Installing siding during extreme heat or cold without accounting for these changes can lead to improper spacing. If siding is installed too tightly in hot weather, it may shrink in colder months, creating noticeable gaps.
Likewise, if installed too loosely in cold weather, it may expand and buckle when temperatures rise. Choosing a moderate temperature for installation helps prevent these problems.
Poorly Securing Trim and Corner Posts
Trim and corner posts provide both structural support and a polished finish. If these components are not properly secured, they can shift over time, causing gaps or misalignment in the siding. Ensuring that all trim pieces are securely fastened and properly fitted prevents future adjustments or repairs.
Avoiding these common mistakes ensures a smooth, professional-looking vinyl siding installation that enhances both durability and aesthetic appeal. Proper preparation, careful installation, and attention to detail are key to a long-lasting, high-quality finish.
FAQs: Installing Vinyl Siding on Uneven Walls
What happens if vinyl siding is installed on an uneven surface?
Installing siding on an uneven wall can cause panels to buckle, warp, or appear wavy. It also affects the siding’s ability to expand and contract properly, leading to long-term durability issues.
How do you level an uneven wall before installing vinyl siding?
The best method is to attach furring strips vertically over the uneven surface. This creates a level base for the siding. In some cases, a backer board or insulation panels can help smooth out minor imperfections.
Do you need a house wrap before installing vinyl siding?
Yes, a house wrap or moisture barrier is essential. It prevents water from seeping into the wall structure, reducing the risk of mold, rot, and insulation damage.
How much space should be left for vinyl siding expansion?
Leave about 1/32 inch between the nail head and the panel. This allows for thermal expansion and contraction, preventing buckling and warping. Expansion gaps should also be left around windows, doors, and corners.
What is the best temperature to install vinyl siding?
Between 50°F and 70°F is ideal. Extreme heat causes expansion, while cold temperatures cause contraction, leading to improper spacing if not accounted for during installation.
Can insulation help with uneven walls when installing vinyl siding?
Yes, rigid foam insulation panels can help smooth out minor wall irregularities while improving energy efficiency. However, furring strips are still needed for significant unevenness.
How do you prevent water damage behind vinyl siding?
Use a moisture barrier, install proper flashing, and ensure panels are not nailed too tightly. These steps help prevent trapped moisture and ensure water drains away from the structure.
Conclusion
Installing vinyl siding on uneven walls requires careful preparation and precise execution to achieve a professional, long-lasting finish. Addressing wall irregularities with furring strips, backer boards, or insulation ensures a level surface that prevents warping and buckling. Using proper techniques, such as leaving expansion gaps and securing panels correctly, helps maintain the siding’s durability.
The right steps and avoiding common mistakes, you can enhance your home’s appearance, improve insulation, and protect it from moisture damage. Proper installation not only extends the lifespan of your siding but also ensures a polished, structurally sound exterior for years to come.