
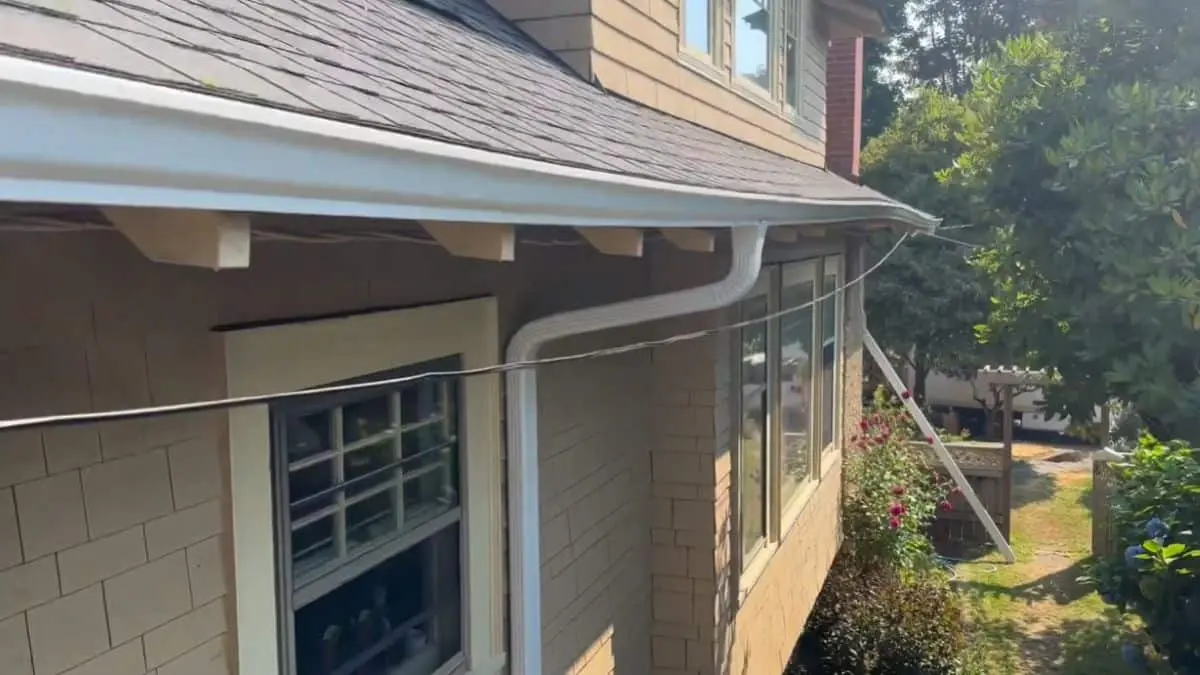
When it comes to protecting your home from water damage, gutters play a crucial role. Without a well-installed gutter system, rainwater can wreak havoc on your roof, walls, and foundation, leading to costly repairs. If your home features exposed rafter tails, installing gutters might seem a bit tricky, but it’s essential for preserving both functionality and curb appeal.
In this quick guide, we’ll walk you through everything you need to know about installing gutters on rafter tails. From the tools and materials you’ll need to step-by-step instructions and expert tips, this article is designed to simplify the process and help you achieve professional results—even if it’s your first time. Whether you’re a DIY enthusiast or a homeowner looking to learn, you’ll leave with the confidence to tackle this project like a pro.
Let’s get started!
What Are Rafter Tails?
Rafter tails are the exposed extensions of your roof’s rafters that protrude beyond the exterior walls. They’re a common architectural feature, especially in homes with traditional or craftsman-style designs. These extensions not only add a decorative touch to your home but also help support the roof’s overhang, which provides extra protection against the elements.

Challenges of Installing Gutters on Rafter Tails
Unlike standard fascia boards that provide a flat, continuous surface for gutter attachment, rafter tails require a more precise installation approach. Their spacing, angles, and potential lack of uniformity can make it challenging to:
- Align Gutters Properly: Ensuring the right slope for water drainage can be tricky when working with uneven or irregularly spaced rafter tails.
- Secure Brackets Firmly: Attaching brackets directly to the rafter tails requires sturdy fasteners to prevent sagging.
- Maintain Aesthetic Appeal: The installation should complement the style of the exposed rafter tails rather than detract from it.
Benefits of a Proper Installation
When done correctly, installing gutters on rafter tails offers several advantages:
- Prevents Water Damage: Properly installed gutters divert rainwater away from your home, protecting your foundation, siding, and landscaping.
- Preserves Curb Appeal: A well-thought-out installation enhances the architectural beauty of exposed rafter tails.
- Improves Roof Functionality: Gutters ensure that water doesn’t accumulate at the roof’s edge, which can cause damage to the roof structure over time.
Tools and Materials Needed
Before you start installing gutters on rafter tails, gathering the right tools and materials is essential for a smooth and efficient process. Having everything on hand will save time and ensure you’re well-prepared for each step. Here’s a comprehensive checklist to guide you.
Tools You’ll Need
- Ladder: A sturdy, extendable ladder to safely reach the roofline.
- Measuring Tape: For accurate measurements of the roofline and gutter sections.
- Drill: To attach brackets and secure gutters to the rafter tails.
- Level: Ensures the proper slope for effective water drainage.
- Hacksaw or Gutter Cutter: For cutting gutters to the correct length.
- Chalk Line: Helps mark the alignment for gutter placement.
- Screwdriver: Useful for fastening smaller screws and making adjustments.
- Safety Gear: Gloves, safety glasses, and a harness for secure and safe work.
Materials You’ll Need
- Gutters: Choose between aluminum, vinyl, or steel based on your budget and local weather conditions.
- Downspouts: Direct water away from your foundation.
- Gutter Brackets: Secure the gutters to the rafter tails.
- Screws: Use corrosion-resistant screws for durability.
- Sealant: Ensures watertight connections between gutter sections.
- End Caps: Close off the ends of the gutters to prevent leaks.
- Splash Blocks: Optional, but helpful for diverting water away from the base of your home.
- Fascia Brackets (Optional): Use these if you need extra support for the gutters.
Expert Tip
When selecting materials, prioritize quality and durability. Aluminum gutters are a popular choice because they are lightweight, rust-resistant, and relatively easy to install. If you live in an area with heavy rainfall or snow, consider reinforced brackets and thicker gutter materials to handle the added weight.
With the right tools and materials in hand, you’re ready to move on to the actual installation. Proper preparation sets the foundation for a successful project!
Step-by-Step Guide to Installing Gutters on Rafter Tails
Installing gutters on rafter tails may seem daunting, but breaking the process into manageable steps makes it much simpler. Here’s a detailed guide to help you tackle this project like a pro.

Step 1: Measure and Plan
Start by measuring the roofline where the gutters will be installed. Use a tape measure to determine the total length of the gutter sections needed. Consider the placement of downspouts to ensure efficient water drainage. Typically, gutters should slope slightly—around 1/4 inch per 10 feet—toward the downspouts for proper water flow. Mark the starting and ending points of the slope using a chalk line for reference.
Step 2: Mark Bracket Placement
Determine where the gutter brackets will be attached to the rafter tails. Brackets should be spaced 24 to 36 inches apart to provide adequate support. Mark the positions on each rafter tail with a pencil, ensuring they align with the chalk line slope.
Step 3: Attach the Brackets
Using a drill, securely fasten the brackets to the rafter tails at the marked locations. Be sure to use corrosion-resistant screws to withstand weather exposure. Check that each bracket is level or aligned with the slope to ensure proper gutter positioning.
Step 4: Cut and Assemble the Gutters
Measure and cut the gutter sections to fit the length of your roofline using a hacksaw or gutter cutter. Connect the sections with connectors or sealant to create a watertight joint. Attach end caps to the open ends of the gutters to prevent leaks.
Step 5: Install the Gutters
Carefully place the gutters into the mounted brackets, ensuring they sit securely and align with the slope. Double-check that all connections are tight and the gutters are properly seated in the brackets.
Step 6: Attach Downspouts
Position and secure the downspouts to the gutters, making sure they direct water away from the foundation. Use downspout brackets to fasten the pipes to the side of your house for added stability. Ensure the bottom of the downspout leads to a splash block or drainage area.
Step 7: Test the System
Once the installation is complete, test the gutters by running water from a hose through the system. Look for leaks, improper drainage, or areas where water may pool. Make any necessary adjustments to ensure optimal performance.
To ensure your gutters remain clog-free and function properly, especially on metal roofs, installing gutter guards is a smart move. If you’re considering this upgrade, our detailed guide on How to Install Gutter Guards on a Metal Roof offers practical tips and step-by-step instructions to make the process easier.
Expert Tips for a Seamless Installation
Successfully installing gutters on rafter tails requires attention to detail and some insider knowledge. These expert tips will help you avoid common pitfalls and achieve a professional-grade result.
Pre-Drill Holes for Brackets
Drilling pilot holes into the rafter tails before attaching the brackets can make installation smoother and reduce the risk of splitting the wood. Use a drill bit slightly smaller than your screws for the best results.
Check the Slope Twice
Ensuring the correct slope is critical for proper water drainage. Use a level to double-check your chalk line and adjust the brackets as needed before mounting the gutters. A slight slope—about 1/4 inch per 10 feet—is sufficient to guide water to the downspouts.
Use Hidden Hangers for a Clean Look
Hidden hangers are a great alternative to traditional brackets for securing gutters to rafter tails. They’re discreet, easy to install, and provide a clean, streamlined appearance without compromising strength.
Seal All Connections
To prevent leaks, apply a high-quality gutter sealant at all seams and joints. This extra step ensures a watertight system, especially during heavy rains.
Add Splash Blocks or Extensions
To protect your home’s foundation, install splash blocks or downspout extensions at the base of the downspouts. This directs water away from the structure and prevents pooling.
Consider Gutter Guards
Adding gutter guards can minimize the need for frequent cleaning by keeping leaves and debris out of your gutters. This is particularly beneficial in areas with heavy foliage.
Read Also: Connecting Gutters at Different Levels
Common Mistakes to Avoid
Even with the best intentions, mistakes can happen during installing gutters on rafter tails. Avoiding these pitfalls will help ensure a durable and effective gutter system while saving you time and money on future repairs.
Incorrect Slope
One of the most common mistakes is failing to establish the correct slope for your gutters. Without a proper incline, water will pool in the gutters instead of flowing toward the downspouts, leading to clogs and potential damage. Always measure and double-check the slope before installation.
Using Insufficient Brackets
Spacing brackets too far apart can cause the gutters to sag under the weight of water or debris. Ensure brackets are placed every 24 to 36 inches to provide adequate support, especially in areas prone to heavy rainfall or snow.
Ignoring the Rafter Tails’ Condition
Attaching gutters to damaged or rotting rafter tails can compromise the stability of the entire system. Always inspect and repair any issues with the rafter tails before starting your installation.
Overlooking Sealant Application
Failing to seal the seams and joints of the gutters can lead to leaks, especially during storms. Use a high-quality gutter sealant at every connection point for a watertight fit.
Cutting Gutters Incorrectly
Poorly cut gutters can lead to misaligned sections or gaps in the system. Measure carefully and use a proper gutter cutter or hacksaw to ensure clean, precise cuts.
Installing Downspouts Too Close to the Foundation
Placing downspouts directly next to your home’s foundation can result in water pooling around the base, potentially causing erosion or structural damage. Use extensions or splash blocks to divert water several feet away from the foundation.
Skipping Safety Precautions
Attempting installation without proper safety measures can lead to accidents. Always use a stable ladder, wear protective gear, and secure yourself with a harness if needed. Avoid working alone or in adverse weather conditions.
FAQs About Installing Gutters on Rafter Tails
To provide additional insights and address common questions, here’s an FAQ section about installing gutters on rafter tails. These answers will help clarify doubts and guide you through the process more effectively.
Can gutters be attached directly to rafter tails?
Yes, gutters can be attached directly to rafter tails, but it’s essential to use the right brackets or hangers. Ensure the rafter tails are in good condition and spaced appropriately to provide strong support for the gutter system.
How do I ensure the correct slope for water drainage?
The ideal slope is about 1/4 inch per 10 feet of gutter length. Use a chalk line and level to mark the slope before attaching the brackets to the rafter tails. Adjust as necessary to achieve proper water flow.
How do I prevent gutters from sagging?
Ensure the brackets or hangers are spaced no more than 36 inches apart. Using hidden hangers can also provide additional support and prevent sagging over time.
Do I need gutter guards if I install gutters on rafter tails?
While not mandatory, gutter guards are highly recommended to reduce debris buildup and the frequency of cleaning. They’re especially useful if your home is surrounded by trees.
How can I protect rafter tails from water damage?
Ensure proper sealing of all gutter joints and connections to prevent leaks. Additionally, inspect and maintain the gutter system regularly to avoid overflow that could damage the rafter tails.
What’s the cost of installing gutters on rafter tails?
The cost varies based on materials, gutter length, and whether you’re hiring professionals. On average, DIY installations may cost $5–$15 per linear foot, while professional services could range from $10–$30 per linear foot.
Conclusion
Installing gutters on rafter tails is a practical and effective way to protect your home from water damage while enhancing its overall functionality. By following the steps outlined in this guide, you can confidently complete the installation process and ensure your gutter system performs seamlessly for years to come.
Remember, preparation is key—gather the right tools and materials, carefully measure and plan your layout, and take the time to understand the role of rafter tails in supporting your gutters. Incorporate expert tips, avoid common mistakes, and prioritize regular maintenance to keep your gutters in top condition.
Whether you’re tackling this as a DIY project or enlisting the help of professionals, your effort will pay off in the form of a well-protected home and peace of mind during every rainstorm. With this guide, you’re equipped to turn your gutter installation project into a success story.
If you found this guide helpful, don’t forget to share it with others who might benefit. Have any questions or tips to add? Drop a comment below—we’d love to hear from you! Happy remodeling!

