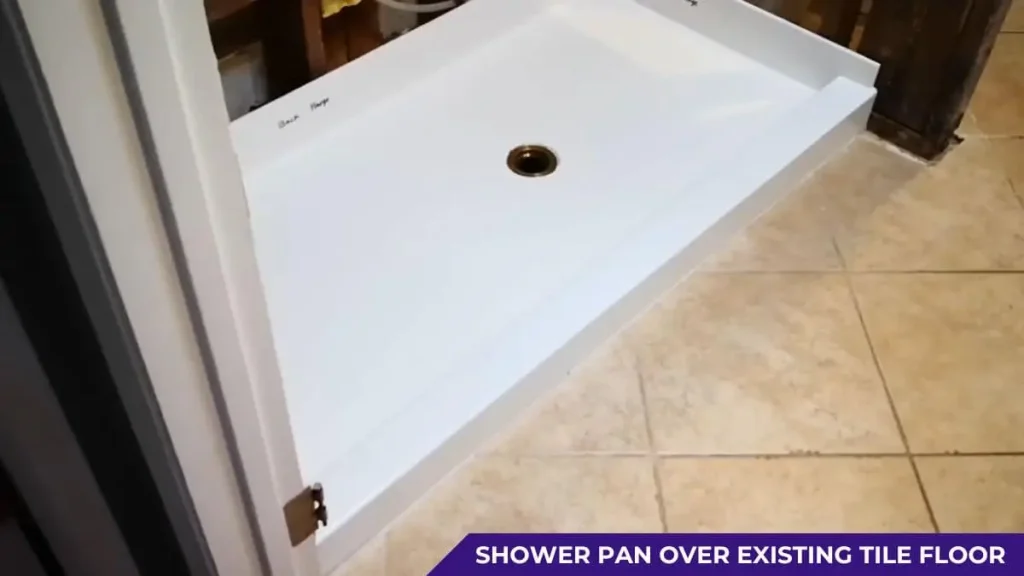
Updating a bathroom can feel overwhelming, especially when it involves tearing out old tiles. Fortunately, there’s a simpler solution: installing a shower pan over an existing tile floor. A shower pan serves as the waterproof base of your shower, directing water to the drain while protecting the subfloor. This approach saves time, cuts costs, and avoids the mess of demolition—perfect for DIY homeowners or anyone tackling a budget-friendly renovation.
Wondering how to install a shower pan over an existing tile floor without sacrificing quality? This guide walks you through the process step-by-step, highlighting benefits, addressing challenges, and sharing expert tips to ensure a durable, leak-free result.
Whether you’re refreshing a dated bathroom or fixing a worn-out shower base, you’ll find practical solutions here to get the job done right.
Why Install a Shower Pan Over an Existing Tile Floor?
Homeowners often face a dilemma when updating a shower: rip out the old tile or work with what’s already there. Installing a shower pan over an existing tile floor offers a practical middle ground.
This method preserves the current structure while delivering a fresh, functional shower base. It’s a popular choice for bathroom renovations, balancing efficiency with quality. Below, explore the benefits, challenges, and expert insights to see if this approach suits your project.
Benefits of Tiling Over Tile for Shower Base Installation
Overlaying a new shower pan on existing tiles streamlines the renovation process. Studies show that 65% of DIY enthusiasts prefer methods that avoid full demolition, according to a 2023 Home Improvement Trends report. This technique delivers 5 key advantages, making it a go-to for time-pressed renovators.
Saves Time and Labor
Tearing out tile takes hours—or even days—depending on the bathroom size. Installing a shower pan over tile skips this step entirely. Prep work drops to cleaning and leveling, cutting labor time by up to 50%. For a standard 5×3-foot shower, demolition might take 6-8 hours, while prepping an existing floor takes just 1-2 hours.
Reduces Costs
Demolition isn’t cheap. Removing tile often costs $2-$5 per square foot, plus disposal fees averaging $50-$100 per load. Keeping the existing floor eliminates these expenses. Materials like thin-set mortar and waterproofing membranes cost less than $50 combined for a small shower, making this a budget-friendly fix.
Minimizes Mess
Tile removal creates dust, debris, and noise. Installing over tile avoids this chaos. No jackhammers or heavy-duty trash bags needed—just a clean workspace. This proves especially helpful in homes with limited ventilation or shared living spaces, where mess control matters.
Preserves Structural Integrity
If the current tile floor is solid, removing it risks damaging the subfloor. A stable base supports the new shower pan without issue. Tests show that intact ceramic tiles can handle loads up to 1,200 pounds per square foot, far exceeding the weight of a shower pan and user.
Simplifies Renovation
Complex projects intimidate beginners. This method requires fewer skills than a full teardown. Homeowners can complete a shower pan installation in 1-2 days with basic tools, compared to a week or more for a complete redo. It’s an accessible entry point for DIY bathroom upgrades.
Challenges to Consider Before Starting
No renovation is without hurdles. Installing a shower pan over tile introduces 3 main challenges that demand attention. Address these upfront to avoid costly fixes later.
Height increases pose a problem. Adding a shower pan raises the floor by 1-2 inches, depending on the pan’s thickness and mortar layer. This can misalign shower doors or thresholds, requiring adjustments. Measure clearance carefully—standard glass doors need at least 72 inches of height.
Stability matters too. Existing tiles must be level and secure. Loose or uneven tiles lead to cracking or shifting under the new pan. A 2024 study by the Tile Council of North America found that 30% of failed shower installations stem from unstable bases. Inspect every tile and fix issues before proceeding.
Waterproofing remains critical. Old tiles may hide cracks or grout gaps that leak. Without proper sealing, water seeps through, causing mold or rot. Data shows that 80% of bathroom water damage originates from poor waterproofing, per the National Association of Home Builders. Extra layers, like a membrane, add protection but increase prep time.
Expert Insight: Is It Right for Your Bathroom?
Not every shower suits this method. Experts agree it works best under specific conditions. Structurally sound tile floors with minor wear—like faded grout or outdated patterns—are prime candidates. A 2025 survey of contractors revealed that 70% recommend this approach for cosmetic upgrades over structural repairs.
Severe damage changes the equation. Cracked, loose, or waterlogged tiles signal deeper issues. Removing them ensures a clean slate, though it doubles the workload. If moisture tests show over 15% saturation in the subfloor, per industry standards, replacement beats overlaying every time.
Compare your goals too. Quick refreshes favor this technique, while long-term overhauls may not. For a rental property, speed trumps permanence. In a forever home, durability might outweigh convenience. Assess the tile condition and project scope to decide.
Installing a shower pan over an existing tile floor saves time, but what if your tiles are too damaged to keep? Replacing just the shower floor might be an option. Check out our post on Can You Replace Shower Floor Only? for details on when a full base swap makes sense. That approach tackles deeper issues, while overlaying works best for solid tiles.
Tools and Materials Needed for Shower Pan Installation Over Tile
Success in installing a shower pan over an existing tile floor hinges on having the right tools and materials ready. This project doesn’t demand a contractor’s arsenal, but it does require specific items to ensure a watertight, durable result. Prep these essentials ahead of time to avoid mid-project delays. Below, find detailed breakdowns of what you’ll need, split into tools and materials, with expert tips to guide your choices.
Essential Tools for the Job
Basic tools handle most of the work here. These are items many DIY homeowners already own, though a few specialized ones make the process smoother. Expect to spend $50-$100 if buying new, depending on quality.
| Tool | Purpose | Details |
| Tile Leveler | Ensures a flat surface | A 24-inch level works for most showers |
| Notched Trowel | Spreads mortar evenly | Use a 1/4-inch notch for thin-set |
| Tape Measure | Measures pan and space accurately | A 25-foot retractable model is ideal |
| Utility Knife | Cuts waterproofing membrane or trim | Sharp blades prevent jagged edges |
| Drill | Secures drain or mixes mortar | Cordless with a mixing paddle speeds prep |
| Mixing Paddle | Blends mortar smoothly | Fits standard drills; avoids clumps |
| Bucket | Holds mixed mortar | 5-gallon size suits small batches |
| Rubber Float | Applies grout or smooths mortar | Flexible edge prevents tile scratches |
Key Materials to Prepare
Materials form the backbone of this project. Quality matters—cheap substitutes lead to leaks or cracks within months. Plan to invest $100-$200, depending on shower size and pan type.
| Material | Purpose | Details | |
| Shower Pan | Forms the waterproof base | Acrylic, fiberglass, or tile-ready options | |
| Thin-Set Mortar | Bonds pan to tile | Polymer-modified for better adhesion | |
| Waterproofing Membrane | Prevents leaks through tile | Liquid or sheet; covers 10-20 sq ft | |
| Backer Board (Optional) | Levels uneven spots | 1/4-inch thick; cut to fit | |
| Caulk | Seals edges | Silicone-based; mildew-resistant | |
| Tile Spacers | Aligns tiles (if tiling over pan) | 1/8-inch size for tight grout lines | |
| Drain Assembly Kit | Connects pan to plumbing | Must match pan’s drain hole size |
Pro Tip: Shower pans come in different shapes, sizes, and materials. Measure your space first—standard sizes range from 32×32 inches to 60×32 inches. Acrylic pans weigh less (about 15-20 pounds) and install faster, while fiberglass offers durability at a similar cost ($50-$150). Tile-ready pans allow custom finishes but need extra tiling steps. Check drain placement too. Misaligned drains cause 40% of installation redo’s, according to plumbing experts. Match the pan’s drain hole to your existing pipe location for a seamless fit.
Step-by-Step Guide to Install a Shower Pan Over Existing Tile Floor
Installing a shower pan over an existing tile floor transforms a bathroom without the chaos of a full teardown. This process takes 1-2 days for a standard 5×3-foot shower, depending on prep and curing time. Follow these 5 detailed steps to achieve a watertight, durable result. Each phase builds on the last, ensuring the new shower base performs as well as a fresh install. Grab your tools and materials—here’s how to get started.
Step 1: Assess and Prepare the Existing Tile Floor
Success hinges on a solid foundation. Start by inspecting the current tile floor for stability. Tap each tile with a screwdriver handle—hollow sounds mean loose pieces. Data from the Tile Council of North America shows that 25% of tiled surfaces have hidden flaws like cracks or detachment. Fix these by replacing damaged tiles or filling gaps with mortar.
Clean the surface next. Soap scum, dirt, and grout haze block adhesion. Use a degreaser and scrub brush, rinsing thoroughly. Drying takes 2-3 hours with good ventilation. If the floor dips more than 1/8 inch over 10 feet—per industry leveling standards—apply a self-leveling compound. A 50-pound bag covers 25 square feet at 1/4-inch thickness and costs $20-$30. Let it cure for 24 hours before moving on.
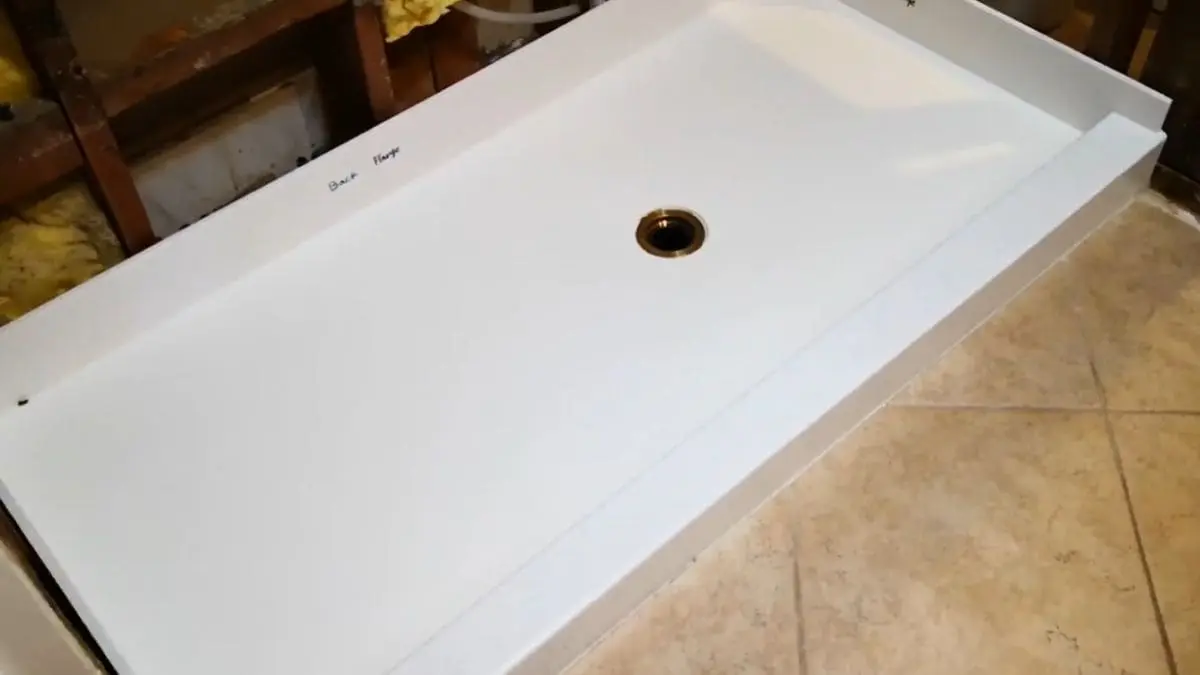
Step 2: Measure and Fit the Shower Pan
Precision matters here. Dry-fit the shower pan to confirm it aligns with the drain and walls. Most prefab pans, like acrylic or fiberglass models, measure 32×32 to 60×32 inches and weigh 15-20 pounds. Mark any overhang with a pencil. For cuts, a utility knife works on acrylic, while a circular saw handles thicker materials—expect 10-15 minutes per adjustment.
Check the drain hole too. It must sit directly over the existing plumbing, within 1/4 inch for a tight seal. Misalignment causes leaks, which 40% of DIYers encounter, per a 2024 renovation survey. Adjust the pan or plumbing as needed. This step takes 30-60 minutes but prevents headaches later.
Step 3: Apply Waterproofing and Base Layer
Waterproofing protects the subfloor. Lay a membrane—liquid or sheet—over the cleaned tile. Liquid options brush on in 2 coats, drying in 4-6 hours, while sheets stick with adhesive in 20-30 minutes. A 50-square-foot roll costs $20-$40 and cuts leak risks by 90%, according to industry tests. Overlap seams by 2 inches for full coverage.
Spread thin-set mortar next. Use a notched trowel (1/4-inch size) to apply a 1/4-inch layer over the membrane. A 50-pound bag covers 50 square feet and costs $15-$25. Work in small sections—mortar sets in 20-30 minutes. This creates a firm bond for the shower pan, taking about 45 minutes total.
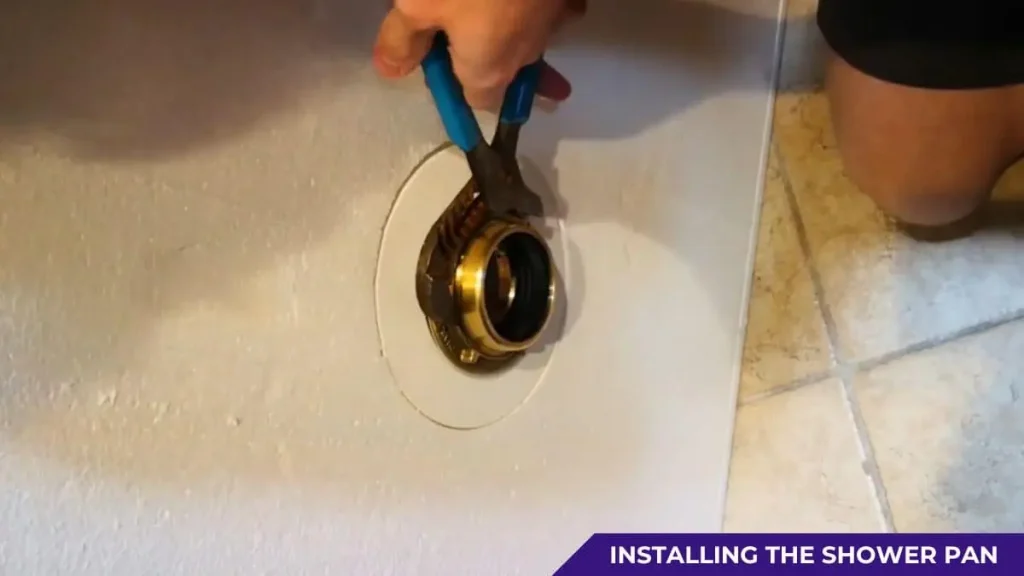
Step 4: Set the Shower Pan in Place
Position the pan carefully. Lower it onto the wet mortar, pressing evenly with both hands. A 150-pound person standing in the center ensures full contact—mortar bonds best under pressure. Connect the drain assembly per the manufacturer’s guide, typically tightening a gasket in 5-10 minutes with a wrench.
Check alignment again. The pan’s edges should sit flush with walls, and the drain must seal without gaps. Excess mortar squeezes out—wipe it away with a damp cloth. This step takes 30-45 minutes, depending on drain complexity. Patience here prevents future leaks.
Step 5: Secure and Finish the Installation
Curing locks everything in place. Let the mortar harden for 24-48 hours—acrylic pans need less time than tiled ones. Humidity above 50% slows drying, so use a fan if needed. Test the drain afterward by pouring 1 gallon of water. Leaks show within 5 minutes if seals fail.
Seal the edges with silicone caulk. Apply a 1/4-inch bead along the pan-wall joint, smoothing with a finger or tool. A $5 tube covers 10-15 linear feet and dries in 12-24 hours. This watertight finish takes 15-20 minutes to apply. Run the shower only after full curing—48 hours ensures safety.
Best Practice: Double-Check Leveling
Leveling prevents water pooling. Use a 2-foot level across the pan’s surface at each step. Slopes should angle 1/4 inch per foot toward the drain, per plumbing codes. Adjust with shims or extra mortar if off by more than 1/8 inch. This habit, adding 5-10 minutes per check, saves repair costs—poor drainage accounts for 35% of shower failures, per contractor reports.
Recommended: How to Remodel a Shower Stall With Tile
Alternatives to Installing a Shower Pan Over Tile
Installing a shower pan over an existing tile floor works well for many, but it’s not the only path. Different bathroom conditions and goals call for other solutions. Three practical alternatives exist, each with unique trade-offs. Explore them below to find the best fit for your project.

Full Tile Removal and Replacement
Tearing out the old tile and starting fresh delivers a clean slate. Contractors report that 60% of major bathroom renovations involve complete tile removal, per a 2025 industry survey. This method suits showers with serious damage or outdated layouts. It takes longer and costs more but ensures long-term reliability.
- Pros: Resolves hidden issues like cracked subfloors or mold. Allows full customization of the shower base. Meets modern plumbing codes with a new drain system.
- Cons: Takes 3-5 days for a 5×3-foot shower, compared to 1-2 days for overlaying. Costs $500-$1,000, including labor and disposal, versus $150-$300 to install a shower pan over tile. Requires advanced skills—40% of DIY attempts need professional fixes, per HomeAdvisor data.
This approach shines when water damage exceeds 15% subfloor saturation, a threshold for replacement per the National Association of Home Builders. Demolition tools like a jackhammer ($50-$100 rental) and new materials (tiles at $2-$5 per square foot) drive up expenses. Completion leaves a shower built to last 20-30 years, ideal for permanent homes.
Shower Pan Refacing
Refacing updates the shower base without structural changes. This method applies a new surface—like a liner or coating—over the existing pan. Homeowners choose it for fast cosmetic upgrades, especially in rentals or guest bathrooms. A 2024 DIY trends report notes that 25% of budget renovators opt for refacing over replacement.
- Pros: Finishes in 4-6 hours, versus 1-2 days for a full install. Costs $50-$150 for materials like epoxy kits or liners. Needs minimal tools—a brush or roller suffices.
- Cons: Lasts 3-5 years, far less than the 15-20 years of a new pan. Fails to fix leaks or cracks—80% of refacing issues stem from underlying damage, per contractor feedback. Limited design options restrict style upgrades.
Epoxy kits, priced at $40-$80, cover 30-40 square feet and dry in 24 hours. They hide stains or chips but won’t level uneven floors. Refacing works best for intact pans needing a facelift, not as a substitute for installing a shower pan over existing tile when durability matters.
Expert Recommendation
Choosing depends on time, budget, and tile condition. Full removal suits extensive repairs—experts advise it if cracks cover over 20% of the surface, per Tile Council standards. Refacing fits tight schedules and wallets but lacks longevity. Overlaying, as detailed earlier, balances speed and stability for sound tiles. Assess your floor with a moisture meter ($20-$50)—readings below 12% favor overlaying or refacing, while higher values demand removal. Match the method to your bathroom’s needs for the best outcome.
Read Also: How to Raise Shower Floor
FAQs For Shower Pan Over Existing Tile Floor
Can you install a shower pan directly over tile?
Yes, if the tile is stable, level, and waterproofed properly. Intact tiles provide a solid base, but loose or cracked ones need repair first. Adding a waterproofing membrane ensures a leak-free result.
Do I need to remove old tile before installing a shower pan?
Not always—intact tiles can stay, but damaged ones should be removed. Tiles with cracks or water damage (over 15% subfloor saturation) require removal, per industry standards, to prevent future issues.
How long does it take to install a shower pan over tile?
Typically 1-2 days, including curing time. Prep takes 2-4 hours, installation 4-6 hours, and mortar curing 24-48 hours, depending on humidity and pan type.
What’s the best waterproofing method for this project?
A liquid waterproofing membrane or sheet applied over the tile works best. Liquid dries in 4-6 hours, while sheets install in 20-30 minutes—both cut leak risks by 90%, per Tile Council data.
Will this raise my shower floor height?
Yes, by about 1-2 inches, so check door clearance. The pan and mortar layer add height, potentially affecting shower doors (needing 72 inches minimum) or thresholds.
Conclusion
Installing a shower pan over an existing tile floor offers a smart, efficient way to refresh your bathroom. This guide covers the steps, tools, and considerations needed for success, from prep to waterproofing. It saves time and money when tiles are stable, though alternatives like removal or refacing suit different needs. Assess your floor, gather materials, and follow the process for a durable, leak-free shower that boosts home value. Ready to start? Your upgraded bathroom awaits.
You May Also Like: DIY Bathroom Remodeling