
Say goodbye to chilly drafts and rising energy bills! Sealing your sliding glass door is one of the easiest DIY projects that can make a huge difference in home comfort, energy efficiency, and even your wallet. Sliding glass doors, while sleek and functional, often become culprits for air leaks over time. If you’ve noticed cold air sneaking into your cozy living room or your AC working overtime in summer, it might be time to address the problem.
This guide breaks down not only the step-by-step process of sealing your sliding glass door but also the tools you’ll need, signs to watch for, and extra tips for better insulation.
Signs Your Sliding Glass Door Needs Sealing
Not sure if your sliding glass door is the source of your discomfort? Look for these telltale warning signs to know when it’s time to reseal:
Drafts and Temperature Fluctuations
One of the most obvious signs that your sliding glass door needs sealing is the presence of drafts. Do you feel a sudden chill near the door during colder months or notice warm air creeping in during summer? These temperature shifts can indicate gaps or wear in the seals, allowing air to move freely between the inside and outside of your home. Over time, small leaks can lead to big energy inefficiencies.
Condensation Build-Up
Have you noticed foggy patches or even water droplets forming between the panes or around the edges of your sliding glass door? This could be a sign of compromised seals. Properly sealed doors should prevent excess moisture from infiltrating, so the presence of condensation might mean it’s time to assess and improve the insulation.
Increased Noise Levels
If sounds from outside suddenly seem louder than usual, your sliding glass door may no longer be effectively insulating your home. Damaged seals can create gaps that not only allow air to pass through but also amplify external noise, whether it’s passing traffic, chirping birds, or your neighbor’s lawnmower.
Visible Damage or Wear
Taking a close look at the edges of your sliding glass door can reveal important clues. Cracked, brittle, or crumbling weatherstripping is a clear indication that the seals have deteriorated. Additionally, if you see small gaps between the door panels and the frame, it’s a sign that sealing is overdue.
Higher Energy Bills
A sudden spike in your heating or cooling costs could also be linked to your sliding glass door. Poor insulation caused by failing seals makes it harder to maintain a consistent indoor temperature, putting extra strain on your HVAC system. If your utility bills are rising unexpectedly, it might be time to give your door some attention.
Tools and Materials You’ll Need
Here’s your sliding glass door sealing toolkit to ensure success:
- Weatherstripping tape (vinyl, rubber, or foam options)
- Caulk (exterior-grade)
- Putty knife or scraper
- Mild detergent and water
- Door sweep (optional, for bottom gaps)
- Rag or cleaning cloth
Having these on hand before you start can make your project smooth and hassle-free.
Step-by-Step Guide to Sealing Your Sliding Glass Door
Step 1: Inspect the Door
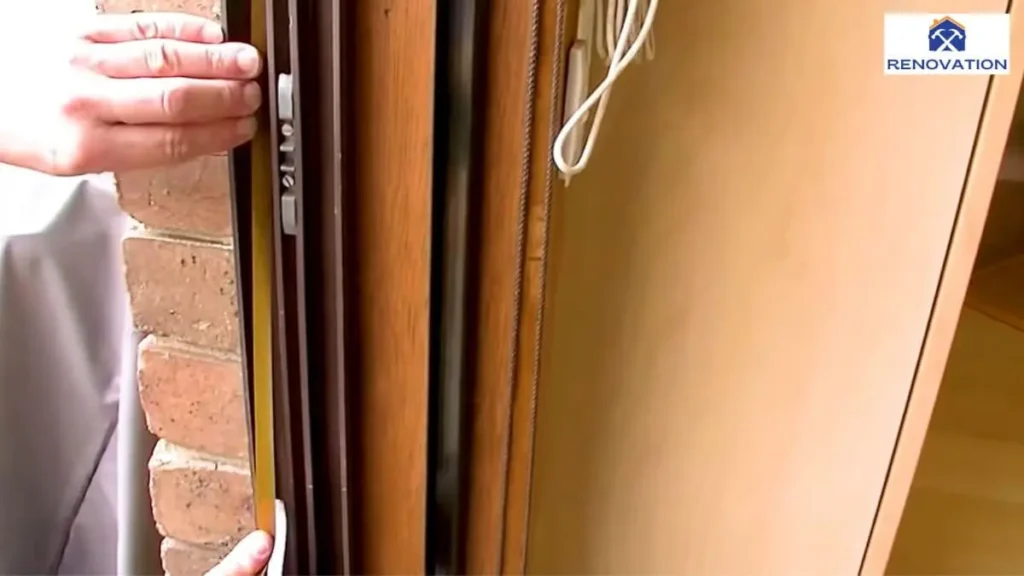
Start by giving your sliding glass door a thorough inspection. Look for gaps or cracks around the frame and check if the weatherstripping is worn out or damaged. Pay close attention to corners and the bottom edge where air is most likely to seep through.
Pro Tip: Use a piece of paper or tissue to check for drafts—you’ll see it flutter near leaks.
Step 2: Remove Old Weatherstripping
Before applying anything new, clear out the old. Use a putty knife or scraper to gently remove worn weatherstripping or leftover sealant. Take your time; a clean workspace ensures a tighter and longer-lasting seal.
Reminder: Dispose of old materials responsibly, especially if adhesive residue contains harmful chemicals.
Step 3: Clean the Surface
Surface prep is crucial! Wipe down the frame edges with a mix of mild detergent and water. This eliminates dust, grease, or debris that may interfere with adhesion. Make sure everything is completely dry before moving on.
Step 4: Choose the Right Sealant
Not all materials are created equal. Decide between foam weatherstripping (great for flexibility), rubber (durable for frequent sliding), or vinyl (ideal for temperature drops). For outdoor crevices, exterior-grade caulk works wonders.
Step 5: Apply the Sealant
- For weatherstripping tape, measure the perimeter of the door frame, cut pieces to fit, and carefully press them into place, ensuring a snug connection.
- For caulk, load the tube into a caulking gun, squeeze along the gaps, and fill any visible cracks.
Tip: Apply in small, controlled sections to avoid uneven coverage.
Step 6: Smooth and Secure
Use a finger, putty knife, or a caulking tool to smooth out any excess sealant. This ensures an even finish and maximizes the seal’s effectiveness. Double-check all edges for consistency.
Step 7: Test for Effectiveness
Once the sealant has dried (check the product instructions for curing time), test your work. Open and close the sliding door a few times to make sure the seal doesn’t peel away. Perform a final draft check by feeling for air leaks with your hands or using a lit candle to detect airflow.
Related Read: Sealing the Bottom of an Exterior Door
Choose the Best Materials for Sealing a Sliding Glass Door
When it comes to selecting the best materials for sealing a sliding glass door, making informed choices can significantly boost both energy efficiency and durability. Here are key materials to consider:
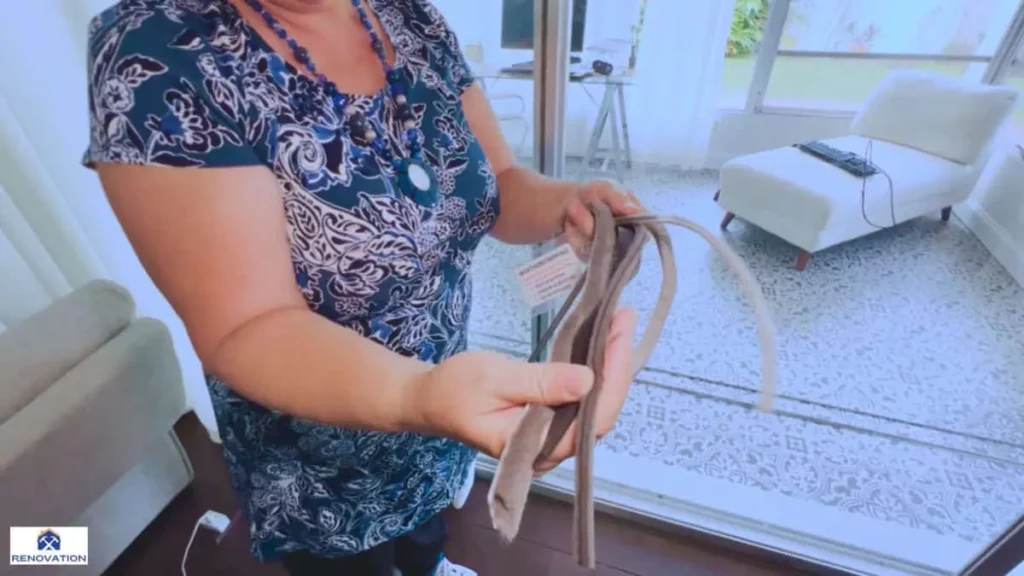
Weatherstripping
Weatherstripping is a popular choice for sealing gaps around sliding doors. It comes in varying forms such as foam, felt, or rubber. Foam weatherstripping is lightweight and easy to install but may wear out faster over time, while rubber and silicone weatherstripping are more durable and effectively prevent air and water infiltration. Consider self-adhesive options for quick application, but ensure the surface is clean and dry for a secure bond.
Caulk
High-quality caulk is essential for sealing gaps between the doorframe and the wall. Silicone-based caulks are particularly effective for sliding glass doors as they are waterproof, flexible, and resistant to temperature changes. Acrylic caulks are another option, offering ease of cleanup, but they may not last as long as silicone in harsh weather conditions. Always choose caulk labeled for exterior use for optimal performance.
Door Sweeps
For the bottom of the sliding glass door, a door sweep is a fantastic addition. These strips, often made from rubber, vinyl, or bristles, are mounted along the bottom edge of the door to block drafts and moisture. Adjustable door sweeps are ideal for creating a snug fit, ensuring no gaps remain for air or pests to pass through.
Insulating Window Film
If reducing energy loss is a top priority, applying insulating window film to the glass is an excellent choice. Window films are designed to block UV rays, reduce heat transfer, and maintain the internal temperature of your home. They are easy to apply and can be an affordable, long-term solution for increasing energy efficiency.
Foam Insulation Tape
Foam tape provides a simple and effective way to seal gaps around the edges of a sliding glass door. It is self-adhesive and available in different thicknesses to match the size of the gap. The compressible nature of foam tape allows it to provide a tight seal while still permitting the smooth operation of the sliding door.
Sliding Door Sealing Kits
For a comprehensive solution, consider a pre-assembled sliding door sealing kit. These kits typically include weatherstripping, caulk, and other essential components to ensure a well-sealed door. They are especially helpful for homeowners who may be unsure about which materials to select individually.
Recommended Adhesive: Best Adhesive for Weather Stripping
Key Considerations
When choosing materials, always factor in the climate conditions in your area. For instance, if you live in a region with heavy rain, prioritize waterproof materials such as rubber or silicone.
Additionally, look for products that are energy-efficient and durable to reduce long-term maintenance costs. Invest in high-quality options to ensure a reliable seal that lasts through years of wear and weather changes.
Additional Considerations for Better Insulation
Want to level up your sliding glass door insulation game? Here are a few bonus ideas to maximize comfort and efficiency:

Addressing Gaps and Cracks Around the Frame
Inspect the entire frame of the sliding door for any gaps or cracks that could allow air to sneak through. These small openings can significantly impact the insulation of your room over time. Use caulk to fill smaller gaps, ensuring a smooth and even application. For larger cracks, consider using an expanding foam sealant, which can fill the space effectively while providing improved thermal insulation. Make sure to clean the area thoroughly before applying any sealant to ensure it adheres properly.
Upgrading to Energy-Efficient Glass
If you find your sliding door is still not keeping the cold or heat out efficiently, it may be time to consider upgrading to energy-efficient glass. Glass options with a low-emissivity (Low-E) coating can reflect heat away during summer and retain warmth in winter, reducing energy costs. Double- or triple-pane glass options with gas fills, like argon, further enhance insulation. Though an investment, these upgrades can improve comfort and save money in the long run.
Adding Insulated Curtains
A simple yet effective way to improve insulation is by installing insulated or thermal curtains. These specialized curtains are designed to block drafts, keep heat from escaping, and regulate indoor temperatures. Choose curtains with a thick, opaque lining and ensure they are long enough to cover the entire sliding door frame. For optimal effectiveness, close the curtains during peak temperature extremes—open them during sunny days to take advantage of natural warmth.
Installing Weatherstripping for Extra Sealing
Even with sealant in place, weatherstripping can offer an added layer of protection against air leakage. Adhesive foam or silicone weatherstrips can be applied along the edges of the sliding door to create a tighter seal when it’s closed. Be sure to measure and cut the weatherstripping to fit precisely along the frame and door edges, and press firmly to secure it in place. Over time, check the weatherstripping for wear and replace it as needed to maintain its effectiveness.
Routine Maintenance for Longevity
To ensure consistent insulation, regular maintenance of your sliding door system is essential. This includes cleaning the tracks to prevent debris buildup and checking for any loosening of sealants or weatherstripping. Lubricate the door’s hardware to ensure a smooth glide that doesn’t disrupt the integrity of the seal.
Seal It Like a Pro and Enjoy the Benefits
Taking the time to seal your sliding glass door doesn’t just improve your home’s comfort—it also reduces your carbon footprint and energy bills. By following these steps, you can redistribute heat more effectively in winter, keep your home cool in summer, and kiss those high utility bills goodbye.
Now that you’ve got the tools and know-how, why not put them into action? Start today, and enjoy the payoff of a cozier, more efficient home.

