Running an ethernet cable through an exterior wall allows homeowners to create a reliable, high-speed wired network connection between indoor and outdoor spaces or detached structures. A hardwired ethernet connection offers faster speeds, lower latency, and more stable performance compared to WiFi, especially over long distances or through thick walls.
Exterior wall installations require the right materials, proper drilling techniques, and weatherproofing methods to protect the cable from moisture, UV exposure, and physical damage. Using outdoor-rated ethernet cable and sealing entry points helps prevent water leaks, pests, and insulation issues.
This guide explains how to run ethernet cable through exterior wall, covering essential tools, step-by-step instructions, safety tips, and best practices to ensure a secure, weatherproof, and long-lasting installation.
How to Run Ethernet Cable Through Exterior Wall: Step-by-Step Guide
Installing ethernet through an exterior wall requires the right tools, careful planning, and proper techniques to avoid damaging the cable or compromising your home’s weatherproofing. Below is a comprehensive, step-by-step guide covering tools, planning, drilling, cable routing, termination, and connection.
Tools and Materials You’ll Need
The right tools ensure clean cuts, smooth cable routing, and secure connections. For exterior installations, materials must also withstand weather exposure and provide durability over time.
| Tool/Material | Purpose |
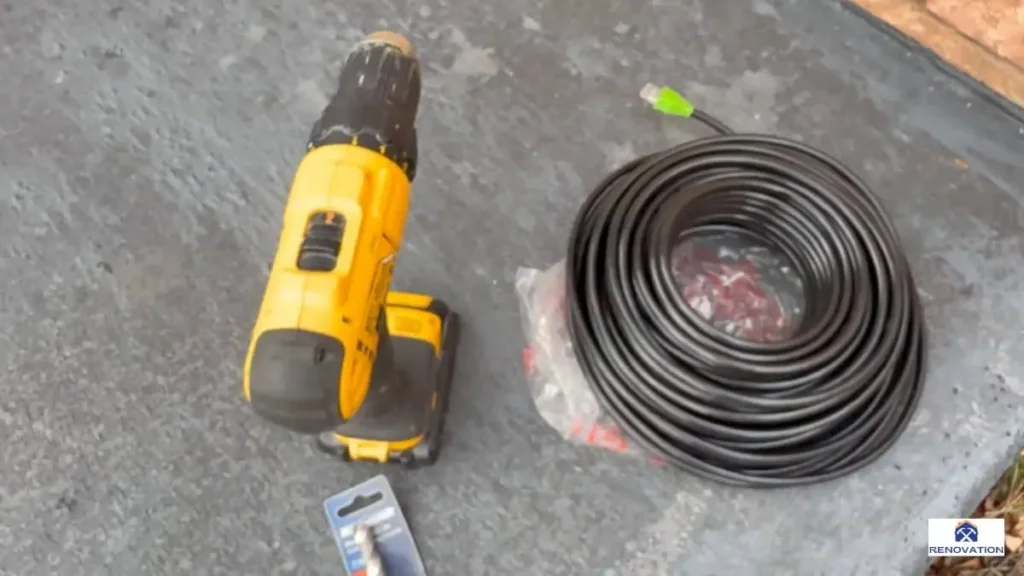
| Ethernet Cable (Outdoor-Rated if Needed) | Transmits network data between interior and exterior devices. |
| Drill & Drill Bits | Creates holes through wood, brick, stucco, or siding. |
| Fish Tape or Cable Puller | Guides the cable through the wall cavity. |
| Ethernet Wall Plates & Keystone Jacks | Provides a clean termination point on interior walls. |
| Weatherproof Silicone Caulk | Seals exterior wall penetration to prevent water intrusion. |
| Grommets or Conduit (Optional) | Protects the cable from abrasion where it passes through the wall. |
| Screwdriver | Secures wall plates and keystone jacks. |
| Tape Measure | Ensures accurate cable routing and hole placement. |
| Stud Finder | Identifies studs and obstacles in wall cavities. |
| Safety Glasses | Protects eyes when drilling, especially in masonry or stucco. |
Step 1: Plan the Cable Route
Proper planning prevents unnecessary drilling and reduces the risk of damage. Start by identifying the entry and exit points for the ethernet cable. The interior location could be near a router, network switch, or home office workstation, while the exterior location might serve a security camera, outdoor access point, detached garage, or garden office.
- Use a stud finder to check for studs, electrical wiring, or plumbing in the wall.
- Consider existing cable runs, conduit pathways, or service chases if available.
- Plan a straight path through the wall to reduce friction and potential kinks.
On the exterior side, select a protected location that minimizes exposure to direct sunlight, rain, or physical damage. Drilling under eaves or sheltered overhangs adds protection.
Step 2: Choose the Right Cable Type

The right ethernet cable ensures reliable performance and durability, especially for outdoor or partially exposed runs.
CAT6 or CAT6a cables are recommended for modern networks requiring speeds up to 10 Gbps over distances up to 55 meters for CAT6 and 100 meters for CAT6a.
If the cable will pass through outdoor air space or along exterior walls, choose an outdoor-rated ethernet cable with the following attributes:
- UV-resistant outer jacket to withstand sun exposure.
- Waterproof or moisture-resistant coating for wet conditions.
- Direct burial rating (if burying underground), which includes gel-filled or water-blocking insulation to prevent moisture intrusion.
Indoor-rated cable can only be used if it remains entirely within the wall cavity and interior space.
Step 3: Drill the Hole in the Exterior Wall

Drilling technique varies depending on wall material. Each surface requires the correct drill bit and method to create a clean, appropriately sized hole for the ethernet cable.
Wood or Vinyl Siding
- Use a standard wood drill bit.
- Start from the interior side if possible for better control and to minimize splintering on the exterior.
- Drill at a slight downward angle to prevent water from running into the hole.
Brick or Masonry
- Use a masonry bit with a hammer drill for efficient drilling.
- Keep the hole diameter just large enough for the cable or conduit.
- For brick veneer walls, avoid drilling into mortar joints, as they are structurally weaker.
Stucco
- Use a masonry bit, but start with a smaller pilot hole to prevent cracking.
- Apply low drill speed to avoid damaging the stucco surface.
Once the hole is drilled, install a grommet or plastic bushing to protect the cable from sharp edges. This is especially important with masonry walls or where wall materials are rough.
Step 4: Run the Ethernet Cable Through the Wall

With the hole prepared, feed the ethernet cable from the interior to the exterior or vice versa, depending on access and cable length. A fish tape or cable puller helps guide the cable through wall cavities, particularly when navigating insulation.
- Keep the cable path as straight as possible to avoid kinks or excessive bends.
- If passing through insulated walls, avoid compressing fiberglass or foam insulation around the cable, as this can damage the outer jacket.
- For long exterior runs, use conduit for added protection from UV, moisture, and physical damage.
After running the cable, seal the exterior penetration point using weatherproof silicone caulk or exterior-grade expanding foam. A proper seal prevents:
- Moisture intrusion into wall cavities.
- Pest entry through the hole.
- Heat loss through unsealed gaps.
Step 5: Terminate and Connect the Cable
Once the cable is inside, terminate both ends with RJ45 connectors or install keystone jacks and wall plates for a professional finish.
Interior Termination
- Attach the cable to a keystone jack.
- Mount the keystone jack into a wall plate, secured to a low-voltage mounting bracket.
- Connect the wall plate to your router, modem, or network switch using a short patch cable.
Exterior Termination
- If the cable ends outside (for a security camera or outdoor access point), attach a weatherproof RJ45 connector.
- Use a weatherproof junction box if additional termination space is needed.
- For cables continuing underground, transition into direct burial conduit.
Testing the Connection
- Use a cable tester to confirm proper termination and signal continuity.
- Verify network speed using an ethernet speed test after connecting devices.
When installing low-voltage wiring like Ethernet, homeowners often need to route other types of cables, such as electrical wiring, through structural elements. If you’re also planning electrical work, understanding the correct methods for running Romex through floor joists ensures compliance with building codes while protecting both the wiring and the structural integrity of your home.
Best Practices for Running Ethernet Cable Through Exterior Walls
Following industry best practices helps ensure the ethernet cable remains functional, protected, and compliant with building codes when running it through an exterior wall. Exterior installations face unique challenges, including exposure to moisture, UV rays, temperature changes, and physical wear.

Choosing Outdoor-Rated Ethernet Cable
The type of ethernet cable directly impacts durability and performance when running through or along exterior walls. Not all cables are designed for outdoor exposure, and using the wrong cable can lead to signal loss, water damage, or complete failure over time.
Outdoor-rated ethernet cables are built with UV-resistant jackets that prevent deterioration from sunlight. Standard indoor cables use PVC jackets, which degrade when exposed to UV rays, becoming brittle and prone to cracking. Outdoor cables also feature weather-resistant materials, protecting the internal copper conductors from moisture, freezing temperatures, and physical damage.
For fully exposed runs, such as between a house and a detached garage, direct burial ethernet cable may be necessary. These cables contain gel-filled cores or water-blocking tapes, which seal out moisture even if the cable is submerged.
The table below highlights key differences between indoor and **outdoor-rated ethernet cables:
| Attribute | Indoor Ethernet Cable | Outdoor Ethernet Cable |
| Jacket Material | Standard PVC | UV-resistant polyethylene (PE) |
| Water Resistance | Minimal | Waterproof or moisture-resistant |
| Durability | Low | High (resistant to abrasion, sun, and cold) |
| Use Case | Inside walls or ceilings | Exterior walls, underground runs, exposed surfaces |
Best Practice: Always match the cable type to the environment. Use indoor-rated cable only if the run is fully enclosed within the wall cavity and does not pass through unconditioned spaces. For exterior exposure, choose outdoor-rated CAT6 or CAT6a.
Protecting the Cable from Moisture and Physical Damage
Ethernet cables running through exterior walls face both environmental and mechanical risks. Moisture infiltration can lead to corrosion of the copper conductors, degrading signal quality or causing complete failure. Physical damage, such as abrasion from sharp edges or crushing by insulation, can also break internal wires or cause signal interference.
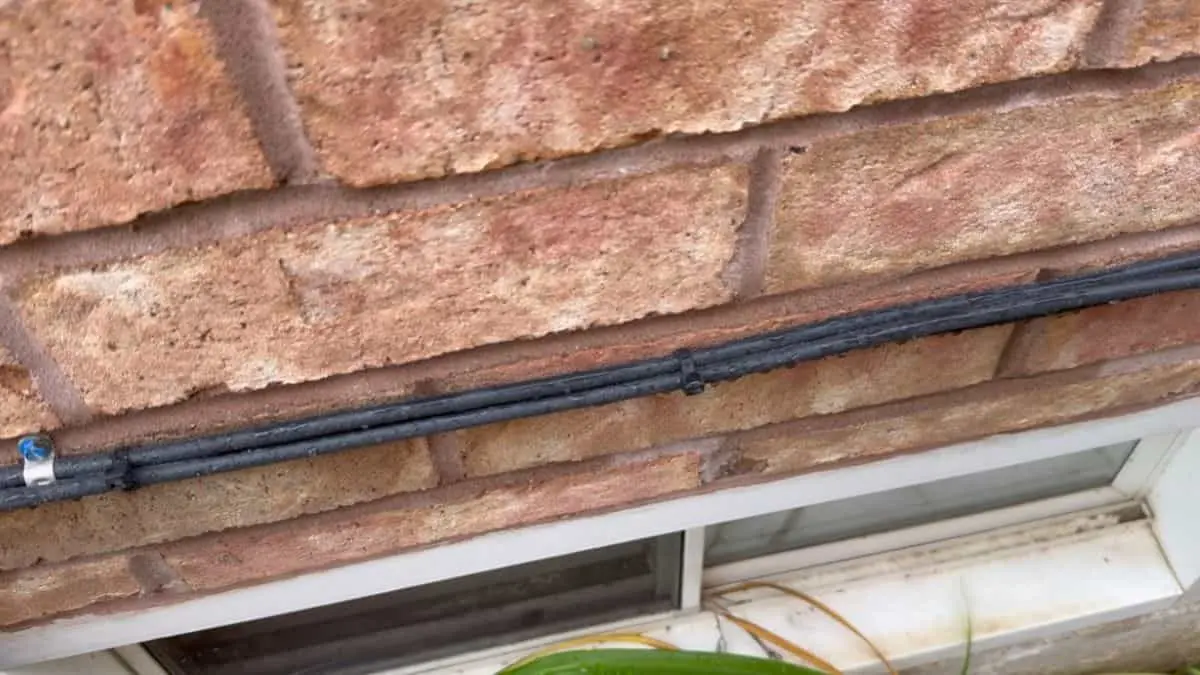
To prevent moisture intrusion, seal every exterior penetration point using weatherproof silicone caulk. Where the cable passes through the wall, install a rubber grommet, plastic bushing, or conduit sleeve. These materials protect the outer jacket from being cut or scraped as it moves through wood, stucco, brick, or siding.
For exterior surface runs, especially along walls exposed to rain or snow, conduit provides superior protection. Use non-metallic PVC conduit for outdoor installations, as it resists corrosion and is easy to cut and assemble. When running conduit vertically, install drip loops to divert rainwater away from the cable entry point.
For partially buried or underground runs, choose direct burial cable and lay it inside a rigid PVC conduit to shield it from rocks, roots, and pests. Direct burial cable alone can withstand moisture, but conduit adds a layer of physical protection, ensuring longevity.
Best Practice: Always install a weatherproof seal around exterior cable entry points, and use grommets, conduit, or protective sleeves wherever the cable is exposed to sharp edges, outdoor weather, or mechanical stress.
Avoiding Signal Interference
Exterior walls often contain electrical wiring, HVAC ducts, and other utilities that can introduce electromagnetic interference (EMI). Ethernet cables, particularly unshielded twisted pair (UTP), are vulnerable to interference from nearby high-voltage power lines, which can degrade signal quality or increase data errors.
The best way to avoid interference is to keep at least 12 inches of separation between ethernet cables and electrical wiring. If running the cable through a shared conduit, choose shielded ethernet cable (STP) with a built-in foil or braided shield that blocks external noise. This is particularly important in homes with older electrical systems, where unshielded wires may produce more electromagnetic interference.
If the cable passes near large appliances, transformers, or outdoor HVAC units, reroute the cable or use STP cable for added protection. In areas where grounding is an issue, grounding the cable shield to an earth ground can further reduce noise.
Best Practice: Maintain a minimum 12-inch separation from power lines, use shielded ethernet cable (STP) near potential interference sources, and ground the shield where needed to minimize external noise.
You May Also Like: How to Run 220 to Detached Garage
Common Challenges and How to Solve Them
Running ethernet cable through an exterior wall is rarely a straightforward process. Every home presents unique challenges, from the type of exterior material to insulation inside the walls and the constant risk of moisture infiltration.
Drilling Through Different Exterior Wall Materials
The type of exterior wall material significantly affects the drilling process. Each material requires different tools, techniques, and safety considerations to create a clean and properly sized hole for the ethernet cable.
- Wood Siding: Wood is relatively easy to drill through, but older siding can split or crack if not handled carefully. Use a spade bit or hole saw for clean holes, and drill at a slow speed to avoid splintering.
- Vinyl Siding: Vinyl is lightweight, but it’s prone to cracking under pressure. To avoid damage, start with a pilot hole using a small drill bit, then enlarge it with a step drill bit to the desired size.
- Stucco: Stucco is brittle and can crumble if drilled incorrectly. Use a masonry bit with a hammer drill and apply light pressure to avoid cracking the surrounding area. Placing masking tape over the drill point can also help minimize surface chipping.
- Brick and Concrete: Both materials require a hammer drill and carbide-tipped masonry bits. Mark the hole location clearly, drill a small pilot hole first, and gradually expand it to the required diameter. Avoid drilling into mortar joints, as they are structurally weaker.
- Metal Siding: Use a metal drill bit designed for cutting through sheet metal. To prevent burrs and sharp edges, insert a rubber grommet or conduit sleeve where the cable passes through.
For any wall type, always seal the drilled hole with exterior-rated silicone caulk after running the cable to prevent water infiltration.
Pro Tip: When drilling through walls with layered materials (such as siding over plywood sheathing), inspect the full wall composition before drilling. This helps choose the correct drill bit and reduces the risk of drilling into unexpected materials like electrical wires, pipes, or insulation.
Running Cable Through Insulated Walls
Exterior walls in modern homes often contain fiberglass batts, spray foam, or rigid foam insulation. These materials can obstruct the cable’s path, making it difficult to pull the ethernet cable cleanly from inside to outside.
- Fiberglass Insulation: Fiberglass batts can be gently moved aside using a fish tape or flexible push rod. Insert the fish tape through the drilled hole, guide it through the insulation, and attach the ethernet cable to the end for pulling.
- Spray Foam Insulation: Closed-cell spray foam forms a rigid barrier, making cable fishing almost impossible after installation. In this case, you may need to cut a small channel, run conduit or flexible raceway, and seal the opening with expanding foam sealant.
- Rigid Foam Board: Rigid insulation panels may require you to cut a small access hole to guide the cable through the foam. Use a flexible drill bit extension if the wall cavity is deep or difficult to reach.
If the cable must pass through the entire wall cavity, use a cable fishing tool to create a clear pathway and ensure the cable does not kink, snag, or compress the insulation, which can lead to damage over time.
Pro Tip: Whenever possible, route the cable through existing conduits or chase spaces, especially in insulated walls, to avoid unnecessary wall damage and simplify future upgrades or maintenance.
Ensuring Weatherproof Installation
Any penetration through an exterior wall presents a potential water intrusion point, especially when dealing with walls exposed to rain, snow, or extreme temperature changes. A properly weatherproofed installation protects not only the ethernet cable but also the structural integrity of the wall itself.
- Use Cable Grommets or Bushings: Wherever the cable passes through wood, stucco, vinyl, or brick, insert a rubber grommet or plastic bushing to protect the cable from friction damage and to help seal the hole.
- Apply Exterior Caulk: After the cable is in place, seal around the cable entry point with 100% silicone or polyurethane exterior caulk. These materials remain flexible, ensuring the seal doesn’t crack over time as the wall expands and contracts.
- Install a Drip Loop: For vertically routed cables, create a drip loop just before the entry point, allowing water to drip off the cable instead of running into the hole.
- Use Weatherproof Junction Boxes: If the ethernet cable terminates at an exterior connection point (such as an outdoor access point or security camera), mount the connection hardware inside a weatherproof junction box rated for outdoor use.
Moisture-resistant measures are especially critical in climates with frequent rain or snow or in areas prone to wind-driven rain, which can push water into small cracks and gaps.
Pro Tip: Always inspect the cable entry point seasonally for signs of wear, cracking, or deterioration of the sealant to prevent water damage to both the wall and the ethernet cable itself.
Safety Tips When Running Ethernet Cable Through Exterior Walls
Working with exterior walls involves tools, structural materials, and potential hazards that require careful handling to protect both the installer and the home’s structure. Following essential safety guidelines reduces the risk of injury, damage, and code violations.
Use Proper Safety Gear
Always wear eye protection when drilling through walls, especially stucco, brick, or concrete, where dust and debris can fly toward the face. Cut-resistant gloves protect hands when handling sharp tools or pulling cable through tight spaces. For high exterior walls, use a stable ladder with a helper to hold the base for added stability.
Check for Electrical Wiring and Pipes
Before drilling any hole, locate and mark nearby electrical wiring, plumbing pipes, and gas lines. Use a stud finder with electrical and metal detection to scan the wall. Accidental drilling into live wires can cause electrical shock or fire, while damaging water pipes can lead to costly leaks and repairs.
Use the Right Tools for Each Wall Type
Different materials require specific tools for safe and efficient drilling. Using the wrong drill bit or applying too much pressure can cause uncontrolled cracking in stucco, vinyl, or masonry. For brick and concrete, always use a hammer drill with a carbide-tipped masonry bit to prevent tool kickback.
Secure the Ethernet Cable Properly
Loose or unsupported cables can sag, tangle, or get pinched, leading to potential performance issues or physical damage. Use cable clips, conduit, or exterior-rated cable channels to hold the cable securely along exterior surfaces. Avoid tight bends, which can degrade signal quality.
Weatherproof All Exterior Penetrations
Every hole through the exterior wall must be sealed thoroughly to prevent water infiltration. After running the ethernet cable, apply exterior-grade silicone caulk around the cable entry point. Failing to seal these gaps can lead to water damage, mold growth, and structural deterioration.
Follow Local Building Codes
Check local building codes and regulations before running any low-voltage cable through exterior walls. Some areas require conduit protection for cables passing through certain wall types or for above-ground exterior runs. Following local codes ensures both safety and compliance during the installation process.
Conclusion
Running Ethernet cable through an exterior wall is a practical solution for improving network coverage in detached spaces, outbuildings, or different floors of a home. Using the right tools, selecting outdoor-rated cable, and ensuring proper weatherproofing protects the cable and the home’s structure.
Following safety guidelines and best practices helps prevent damage, signal loss, and long-term issues. With careful planning and attention to detail, homeowners can create a reliable, weather-resistant wired connection that supports fast and stable internet access for years.