
Bathroom exhaust fans are essential for removing excess moisture, odors, and humidity — but if they’re not properly insulated, they can become a major source of heat loss, drafts, and condensation problems. Whether you’re upgrading your bathroom or looking to make your home more energy-efficient, knowing how to insulate around a bathroom exhaust fan is a smart move.
In this guide, we’ll walk you through why it matters, the best materials to use, and how to get the job done right — whether you’re working from the attic or directly from the bathroom.
Why Insulating Around a Bathroom Exhaust Fan Matters
Preventing Air Leaks and Drafts
Air leaks around bathroom exhaust fans allow warm air to escape and cold air to enter. This increases energy bills by up to 10-20%, according to the U.S. Department of Energy. Proper insulation seals gaps, maintaining consistent indoor temperatures. Effective sealing around the fan housing stops drafts, improving comfort in bathrooms and nearby rooms. This also supports energy-efficient bathroom ventilation, reducing strain on heating and cooling systems.
Controlling Moisture and Condensation
Bathroom exhaust fans remove humid air, but poor insulation can lead to moisture intrusion. Unsealed gaps allow water vapor to enter the attic, causing mold growth and wood damage. Insulating the fan housing and ductwork prevents condensation buildup, which can reduce attic insulation effectiveness by 30%. Proper insulation ensures moisture control in bathrooms, protecting your home’s structure and air quality.
Ensuring Code Compliance
Building codes, such as the International Residential Code (IRC), require proper insulation and sealing around bathroom exhaust fans to prevent energy loss and moisture issues. Compliance avoids costly fines and ensures safety during inspections. Insulation around the fan housing and ductwork meets energy efficiency standards, reducing heat loss by up to 15%. Avoiding common mistakes, like leaving gaps unsealed, keeps your project aligned with local regulations.
Tools and Materials Needed for Insulating a Bathroom Exhaust Fan
| Category | Item | Purpose |
| Tools | Utility knife | Cut insulation materials |
| Tape measure | Measure gaps and materials | |
| Caulking gun | Apply caulk or spray foam | |
| Screwdriver | Remove or secure fan housing | |
| Gloves | Protect hands from insulation | |
| Safety glasses | Shield eyes from dust | |
| Dust mask | Prevent inhalation of particles | |
| Ladder | Access attic or ceiling | |
| Insulation Materials | Foam board insulation | Insulate fan housing |
| Duct insulation | Wrap exhaust duct to prevent heat loss | |
| Spray foam or caulk | Seal small gaps | |
| Fiberglass batts or rigid foam | Insulate surrounding ceiling or attic | |
| Additional Supplies | Foil-backed duct tape | Secure duct insulation |
| Vapor barrier or house wrap | Control moisture | |
| Insulation hangers or staples | Secure insulation in place |
Insulating Around a Bathroom Exhaust Fan: Step-by-Step Guide
Proper insulation around a bathroom exhaust fan ensures energy efficiency and moisture control. This process is manageable for DIY homeowners and entry-level contractors. Follow these steps to seal air leaks, prevent condensation, and maintain a comfortable home.
Step 1: Safety and Preparation
Safety comes first when working with insulation and electrical components. Turn off the power to the bathroom exhaust fan at the circuit breaker to avoid electrical hazards. Wear gloves, safety glasses, and a dust mask to protect against insulation fibers and dust.
Gather all tools and materials before starting. A utility knife, tape measure, caulking gun, and screwdriver are essential. Keep foam board insulation, spray foam, duct insulation, and foil-backed tape ready. A ladder is necessary for attic access. Having everything prepared streamlines the process and reduces interruptions.
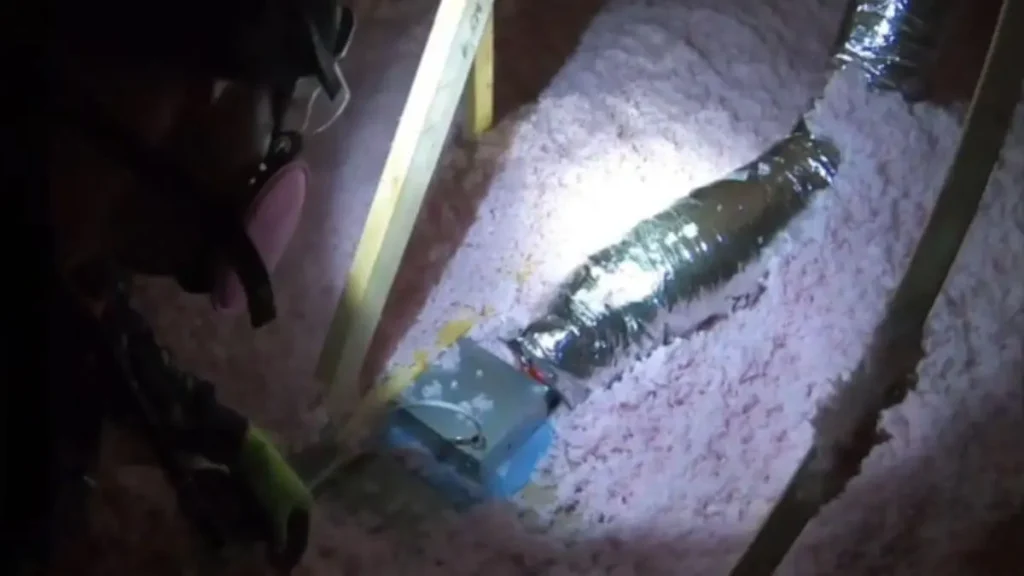
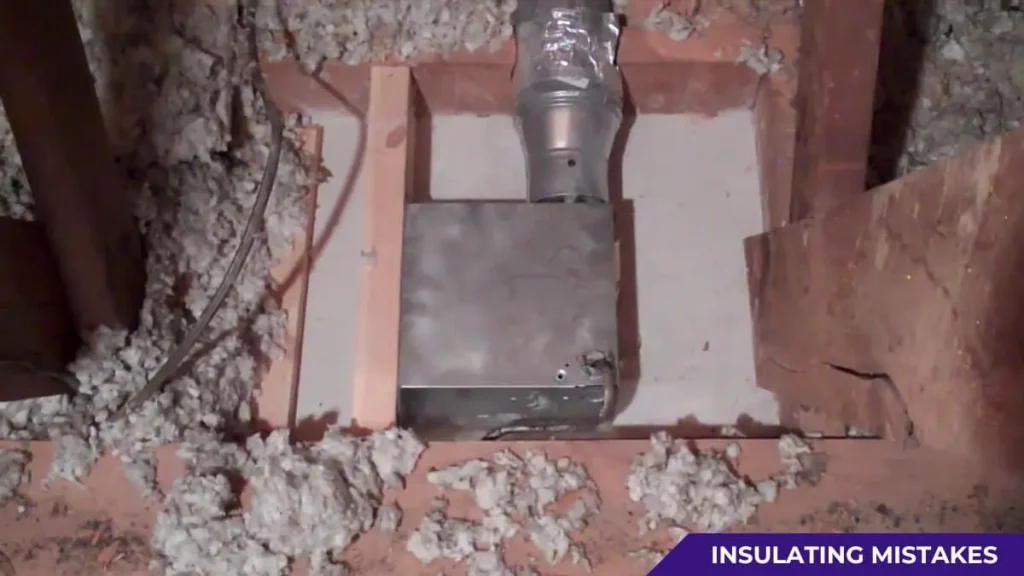
Step 2: Inspect the Exhaust Fan and the Surrounding Area
Examine the exhaust fan and its surroundings to identify problem areas. Look for gaps around the fan housing where air might escape. These gaps can increase energy bills by up to 15%, according to a U.S. Department of Energy report. Check the ductwork for loose connections or uninsulated sections, as these contribute to heat loss.
If working in the attic, assess the insulation levels near the fan. Uneven or compressed insulation reduces effectiveness, lowering the R-value. Note any signs of moisture damage, such as discoloration or mold, which indicate poor sealing. A thorough inspection guides the insulation process and prevents future issues.
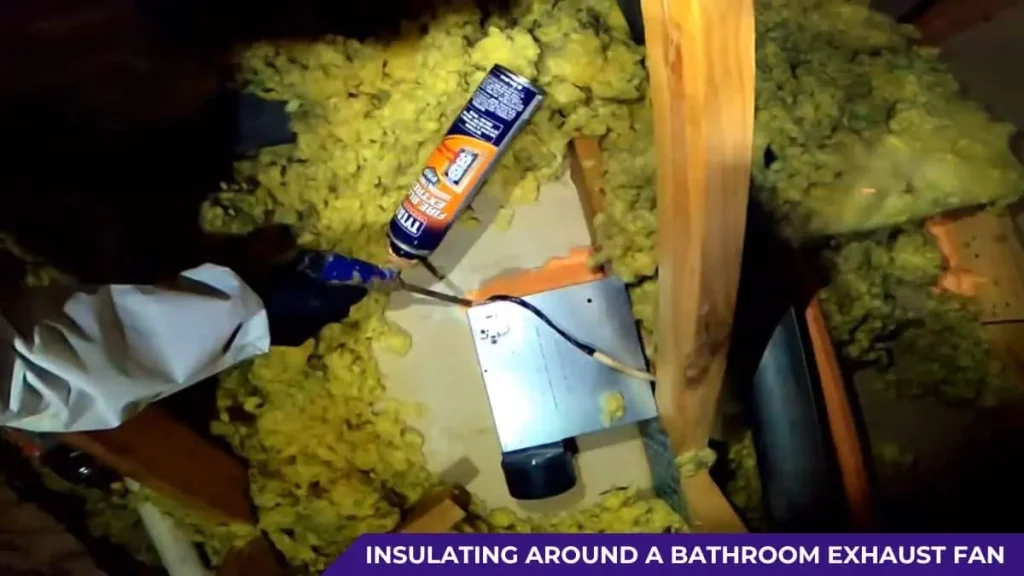
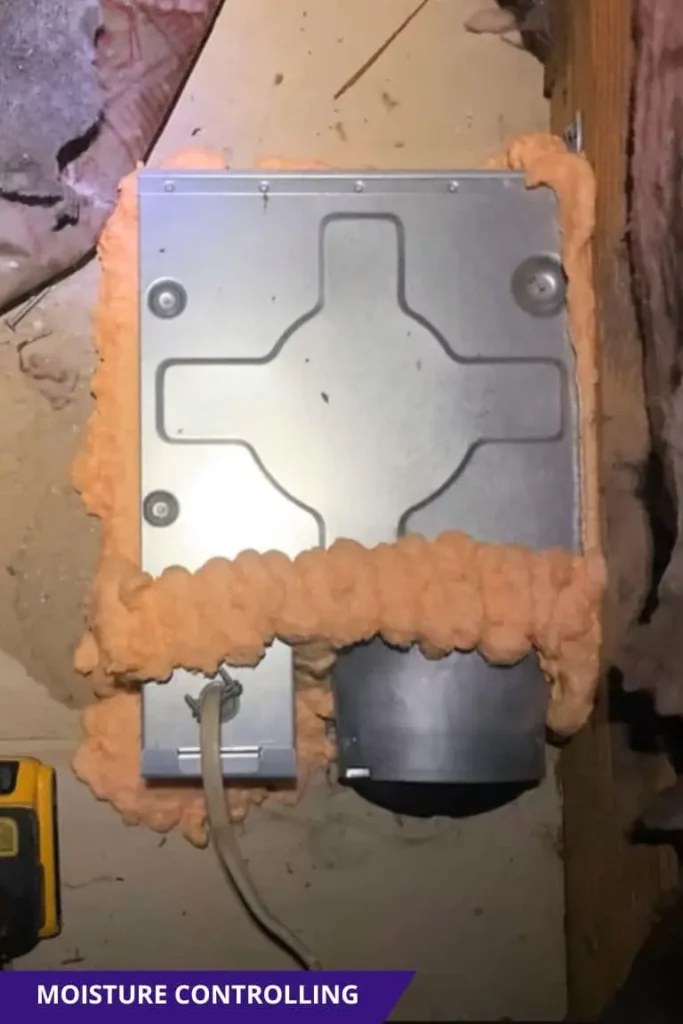
Step 3: Seal Gaps Around the Fan Housing
Sealing gaps around the fan housing prevents air leaks and drafts. Use a caulking gun to apply silicone caulk or low-expansion spray foam to small gaps, typically less than 0.5 inches wide. For larger gaps, cut foam board insulation to fit snugly around the fan housing. Secure it with foil-backed tape for durability.
Ensure the seal is airtight but avoid covering the fan’s ventilation openings. This maintains proper airflow while blocking unwanted drafts. A tight seal can reduce heat loss by up to 10%. Double-check that the fan housing remains accessible for future maintenance.
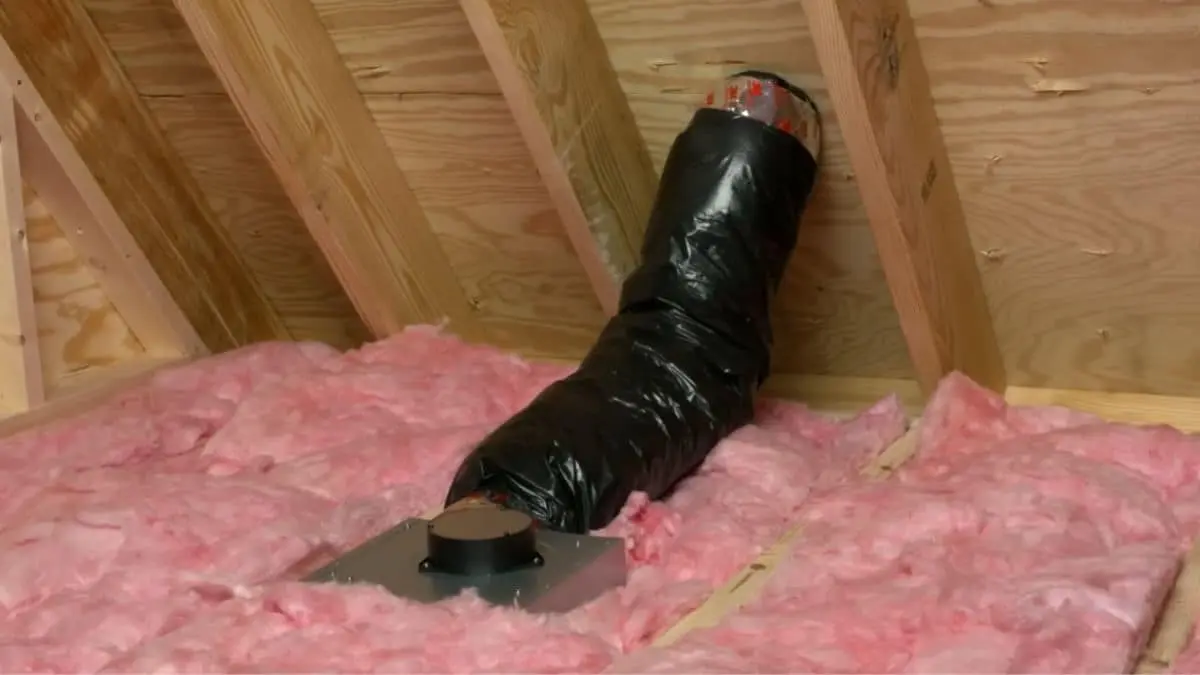
Step 4: Insulate the Exhaust Duct
The exhaust duct carries moist air out of the bathroom, and uninsulated ducts lead to condensation and heat loss. Wrap the duct with duct insulation, such as fiberglass or foil-faced foam, to maintain air temperature. Secure the insulation with foil-backed tape to ensure a tight fit.
Check that the duct slopes upward toward the exterior vent to prevent condensation buildup. A 1-inch rise per 12 inches of duct length is ideal, according to IRC guidelines. Properly insulated ducts improve ventilation efficiency and prevent moisture issues in the attic.
Step 5: Add Insulation to the Surrounding Ceiling or Attic
Insulate the ceiling or attic area around the fan to create a continuous barrier. Use fiberglass batts or rigid foam boards, aiming for an R-value of at least R-38 for attics, as recommended by the Department of Energy. Cut insulation to fit around the fan housing without compressing it, as compression reduces effectiveness by up to 20%.
Install a vapor barrier, such as polyethylene sheeting, to control moisture in bathrooms. Secure it with insulation hangers or staples, ensuring no gaps. This step prevents water vapor from reaching the attic, reducing the risk of mold. Maintain at least a 1-inch gap between insulation and the fan’s exhaust port to ensure proper ventilation.
Step 6: Test and Verify the Insulation
After insulating, test the exhaust fan to confirm it operates correctly. Restore power at the circuit breaker and turn on the fan. Listen for unusual noises or reduced airflow, which may indicate blocked vents. Use a flashlight to check for light leaks around the fan housing, signaling unsealed gaps.
Monitor the bathroom and attic for drafts or moisture over the next few weeks. A properly insulated fan should eliminate drafts and prevent condensation. If issues persist, re-inspect the seals and ductwork. Regular checks ensure long-term energy efficiency and home comfort.
Best Practices for Insulating Bathroom Exhaust Fans
Proper insulation around bathroom exhaust fans boosts energy efficiency and prevents moisture damage. These best practices ensure long-lasting results for DIY homeowners and contractors. Follow these guidelines to achieve optimal performance and avoid common pitfalls.
Choosing the Right Insulation Type
Selecting the correct insulation material is critical for effectiveness. Foam board insulation works well for sealing fan housings due to its rigidity and high R-value, typically R-5 per inch. Fiberglass batts, with an R-value of R-3.2 per inch, are ideal for surrounding attic spaces. Spray foam seals small gaps but expands, so apply it sparingly to avoid blocking vents.
Each material has trade-offs. Foam board resists moisture better than fiberglass, which can absorb water if not paired with a vapor barrier. Spray foam offers airtight seals but is costlier, averaging $1.50 per square foot. Choose materials based on your climate and budget to maximize energy-efficient bathroom ventilation.
Recommended: How to Get R49 Insulation in 2×10 Roof
Avoiding Common Mistakes
Mistakes during insulation can reduce efficiency and cause damage. Never overstuff insulation around the fan housing, as compression lowers the R-value by up to 20%. Ensure insulation does not block ventilation paths, which can trap moisture and lead to mold growth.
Neglecting duct insulation is another error. Uninsulated ducts lose up to 15% of heat, per the U.S. Department of Energy. Always wrap ducts with foil-faced insulation and secure with tape. Check for gaps around the fan housing after sealing, as even small leaks can increase energy bills by 5-10%.
Maintaining Energy Efficiency
Insulation supports energy-efficient ventilation when done correctly. Pair insulation with a high-quality exhaust fan rated at least 80 CFM for standard bathrooms, as recommended by the Home Ventilating Institute. This ensures proper airflow while minimizing heat loss.
Integrate smart bathroom systems, like humidity-sensing fans, to optimize ventilation. These devices run only when needed, reducing energy use by up to 30%. Regular maintenance, such as cleaning fan blades and checking seals annually, preserves efficiency and extends the fan’s lifespan, saving $50-100 yearly on energy costs.
Related: Venting Bathroom Fan Through Roof
Expert Tips for Long-Term Success
Insulating a bathroom exhaust fan is a smart investment in energy efficiency and home durability. These expert tips ensure your insulation project delivers lasting benefits. Follow these strategies to maintain performance and avoid costly repairs.
Regular Inspections for Wear or Damage
Check insulation around the exhaust fan annually to catch issues early. Look for signs of wear, such as crumbling foam board or damp fiberglass, which can reduce effectiveness by up to 25%. Inspect duct insulation for loose tape or gaps, as these allow heat loss.
Examine the fan housing and surrounding attic for moisture stains or mold, indicating poor sealing. Address any damage promptly by replacing insulation or reapplying caulk. Routine checks keep your bathroom ventilation system efficient and protect your home’s structure.
Pair Insulation with a High-Quality Fan
A well-insulated fan performs best with a reliable exhaust unit. Choose a fan with a minimum of 80 CFM for bathrooms up to 80 square feet, as recommended by the Home Ventilating Institute. Energy-efficient models with Energy Star certification use 20-30% less power, saving $15-25 annually on energy bills.
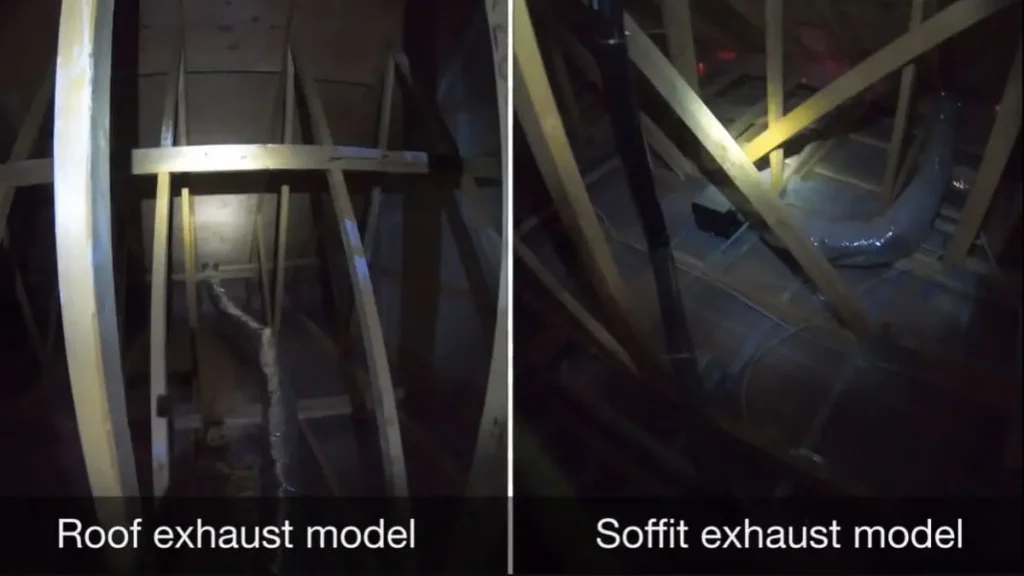
Ensure the fan vents directly to the exterior, not into the attic, to prevent moisture buildup. Upgrading to a quieter model, rated below 1.5 sones, improves comfort without sacrificing airflow. A high-quality fan maximizes the benefits of insulation for long-term efficiency.
Consider Professional Consultation for Complex Projects
Some insulation projects require expert input, especially in older homes or tight attic spaces. Professionals ensure compliance with local building codes, such as the International Residential Code, avoiding fines that can exceed $500. They also identify hidden issues, like improper duct slopes, which cause condensation.
For complex installations, consult a licensed contractor before starting. They can recommend solutions like flexible duct insulation for cramped areas, costing $2-4 per linear foot. Professional advice ensures safety and durability, particularly for extensive bathroom or attic renovations.
Use Smart Controls for Optimal Ventilation
Smart technology enhances bathroom ventilation efficiency. Install a humidity-sensing fan or smart thermostat to control moisture automatically. These devices activate only when humidity exceeds 60%, reducing energy use by up to 35%.
Programmable timers ensure the fan runs just long enough to clear moisture, typically 10-20 minutes after a shower. Smart controls prevent over-ventilation, which can pull conditioned air out of the home. Integrating these systems with proper insulation creates a cost-effective, energy-efficient bathroom environment.
You Should Read: How to Vent Multiple Bathroom Exhaust Fan
Conclusion
Insulating around a bathroom exhaust fan prevents drafts, reduces energy costs, and controls moisture. This DIY project boosts home comfort and protects against damage. Start today with the right tools and materials to improve ventilation efficiency.
Explore related topics like insulation between the basement and first floor for more ways to enhance your home’s value and performance.

