
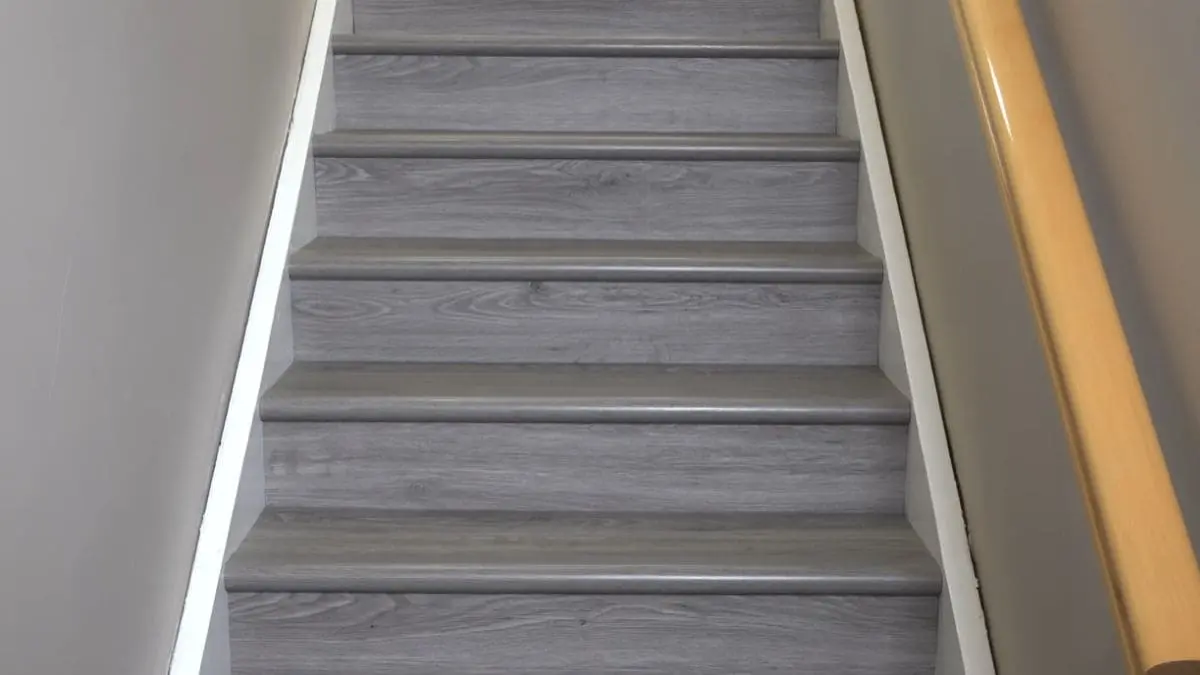
Vinyl plank flooring has become a popular choice for homeowners looking to upgrade their stairs. Its durability, affordable cost, and wide range of styles make it an ideal option for transforming your staircase into a stylish and functional feature of your home. Whether you’re aiming for a modern look or a classic finish, vinyl plank flooring offers versatility that complements any interior design.
Installing vinyl plank flooring on stairs might seem challenging at first, but with the right tools and clear instructions, it’s a manageable DIY project. This guide will walk you through the step-by-step process, from preparation to finishing touches, ensuring your stairs are not only visually appealing but also safe and long-lasting.
Ready to give your staircase a stunning makeover? Let’s dive into the process of installing vinyl plank flooring on stairs!
Tools and Materials Needed
What do you need to install vinyl plank flooring on stairs? Before starting your project, gather the necessary tools and materials to ensure a smooth and efficient installation. Here’s a detailed list:
Tools
- Measuring Tape
Used to measure the dimensions of each stair for accurate cuts. - Utility Knife
Essential for cutting vinyl planks to fit the exact measurements. - Rubber Mallet
Helps secure planks into place without damaging them. - Tapping Block
Ensures tight and even plank connections. - Pry Bar
Useful for removing old flooring or baseboards. - Saw (Circular or Jigsaw)
Needed for precise cuts, especially around stair edges or tricky corners. - Adhesive Trowel
Used to apply adhesive evenly on stair surfaces. - Level
Ensures the stairs are even and ready for installation. - Painter’s Tape
Helps mark measurements and temporarily hold pieces in place during installation. - Safety Gear
Includes gloves, safety goggles, and a dust mask to ensure safety during cutting and adhesive application.
Materials
- Vinyl Plank Flooring
Choose planks designed for stairs, preferably with a durable wear layer and slip-resistant surface. - Stair Nosing
Provides a finished look and enhances safety by protecting the edges of each step. - Adhesive or Double-Sided Tape
Depending on the type of vinyl planks, you’ll need a strong adhesive or tape to secure them to the stairs. - Underlayment (Optional)
If required, underlayment can provide added comfort and noise reduction. - Wood Filler or Floor Leveler
Used to fix any imperfections or uneven areas on the stair surface before installation. - Cleaning Supplies
Includes a vacuum or broom and a damp cloth to ensure the stairs are clean and free from debris.
Pro Tip
Double-check the manufacturer’s instructions for your vinyl planks, as they might require specific tools or adhesives. Having all tools and materials ready before you start will save time and help avoid interruptions during the installation process.
Preparation Tips for a Successful Installation
Proper preparation is key to ensuring your vinyl plank flooring installation on stairs is smooth and long-lasting. Taking time to carefully prepare the stairs and the necessary tools will make the entire process easier and improve the final result. Here’s a step-by-step guide to get you ready for a successful installation:
Clean the Staircase Thoroughly
Before beginning the installation, it’s crucial to clean the stairs thoroughly. Dust, dirt, and debris can interfere with adhesive bonding and cause uneven surfaces, leading to issues with the vinyl planks. Sweep or vacuum the stairs to remove all dirt, and then use a damp cloth to wipe down the surfaces. If you’re removing old flooring, make sure all remnants are scraped off and the surface is completely smooth.
Inspect the Stairs for Damage or Unevenness
Examine the stair treads closely for any signs of damage, such as cracks, gouges, or an uneven surface. Vinyl planks require a smooth, flat base to adhere properly. If you find any imperfections, fill them with wood filler or use a floor leveler to smooth out the surface. This step ensures that the vinyl planks won’t shift or wear unevenly over time. Allow any filler or leveling compound to dry completely before continuing.
Recommended Post: Replacing Stair Treads Built into Stringer
Measure Each Stair Individually
Accurate measurements are crucial when installing vinyl plank flooring on stairs. While the general width of stairs may seem consistent, each tread and riser may have slight variations. Use a measuring tape to measure the length and width of each tread individually. If your stairs are not square or have irregular edges, take extra care to measure these areas precisely. This will help you cut the vinyl planks to the correct size, ensuring a perfect fit.
Ensure Proper Temperature and Humidity
Vinyl plank flooring should be installed in a controlled environment, as extreme temperatures or humidity can cause the planks to expand or contract. Make sure the temperature in your home is between 65°F and 85°F (18°C to 29°C) before beginning installation. Additionally, the relative humidity should be between 35% and 65%. If your home is too humid or too dry, it can affect how the planks adhere and perform over time.
Plan the Layout and Stair Nosing
Before starting installation, plan how you want the vinyl planks to run across the stairs. Generally, it’s best to lay the planks parallel to the stair treads to ensure a clean, uniform look. Decide where to place the stair nosing, which will cover the edges of the stairs and provide a finished appearance. Make sure the nosing fits snugly against the edge of each step, as it will help with both the aesthetic appeal and safety of the stairs.
Test the Adhesive or Plank Fitting
If your vinyl planks require adhesive, test the adhesive on a small section of the stair to ensure it bonds well to the surface. Follow the manufacturer’s instructions on the recommended application method and drying time. If you are using peel-and-stick planks, lay a few pieces on the stairs to check how well they fit and adjust accordingly. This will give you confidence in your material choices and installation method before committing to the entire staircase.
Gather All Tools and Materials
Double-check that you have all the tools and materials you’ll need before starting the installation. Having everything on hand will allow for a more efficient and seamless process. If any tools or materials are missing, gather them ahead of time to avoid delays.
Step-by-Step Guide to Install Vinyl Plank Flooring on Stairs
Installing vinyl plank flooring on stairs involves a detailed process that requires precision and patience. Follow these step-by-step instructions to achieve a professional-looking and durable finish.
Step 1: Prepare the Stairs
Begin by ensuring that your stairs are clean, smooth, and free of debris. Remove any old flooring materials, adhesives, or nails. Use a scraper to eliminate residues and a sander to smooth uneven surfaces. If necessary, fill any cracks or gaps with wood filler or a leveling compound and let it dry completely. A properly prepared surface ensures the planks adhere securely.
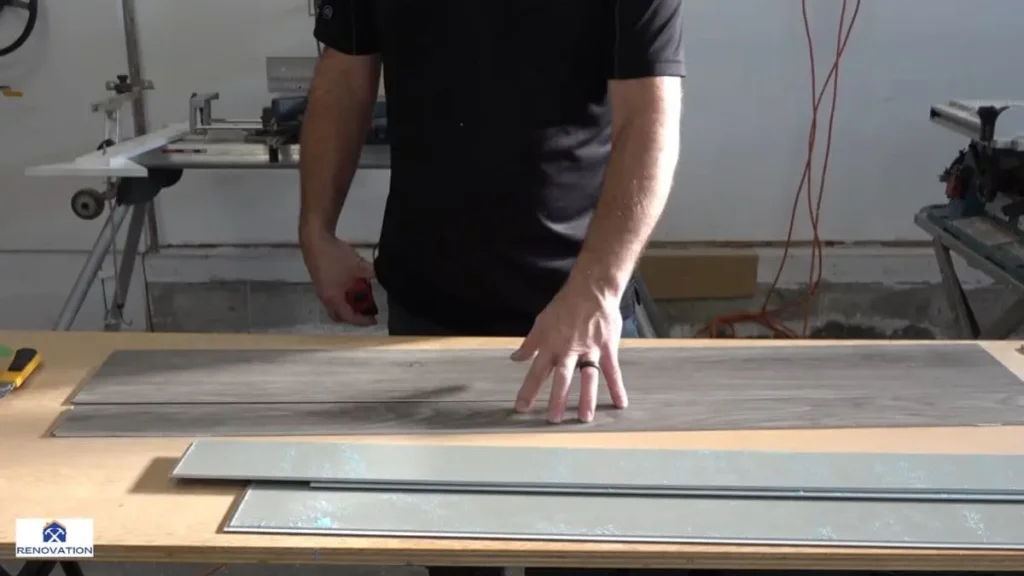
Step 2: Measure and Cut the Planks
Measure the dimensions of each stair tread, riser, and nosing individually. Staircases often vary slightly, so precise measurements are critical. Use a tape measure to determine the width and length of each section. Transfer the measurements to your vinyl planks, and cut them to size using a utility knife, jigsaw, or table saw.
Tip: Always cut slightly larger than needed and trim down for a perfect fit. Ensure cuts are clean and straight for a seamless appearance.
Step 3: Install the Stair Nosing
Stair nosing provides a finished edge and improves safety by preventing slippage. Start by dry-fitting the nosing to ensure it fits snugly along the edge of each stair. Apply a strong construction adhesive to the bottom of the nosing and press it firmly into place. For added security, use finish nails or screws to secure the nosing, ensuring it doesn’t shift over time.
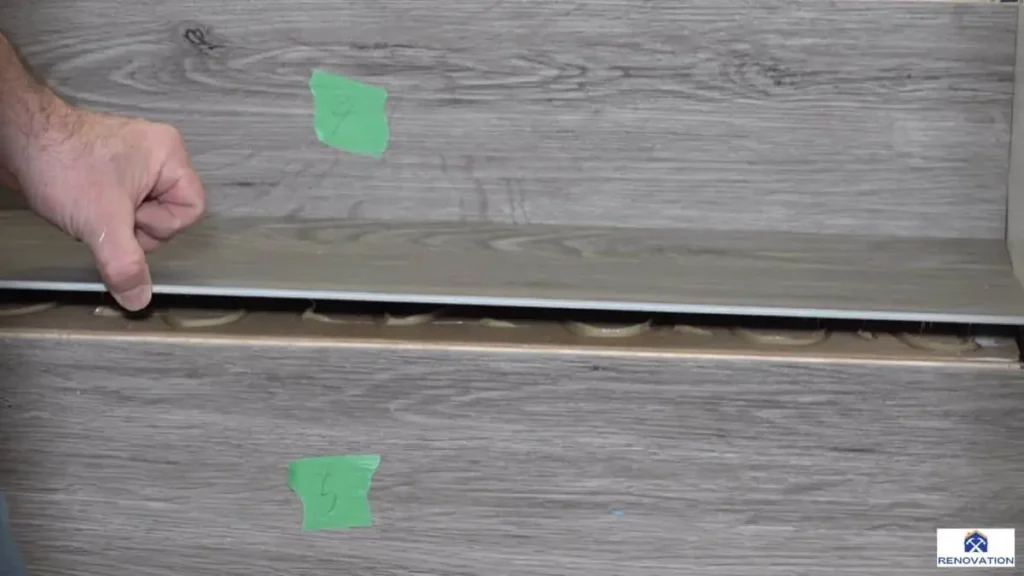
Step 4: Apply Adhesive to the Tread
For the stair treads, apply a high-quality adhesive evenly across the surface. Use a trowel to spread the adhesive thinly and consistently, following the manufacturer’s instructions. If you’re using peel-and-stick vinyl planks, remove the backing and position the plank carefully before pressing it down firmly.
Step 5: Position and Secure the Plank
Place the cut vinyl plank onto the tread, starting from the back edge and working toward the front. Use a rubber mallet or roller to press the plank down firmly, ensuring full adhesion and eliminating air pockets. Check that the plank aligns evenly with the stair edges for a clean look.
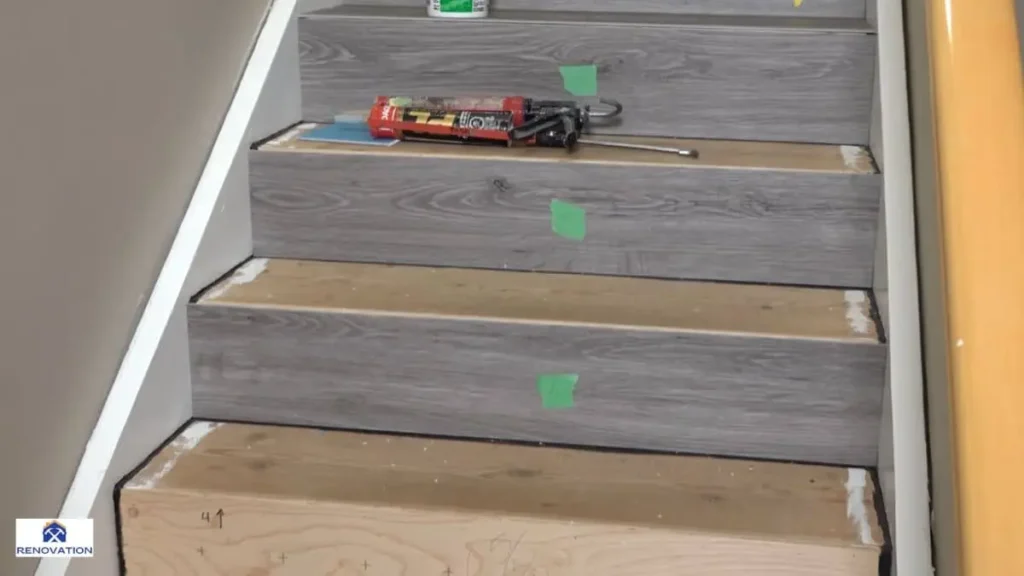
Step 6: Repeat for the Risers
Next, install the vinyl plank on the riser, which is the vertical part of the step. Apply adhesive evenly across the riser surface, position the cut plank, and press it into place. Use a rubber roller to ensure it adheres completely without bubbles or gaps.
Step 7: Seal the Edges
To ensure a professional and finished appearance, seal the edges where the planks meet the stair nosing or walls. Use a matching caulk or silicone sealant for this purpose. This step prevents dirt, moisture, or debris from entering the seams and adds to the overall durability of your installation.
Step 8: Allow the Adhesive to Cure
Once all the planks are installed, allow the adhesive to cure for the time recommended by the manufacturer. Avoid walking on the stairs during this period to ensure the planks bond securely to the surface.
Step 9: Final Inspection
After the adhesive has cured, inspect your work carefully. Check for any loose edges, gaps, or misaligned planks. Make any necessary adjustments or touch-ups to achieve a flawless finish.
Common Mistakes to Avoid
While installing vinyl plank flooring on stairs can significantly enhance the appearance and functionality of your home, several common mistakes can hinder the outcome. Avoid these errors to ensure a professional and long-lasting finish:
Inadequate Surface Preparation
Failing to properly prepare the stairs is one of the most common mistakes. Dust, debris, old adhesives, and uneven surfaces can prevent the planks from adhering properly.
Solution: Always clean the stairs thoroughly and sand down any rough areas. Fill gaps or cracks with wood filler or leveling compound and ensure the surface is smooth and dry before starting.
Incorrect Measurements
Even minor inaccuracies in measurements can lead to visible gaps or uneven edges. Stair dimensions often vary slightly, making it crucial to measure each step individually.
Solution: Use a precise tape measure and double-check your measurements for each tread, riser, and nosing before cutting. Always account for the thickness of the nosing when measuring the treads.
Cutting Errors
Poor cutting techniques can result in uneven or jagged edges, detracting from the overall finish.
Solution: Use sharp, appropriate tools like a utility knife, jigsaw, or table saw for clean cuts. Cut slightly larger than required and trim gradually for a snug fit.
Skipping the Adhesive Step
Relying solely on the plank’s peel-and-stick backing without applying additional adhesive can lead to loose or shifting planks over time.
Solution: Always use a high-quality construction adhesive in addition to any existing adhesive backing to ensure a secure bond.
Neglecting to Secure the Stair Nosing
The stair nosing provides safety and a finished look, but it can come loose if not installed correctly.
Solution: Use a combination of adhesive and screws or nails to firmly secure the nosing to each step. Double-check that it is level and flush with the plank edges.
Overlooking Edge Sealing
Unsealed edges can allow dirt, moisture, or debris to seep in, compromising the integrity and appearance of the installation.
Solution: Seal all edges with a matching caulk or silicone to create a waterproof barrier and prevent damage over time.
Walking on the Stairs Too Soon
Premature use of the stairs before the adhesive has fully cured can cause planks to shift or lose adhesion.
Solution: Allow sufficient curing time as specified by the adhesive manufacturer. Block access to the stairs during this period.
FAQs About Installing Vinyl Plank Flooring on Stairs
Can vinyl plank flooring be installed on stairs?
Yes, vinyl plank flooring can be installed on stairs and is a popular choice due to its durability, ease of maintenance, and stylish appearance. With proper preparation and installation techniques, it provides a seamless and professional look.
Do I need special planks for stairs?
Yes, stair-specific planks, often called stair treads or nosing pieces, are recommended. These are designed to cover the edge of the step securely, providing additional grip and preventing wear over time. If you can’t find stair treads that match, you can use standard planks with separate nosing pieces.
What type of adhesive should I use for vinyl planks on stairs?
A high-strength adhesive specifically designed for vinyl flooring is recommended. Look for products that are water-resistant and compatible with your subfloor type. Always follow the manufacturer’s guidelines for best results.
Can I install vinyl plank flooring on stairs with carpet?
No, the carpet must be removed first. The surface beneath the carpet should be cleaned and smoothed to create a solid and even base for the vinyl planks. Installing over carpet can cause instability and uneven results.
Is vinyl plank flooring slippery on stairs?
Vinyl plank flooring can be slippery if not properly textured. To improve safety, choose planks with an embossed or textured surface designed for slip resistance. You can also add anti-slip strips or coatings for added traction.
How long does it take to install vinyl planks on stairs?
The time required depends on the number of stairs and your experience level. On average, it takes about 30–60 minutes per step, including preparation, adhesive application, and cutting planks to size. For a standard staircase, plan for a full day of work.
Can vinyl plank flooring be removed from stairs later?
Yes, but it may require effort to remove adhesive residue. The planks can be peeled off with a pry tool, and any remaining adhesive can be cleaned with a scraper and adhesive remover.
How do I maintain vinyl plank flooring on stairs?
Regular sweeping and mopping with a vinyl-safe cleaner are key. Avoid harsh chemicals or abrasive cleaning tools that may damage the surface. Promptly wipe spills to prevent moisture from seeping into the edges.
Are vinyl planks a better option than carpet for stairs?
It depends on your needs. Vinyl planks are more durable, easier to clean, and offer a modern look, making them ideal for high-traffic areas. Carpet, however, provides better cushioning and sound insulation but requires more maintenance.
What should I do if my vinyl planks start lifting on stairs?
If planks begin to lift, reapply adhesive to secure them in place. Clean the surface thoroughly before reapplying to ensure proper bonding. Inspect regularly to catch issues early.
Conclusion
Installing vinyl plank flooring on stairs is a practical and stylish way to enhance the functionality and appearance of your home. With its durability, ease of maintenance, and affordability, vinyl plank flooring has become a go-to option for homeowners seeking an upgrade that combines aesthetics with long-lasting performance.
By carefully planning the installation, preparing the surface, and following a systematic step-by-step process, you can achieve professional results without requiring extensive experience or tools. Avoiding common mistakes and adhering to proper maintenance practices will further ensure your stairs remain safe, attractive, and in excellent condition for years to come.
Whether you’re tackling the project yourself or enlisting the help of a professional, this guide equips you with the knowledge needed for success. By understanding the benefits, preparation requirements, and installation techniques, you can transform your stairs into a centerpiece that complements your home’s design.
Vinyl plank flooring on stairs is more than just a trend—it’s a practical solution for modern living. Ready to elevate your space? Start planning your project today and enjoy the satisfaction of a job well done!

