
An expansion tank is a crucial component that helps protect your water heater system from pressure-related issues. When water heats up, it expands, increasing the pressure within the system. Without an expansion tank, this excess pressure can damage your water heater, leading to leaks, reduced efficiency, and even early failure of the unit.
Installing an expansion tank allows the extra water volume to flow into the tank, preventing pressure buildup. It not only helps prolong the lifespan of your water heater but also ensures the system operates safely. This guide will provide a step-by-step approach on how to install an expansion tank on your water heater, even if you have minimal plumbing experience.
This guide, you can save on potential repair costs while ensuring your water heater remains in top working condition. Before starting, it’s essential to understand the process, gather the necessary tools, and take all safety precautions.
Tools and Materials Needed
Before beginning the installation of an expansion tank, gathering the right tools and materials is essential for a smooth and efficient process. Ensuring that you have everything prepared beforehand will prevent interruptions and allow for a more straightforward installation.
What Tools Do You Need to Install an Expansion Tank?
For this task, you’ll require a few basic plumbing tools. These tools are likely already available in most households but can be easily purchased if needed. A pipe wrench is essential for tightening and loosening the water heater’s fittings.
An adjustable wrench will also be necessary to make sure connections are secure. If you need to cut pipes, a pipe cutter or hacksaw is required to ensure precise cuts. Additionally, a plumber’s tape, also known as Teflon tape, is vital for creating leak-proof seals at threaded connections.
Which Materials Are Required for an Expansion Tank Installation?
Aside from the tools, you will also need specific materials to complete the installation. First and foremost, you’ll need the expansion tank itself, which should be chosen based on the capacity of your water heater. Make sure to select one that matches the pressure rating of your existing water system.
You’ll also need a threaded connection fitting to attach the tank to the water supply line. In most cases, a copper or brass fitting works best, as these materials are durable and resistant to corrosion. Pipe joint compound or plumber’s tape is required to seal the connection threads, preventing any potential leaks.
How Do You Choose the Right Expansion Tank?
Choosing the correct expansion tank is critical to ensuring its effectiveness. Expansion tanks come in different sizes and pressure ratings, so you must match the tank size to your water heater. A typical residential water heater will require an expansion tank with a volume capacity of around 2 gallons.
When it comes to pressure ratings, ensure that the expansion tank matches the pressure of your home’s water supply. This is usually between 40 and 80 PSI (pounds per square inch). Most tanks come with adjustable pressure settings, but verifying the exact pressure level before purchasing is important.
Where Can You Find These Tools and Materials?
All the necessary tools and materials can be found at any local hardware store or home improvement retailer. Expansion tanks and compatible fittings are usually available in the plumbing section, while wrenches and pipe cutters can be found with general tools.
You may also choose to purchase these items online, where many retailers provide detailed specifications to help you match the correct expansion tank to your water heater model.
Having these tools and materials ready before beginning the installation, you’ll ensure the process is efficient and avoid unnecessary delays.
Safety Precautions
Installing an expansion tank on a water heater involves working with plumbing and pressurized systems, which requires attention to safety. Before starting the installation, it’s important to understand the potential hazards and how to prevent them. Taking proper precautions ensures not only your safety but also the smooth functioning of the water heater after installation.
If you’ve recently replaced your water heater and noticed low water pressure in your kitchen sink, you’re not alone. This is a common issue that can arise due to sediment buildup, airlocks, or valve adjustments. Understanding the root cause can save you time and frustration. To learn more about why your kitchen sink’s water pressure might drop after a water heater replacement and how to fix it, check out our in-depth guide
Why Is It Important to Shut Off the Water Supply?
One of the first steps in working with any water heater system is shutting off the water supply. This prevents unwanted water flow while you’re installing the expansion tank, reducing the risk of flooding or accidental water release.
Locate the main water supply valve, usually found near the water heater, and turn it off completely. Failing to do so could lead to water spurting from the pipes when disconnecting them, which can cause injury or property damage.
How Do You Safely Drain the Water Heater?
To ensure no excess pressure or hot water remains in the tank, it is essential to drain the water heater before proceeding. Connect a garden hose to the drain valve at the bottom of the water heater, and run the hose to a nearby drain or outside.
Open the drain valve and allow the water to exit the tank. Additionally, open a nearby hot water faucet to allow air into the system and expedite the draining process. Make sure the water is cool before draining, as hot water can cause burns if mishandled.
Why Is Turning Off the Power Supply Critical?
For electric water heaters, turning off the power supply is non-negotiable for your safety. Working on an active electric appliance can cause serious injury due to electrical shock. Locate the breaker box and switch off the breaker controlling the water heater.
If you’re working on a gas water heater, you must turn off the gas supply at the shutoff valve located near the water heater. This prevents any potential gas leaks while you’re working on the unit.
What Personal Protective Equipment (PPE) Should You Use?
Using personal protective equipment (PPE) is highly recommended during the installation process. Wear gloves to protect your hands from sharp edges or hot surfaces, especially if the water heater hasn’t cooled down fully.
Safety goggles should also be worn to prevent debris, dust, or water from entering your eyes while working on pipes or fittings. If you’re using power tools or cutting pipes, wearing ear protection and a mask to avoid inhaling any particles is also a wise precaution.
How Do You Test for Pressure Safety After Installation?
Once the expansion tank is installed, it’s important to verify that the water pressure is within a safe range. After turning the water supply back on, check the pressure gauge attached to the expansion tank.
Most residential water systems operate between 40 to 80 PSI. Exceeding this pressure can lead to system failure or damage to the water heater. If the pressure is too high, use a pressure-reducing valve (PRV) to adjust it to the appropriate level.
What Precautions Should Be Taken When Working in Tight Spaces?
Water heaters are often installed in tight or poorly ventilated areas like basements, utility closets, or garages. If you’re working in a confined space, ensure there is proper ventilation to avoid overheating or exposure to harmful fumes, particularly if you’re dealing with a gas water heater.
Working in tight spaces can also increase the likelihood of bumping into objects or tripping, so clear the area of any unnecessary items before beginning the installation.
Taking these safety precautions will protect you from potential hazards during the installation process and ensure that your water heater system functions effectively after the expansion tank is installed.
Step-by-Step Guide to Installing an Expansion Tank

Installing an expansion tank on a water heater may seem complex, but following a methodical, step-by-step approach ensures success. This guide will walk you through each phase of the installation, from preparing the system to securing the final connections. Whether you’re a DIY enthusiast or a homeowner looking to save on professional costs, this guide will help you navigate the process efficiently and safely.
How Do You Prepare the Water Heater for Installation?
Before starting, you need to ensure the water heater is completely prepped for installation. Begin by turning off the water supply to the heater. This will prevent water from flowing into the tank while you work.
Then, shut off the power to the unit, either by flipping the circuit breaker for electric heaters or turning off the gas valve for gas heaters. For safety, it’s also recommended to wait until the tank’s water has cooled down before proceeding.
Next, drain the water heater by attaching a hose to the drain valve located at the bottom of the tank. Open the valve and allow the water to drain completely. Simultaneously, open a hot water tap in your home to allow air to flow into the system, which helps speed up the draining process. Once drained, you can close the valve and remove the hose.
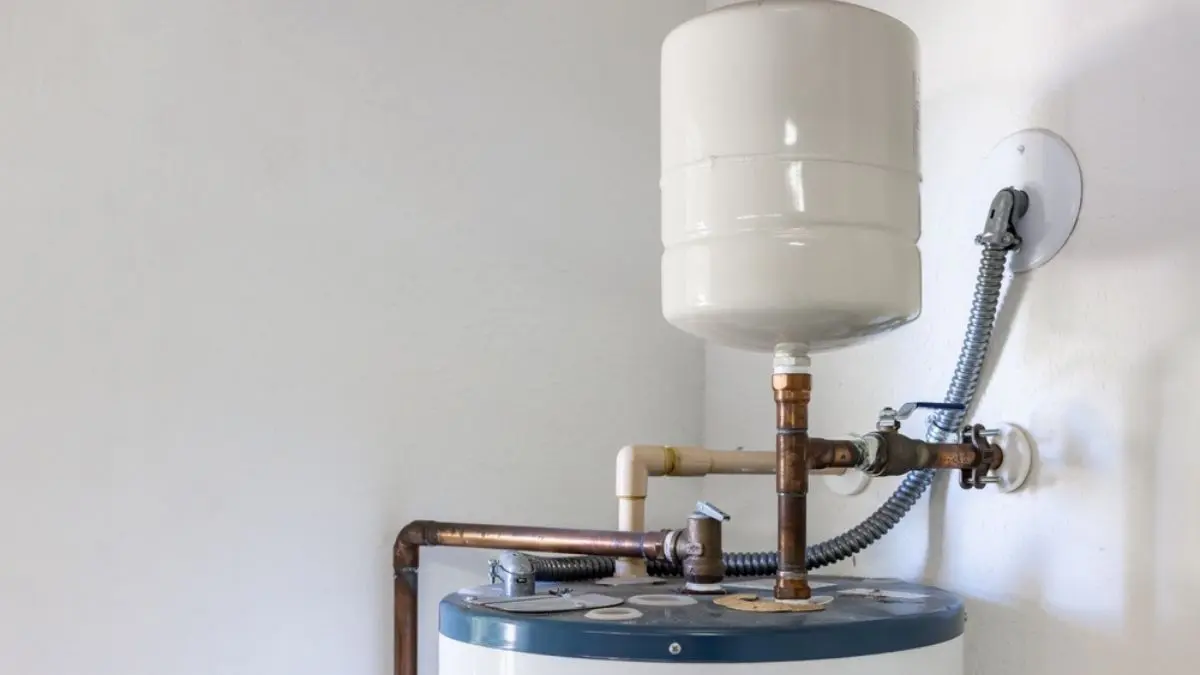
Where Should You Install the Expansion Tank?
The placement of the expansion tank is crucial for its functionality. The expansion tank should be installed on the cold water supply line that leads into the water heater. Typically, you’ll find the cold water line above the heater, and it should be easily accessible for installation. Choose a location that is near the water heater and offers enough space for the tank to be mounted securely.
The orientation of the expansion tank doesn’t matter much as long as it is installed vertically or horizontally and securely fastened. Some prefer to mount it vertically to allow for easier pressure monitoring, but this is not a requirement.
How Do You Attach the Fitting to the Cold Water Line?
Once the location is identified, the next step is to connect the expansion tank to the cold water line. Start by turning off the cold water line using the shutoff valve to prevent any water from entering the system during installation. With the water supply turned off, you can now prepare the threaded connection fitting.
Use a wrench to loosen the cold water supply line where the expansion tank will be installed. Depending on your system, you may need to use a pipe cutter or hacksaw to create space for the expansion tank fitting. After cutting, remove any debris or water from the pipes.
Next, apply plumber’s tape (Teflon tape) to the threaded ends of the connection fitting. This will ensure a tight, leak-free seal. Insert the fitting into the pipe and use your wrench to tighten it securely, being careful not to over-tighten and damage the threads.
How Do You Install the Expansion Tank?
With the fitting in place, you’re ready to install the expansion tank. Begin by threading the tank onto the fitting you’ve just installed on the cold water line. Ensure that the fitting and the tank are properly aligned and screw the tank in by hand at first.
Once hand-tightened, use a wrench to secure the tank firmly, again being cautious not to overtighten, as this could damage the fitting or the tank.
Ensure the tank is stable and properly positioned. If mounting the tank horizontally, make sure the tank is supported adequately to prevent it from sagging under its weight. Vertical installation usually requires bracing or attaching the tank to a wall for additional support.
How Do You Pressurize the Expansion Tank?
After the expansion tank is secured to the cold water line, the next step is to ensure it is pressurized correctly. Expansion tanks usually come pre-pressurized from the manufacturer, but you may need to adjust this pressure to match your home’s water system.
Use a tire pressure gauge to check the air pressure in the expansion tank’s valve, located at the top of the tank. The tank’s air pressure should match your home’s water supply pressure, which is typically between 40 and 80 PSI.
If the tank’s pressure is lower than your water supply, use an air pump to increase the pressure until it matches. If the pressure is too high, release air from the valve until it reaches the correct PSI.
How Do You Reconnect and Test the System?
Once the expansion tank is installed and pressurized, you can begin to reconnect the system. Start by turning the cold water supply back on, allowing water to flow into the heater and the expansion tank. Open a hot water faucet in your home to let out any trapped air and check for smooth water flow. Monitor the area around the expansion tank for any leaks or drips.
If you’ve turned off the power supply, whether electric or gas, this is the time to turn it back on. Once everything is reconnected and running smoothly, inspect the expansion tank once more to ensure it is working properly. Test the system by running hot water in the home, and check that the expansion tank is absorbing the excess pressure as intended.
Taking these steps carefully will ensure that your expansion tank is installed correctly, allowing your water heater to function efficiently without any pressure-related issues.
Common Mistakes to Avoid
When installing an expansion tank, several mistakes are frequently made by both DIY homeowners and inexperienced technicians. Understanding these common errors can help you avoid potential issues that could lead to costly repairs, system failures, or safety hazards. Below are key mistakes to avoid when installing an expansion tank on a water heater.
What Happens if You Don’t Match the Water Pressure?
One of the most critical aspects of installing an expansion tank is ensuring the air pressure inside the tank matches your home’s water pressure. Failure to do so can result in an ineffective system, as the tank may not absorb the pressure fluctuations caused by thermal expansion.
If the tank’s pressure is too low, it won’t be able to handle the increased water pressure effectively, leading to unnecessary stress on your water heater and plumbing system.
To avoid this, always use a pressure gauge to measure both the water pressure in your home and the air pressure in the expansion tank. Adjust the tank’s pressure to match the system’s PSI before completing the installation. Skipping this step could lead to malfunction or a reduced lifespan of your water heater.
Why Is Improper Placement of the Expansion Tank a Problem?
The placement of the expansion tank is another common mistake. Some homeowners believe the tank can be installed anywhere along the water supply line, but incorrect placement could reduce the system’s efficiency. The expansion tank should always be installed on the cold water inlet line, close to the water heater.
Installing the tank too far from the heater can reduce its effectiveness in relieving the water pressure. Additionally, the tank should be installed in a way that allows it to be securely supported. Incorrectly mounted tanks may sag or even detach from the piping over time, potentially causing damage to your plumbing and the tank itself.
What Happens if You Overtighten the Fittings?
A frequent issue in expansion tank installation is overtightening the fittings, particularly when attaching the tank to the cold water line. While it’s important to ensure a secure connection to prevent leaks, overtightening can lead to damaged threads or fittings. This could result in small leaks that worsen over time, causing water damage or reducing the system’s efficiency.
To avoid this, tighten fittings securely but be cautious not to force them beyond their limits. Using Teflon tape on the threads can help create a watertight seal without the need for excessive force. Always check for leaks after installation by turning the water back on gradually and inspecting the connections.
Why Skipping the Pressure Check Can Lead to Failure
Many people, in an effort to complete the installation quickly, skip checking the air pressure inside the expansion tank. Since most tanks come pre-pressurized, it might seem unnecessary to check the pressure before installation.
However, the factory-set pressure might not match your home’s water pressure, and installing the tank without adjusting the pressure can result in system failure.
Skipping the pressure check could also lead to situations where the tank is either over-pressurized or under-pressurized. Both scenarios can cause excessive wear and tear on the water heater and may result in leaks or damage to your plumbing system.
Why Ignoring Local Plumbing Codes Can Cause Problems
Another common mistake involves ignoring local plumbing codes and regulations when installing an expansion tank. Different areas have specific requirements for water heaters and expansion tanks, including placement, installation practices, and pressure ratings. Failing to comply with these codes could lead to fines, penalties, or worse, dangerous system malfunctions.
Before starting the installation process, make sure to review your local building codes and regulations regarding water heater and expansion tank installations. In some cases, it may be necessary to obtain a permit or hire a licensed professional to complete the job in compliance with local laws.
Why Is Forgetting to Turn Off the Power a Safety Hazard?
Safety is paramount when working on any home appliance, and forgetting to turn off the power to your water heater is a major hazard. If your water heater is electric, failing to cut the power at the breaker box could result in electrical shock or severe injury.
For gas heaters, not shutting off the gas valve could lead to leaks or dangerous gas buildup, which poses a risk of fire or explosion.
Before beginning any work, always ensure the water heater is disconnected from its power source. Double-check the breaker or gas valve to make sure the heater is completely shut off. This simple step can prevent severe accidents and injuries during the installation process.
Understanding these common mistakes and how to avoid them, you can ensure a smoother, safer, and more effective installation of your expansion tank. Each of these issues, whether it’s mismatched pressure, improper placement, or neglected safety procedures, can lead to significant problems if overlooked, so careful attention to detail throughout the process is essential.
Conclusion
Installing an expansion tank on your water heater is a simple yet effective way to safeguard your home’s plumbing system from the effects of thermal expansion. This addition not only enhances the longevity of your water heater but also prevents potentially costly damage to pipes and fixtures due to excessive pressure buildup.
The steps outlined in this guide, you can complete the installation safely and effectively. Ensuring that you use the correct tools, check water pressure accurately, and avoid common mistakes will make a significant difference of the installation.
Properly mounting the expansion tank, securing it to the water supply, and adjusting the pressure to match your home’s system are key steps to achieving optimal performance.
If at any point you feel uncertain about the process or encounter difficulties, it is always wise to consult a professional plumber. A trained expert can ensure that the installation complies with local plumbing codes and safety regulations, providing peace of mind that your system is functioning properly.
An expansion tank is a small investment that offers big returns in terms of preventing future plumbing problems, extending the lifespan of your water heater, and maintaining consistent water pressure throughout your home.
Whether you’re handling the installation yourself or seeking professional help, this addition will contribute to a safer, more reliable, and efficient water heating system.

