Siding too close to the ground can lead to costly home damage. Moisture, pests, and rot threaten the longevity of materials like vinyl, wood, or fiber cement siding. This issue often stems from poor installation, soil buildup, or foundation settling. Addressing it promptly protects your home’s value and structural integrity.
This article explains the causes of low siding, offers practical solutions like regrading or trimming panels, and shares prevention tips. Learn how to fix siding too close to the ground with clear steps and expert insights.
Why Is Siding Too Close to the Ground a Problem?
Siding too close to the ground creates serious risks for homeowners. It invites moisture damage, pest infestations, and structural issues. These problems reduce the lifespan of siding materials and can lead to expensive repairs. Understanding the causes, risks, and warning signs helps you address the issue before it worsens.

Common Causes of Low Siding Installation
Low siding often results from specific oversights or changes over time. Poor initial installation is a frequent culprit. Contractors may fail to leave the recommended 6-8 inch gap between siding and the ground, especially on uneven terrain. Soil buildup from landscaping projects, such as adding mulch or garden beds, can also reduce clearance.
Foundation settling, which occurs naturally in homes over years, lowers the siding’s position relative to the ground. Each of these factors—installation errors, landscaping changes, and settling—contributes to siding sitting too low.
Risks of Siding Too Close to the Ground
When siding contacts or sits near the ground, it faces multiple threats. Moisture wicking is a primary concern. Water from soil seeps into materials like wood or fiber cement, causing rot and mold growth. This damage spreads upward, compromising entire siding panels. Pests, including termites, ants, and rodents, exploit the moist environment and gaps near the ground to enter the home. These infestations can weaken walls and framing.
Low siding also shortens the lifespan of materials. For example, vinyl siding may warp, while wood siding decays faster. Over time, unchecked moisture and pests can harm the home’s foundation, leading to cracks or shifts that cost thousands to repair.
Signs Your Siding Is Too Close to the Ground
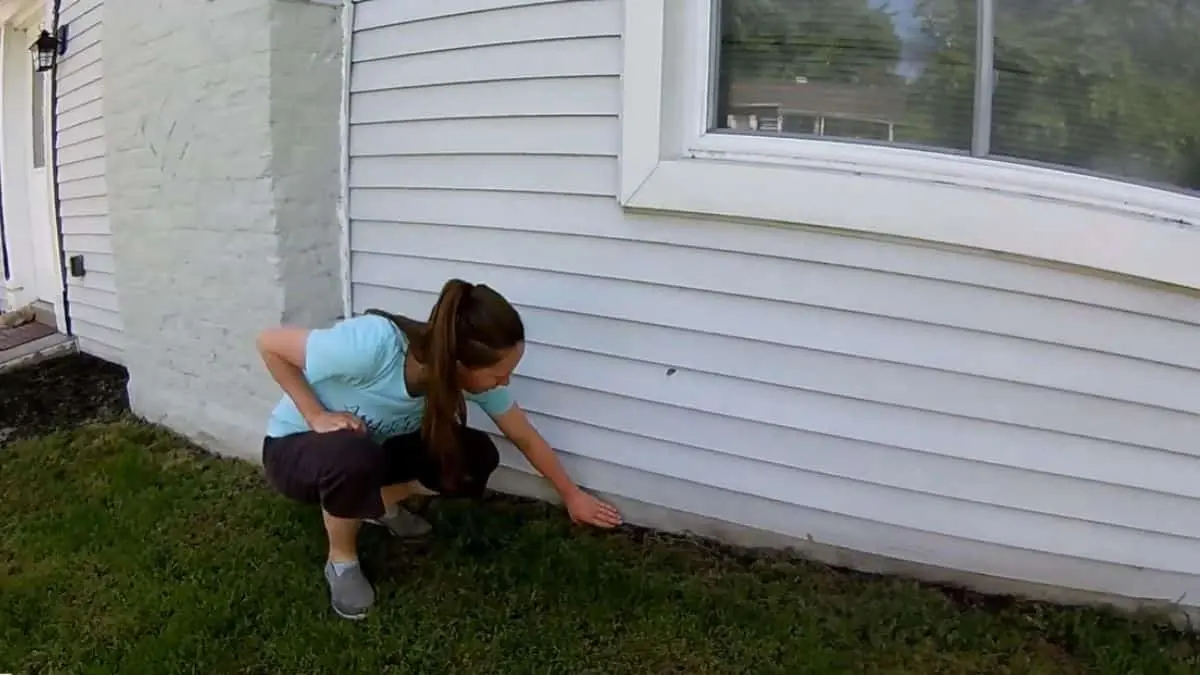
Spotting low siding early prevents extensive damage. A clear sign is visible soil contact with the siding’s bottom edge. Measure the gap; less than 6 inches indicates a problem. Water stains or discoloration at the base of siding suggest moisture infiltration. Warped panels, peeling paint, or soft spots in wood siding point to ongoing damage.
Insect activity, such as termite trails or ant nests near the base, is another red flag. Rodents may leave chew marks or small entry holes. Regularly inspecting these signs—soil contact, stains, warping, and pests—helps you catch issues before they escalate.
How to Assess Siding Proximity to the Ground
Evaluating siding proximity to the ground is the first step to fixing the issue. Proper assessment identifies whether the clearance is inadequate and reveals any existing damage. This process involves understanding clearance standards, gathering the right tools, and following specific steps to measure and inspect the siding. A thorough evaluation ensures you choose the best solution for your home.
Recommended Siding Clearance Standards
Industry standards specify a clearance of 6-8 inches between the bottom of siding and the ground. This gap prevents moisture wicking and pest entry while allowing proper ventilation. For wood siding, 8 inches is ideal due to its susceptibility to rot. Vinyl and fiber cement siding can function with a 6-inch gap, provided drainage is adequate. Local building codes may also dictate minimum clearances, especially in areas prone to heavy rain or flooding. Maintaining these standards—6-8 inches for most materials—protects siding from soil-related damage.
Tools Needed for Assessment
Accurate assessment requires a few basic tools. A measuring tape or ruler determines the exact distance between the siding and the ground. A level checks the slope of the soil to ensure it directs water away from the home. A flashlight illuminates dark areas under siding to spot hidden damage, such as mold or insect activity. Optional tools include a moisture meter to detect water infiltration and a small probe to test wood siding for softness. These tools—measuring tape, level, flashlight, and optional meters—enable a precise and comprehensive evaluation.
Steps to Evaluate Siding
Start by measuring the clearance along the entire perimeter of the home. Use a measuring tape to check the distance from the bottom of the siding to the ground at multiple points. Record measurements every 3-5 feet to account for uneven terrain. Next, inspect for signs of damage. Look for water stains, warped panels, or peeling paint on the siding’s lower sections. Use a flashlight to check for mold, rot, or pest activity in shaded areas.
Then, assess the ground’s slope with a level. The soil should slope downward at a 1-2% grade (about 1 inch per foot) away from the foundation to ensure proper drainage. Finally, note any landscaping features, like mulch or gravel, that may reduce clearance. These steps—measuring clearance, inspecting damage, checking slope, and noting landscaping—provide a complete picture of the siding’s condition.
Solutions to Fix Siding Too Close to the Ground
Fixing siding too close to the ground prevents moisture damage, pest issues, and structural risks. Solutions range from simple landscaping adjustments to advanced structural repairs. Each approach—regrading soil, trimming siding, installing flashing, or raising the foundation—offers unique benefits and challenges. Choose the method based on the severity of the issue, your budget, and DIY skills.
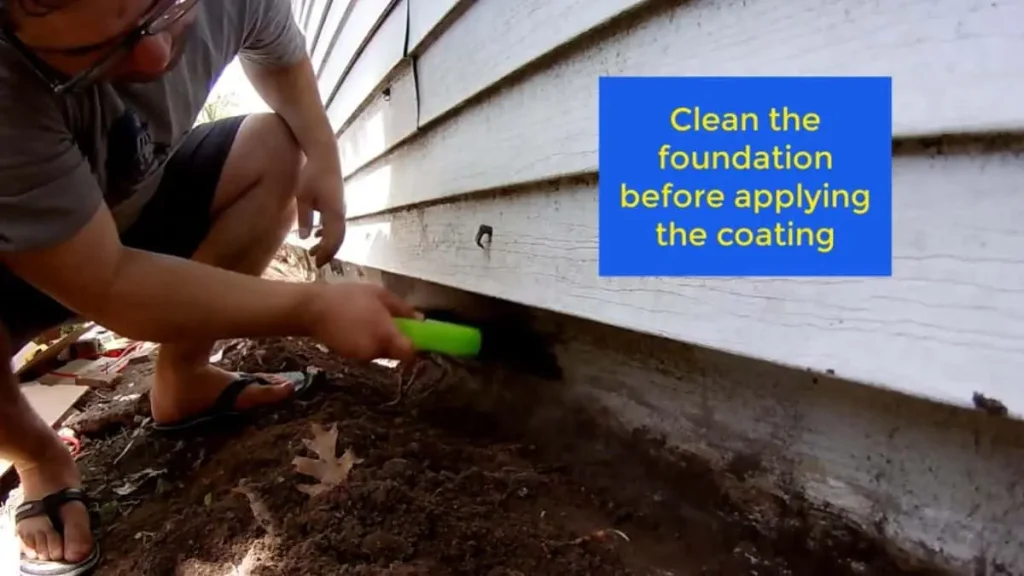
Regrade the Soil Around the Home
Regrading soil increases clearance by lowering the ground level near the siding. This method improves drainage and prevents water pooling, reducing moisture risks. It suits minor clearance issues and preserves existing siding. However, regrading requires careful planning to avoid disrupting landscaping or creating uneven terrain.
To regrade, remove soil to achieve a 6-8 inch gap between the siding and ground. Use a shovel to dig evenly along the home’s perimeter. Create a 1-2% slope (about 1 inch per foot) away from the foundation to direct water runoff. Compact the soil with a tamper to prevent settling. Add a 2-inch layer of gravel or mulch to stabilize the surface and deter erosion. Check local codes, as some areas restrict soil removal near foundations. Regrading costs $500-$2,000 for a typical home, depending on labor and materials.
Trim or Replace Siding Panels
Trimming or replacing siding panels directly raises the siding’s bottom edge. This solution restores proper clearance and improves the home’s appearance. It works well for siding with minimal damage but requires precision to maintain a seamless look. Inexperienced DIYers may struggle with matching materials or ensuring weatherproof seals.
Start by removing the bottom row of siding. Use a pry bar to detach vinyl or fiber cement panels, or a saw for wood siding. Install a new starter strip 6-8 inches above the ground, following manufacturer guidelines. Attach new siding panels, ensuring proper overlap to prevent water infiltration. Seal joints with caulk rated for exterior use. For damaged sections, replace entire panels to maintain uniformity. Costs range from $1,000-$3,000 for materials and labor, though DIY can reduce expenses to $200-$500 for small areas.
Install a Base Flashing or Drip Edge
Base flashing or a drip edge shields siding from moisture wicking. This cost-effective fix adds a metal barrier at the siding’s base, redirecting water away. It suits homes with adequate clearance but persistent moisture issues. Precise installation is critical to avoid leaks or aesthetic mismatches.
Attach corrosion-resistant metal flashing, such as aluminum or galvanized steel, along the siding’s bottom edge. Position the flashing to extend 1-2 inches below the siding and angle it outward. Secure it with exterior-grade screws or nails, spacing them 12 inches apart. Apply silicone caulk along the top edge to seal gaps. Ensure the flashing integrates with existing drainage systems, like gutters. Installation costs $300-$1,000, with DIY options as low as $100 for materials. Regular inspections ensure the flashing remains secure.
Raise the Foundation (Advanced Solution)
Raising the foundation is a permanent fix for severe cases, such as significant settling or chronic low siding. This method lifts the entire home, restoring clearance and addressing structural issues. It requires professional expertise and substantial investment, making it suitable only for extreme situations.
Consult a structural engineer to assess feasibility. Factors like soil type, home weight, and foundation condition determine viability. Hire a licensed foundation contractor to lift the home using hydraulic jacks and temporary supports. Once elevated, adjust the foundation to achieve 6-8 inch siding clearance. Reinstall siding as needed. This process costs $5,000-$20,000 or more, depending on the home’s size and complexity. Compare this to regrading or trimming, which are less invasive and more affordable for most homes.
Recommended Post: How to Update Vinyl Siding Efficiently
Preventing Future Siding Issues
Maintaining proper siding clearance protects your home from moisture, pests, and costly repairs. Preventive measures include routine maintenance, choosing durable materials, and smart landscaping. These strategies—regular inspections, material selection, and drainage-focused landscaping—ensure siding remains elevated and functional for years.
Regular Maintenance Tips
Consistent maintenance catches issues early and extends siding lifespan. Inspect siding annually to confirm a 6-8 inch clearance from the ground. Use a measuring tape to check multiple points along the home’s perimeter. Look for signs of damage, such as water stains, warped panels, or pest activity. Clean gutters every spring and fall to prevent water overflow, which can erode soil near the foundation.
Remove debris like leaves or dirt piling against siding. Schedule professional inspections every 3-5 years for hidden issues, especially in older homes. These steps—annual checks, gutter cleaning, and debris removal—cost little but save thousands in repairs.
Choosing the Right Siding Material
Selecting durable, moisture-resistant siding reduces ground-related issues. Vinyl siding resists rot and pests but can warp if water pools nearby. Fiber cement siding offers superior durability and withstands moisture better than wood, with a lifespan of 30-50 years. Wood siding, while attractive, requires 8 inches of clearance and regular sealing to prevent decay.
Pressure-treated wood or composite materials perform best for lower sections exposed to soil. Compare costs: vinyl averages $4-$7 per square foot, fiber cement $5-$10, and wood $6-$12. Choosing materials like fiber cement over wood for humid climates ensures long-term protection.
Landscaping Best Practices
Smart landscaping maintains clearance and improves drainage. Install a 4-6 inch gravel or stone border along the home’s base to deter soil buildup and allow air circulation. Avoid piling mulch or soil against siding, as they retain moisture and attract pests. Keep mulch layers under 2 inches thick and 6 inches from the siding. Plant shrubs or grass at least 12 inches from the foundation to prevent root-related soil shifts.
For areas with heavy rainfall, install French drains or swales to divert water. These measures—gravel borders, minimal mulch, spaced plants, and drainage systems—preserve siding clearance and reduce maintenance needs.
Conclusion
Siding too close to the ground risks moisture damage, pests, and costly repairs. Assessing clearance, identifying causes, and applying solutions like regrading, trimming panels, or installing flashing restore protection. Regular maintenance, durable materials, and smart landscaping prevent future issues. Act promptly to fix siding too close to the ground, ensuring your home’s durability and value for years.
You May Also Like: How to Seal the Bottom of T1-11 Siding