
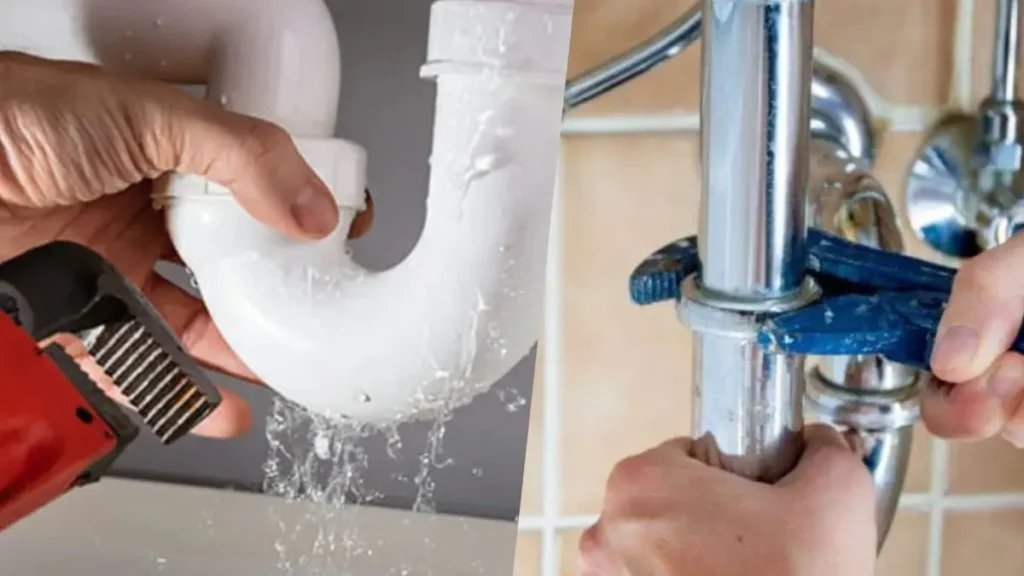
A leaking pipe under your sink can cause significant water damage, lead to mold growth, and increase your water bills. Fixing this issue promptly is essential to avoid further complications.
While it might seem like a complex task, with the right tools and knowledge, it can be a straightforward repair. This guide will provide you with step-by-step instructions on how to fix a leaking pipe under your sink.
You’ll also learn about common causes of leaks, prevention tips, and how to spot potential signs of larger plumbing issues. Whether you’re a beginner or have some plumbing experience, this guide offers all the information you need to get the job done correctly.
Common Causes of Leaks Under the Sink
Leaks under the sink are a common problem in many households, and understanding the cause is the first step in resolving the issue. Several factors can contribute to this problem, ranging from simple wear and tear to more significant structural issues. Below are some of the most frequent causes of leaking pipes beneath the sink, and how they can affect the plumbing system.
Loose or Damaged Connections
One of the most common reasons for a leak is loose or damaged connections. Over time, the nuts and bolts securing the pipes can become loose due to regular use or vibrations. If these connections are not tight enough, water can escape, leading to leaks.
Additionally, washers and gaskets, which help form a seal at the joints, can deteriorate over time. When these components degrade, the seal becomes less effective, allowing water to seep out around the connections.
Corroded Pipes
Corrosion is another frequent cause of leaks, particularly in homes with older plumbing systems. Over time, metal pipes, especially those made of galvanized steel or copper, can corrode due to exposure to moisture and chemicals in the water.
Corrosion weakens the structure of the pipe, causing small holes or cracks that lead to leaks. Corroded pipes often have visible signs, such as rust or discoloration, which indicate the need for replacement or repair. Addressing corrosion early can prevent more extensive damage to the plumbing system.
Cracks or Breaks in the Pipe
Cracks or breaks in the pipes under the sink can also result in leaks. These issues can arise from a variety of causes, such as accidental impact, freezing temperatures, or aging pipes. When the water inside the pipe freezes, it expands, causing the pipe to crack.
Once the ice melts, water leaks through the cracks. Similarly, an accidental bump or impact during routine cleaning or maintenance can cause damage. Even small cracks can lead to significant water loss over time if not addressed promptly.
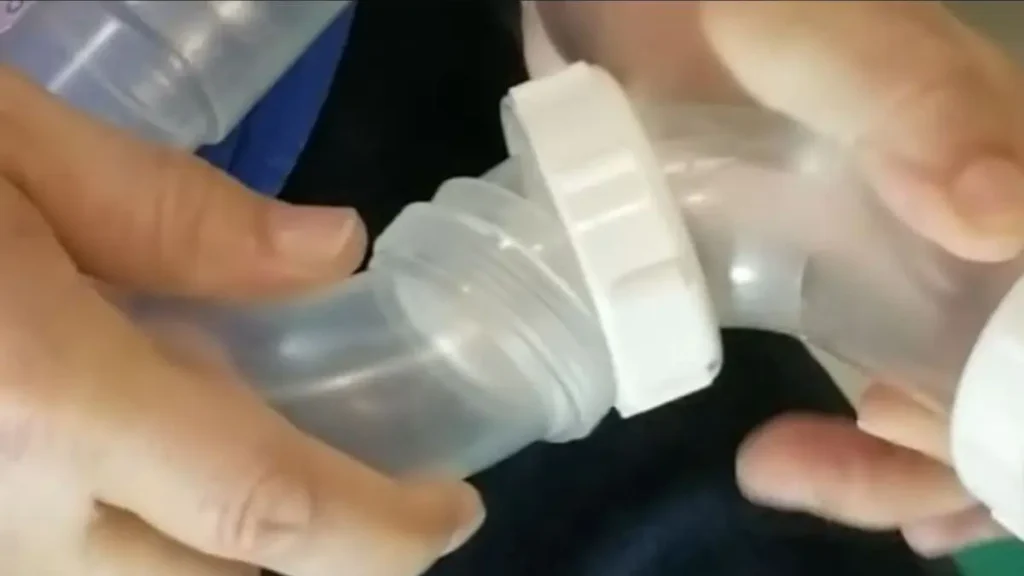
Faulty P-Trap
The P-trap, the U-shaped pipe located under the sink, plays a crucial role in preventing sewer gases from entering the home. However, this component is also prone to leaks. A faulty P-trap can develop leaks due to loose connections, clogs, or aging materials.
If the P-trap is clogged with debris, it may create pressure that forces water to leak out. Additionally, if the materials of the P-trap deteriorate, they may no longer form a proper seal, leading to leaks around the joints.
Overflow from Sink Drain
Another possible cause of leaks under the sink is overflow from the sink drain itself. This typically occurs when the sink becomes clogged, causing water to back up and overflow.
If the drain is blocked, water can escape from the seals around the drain, leading to a leak. While this may seem like a minor issue, repeated blockages can cause damage to the drain and the pipes, increasing the risk of leaks over time.
How to Prepare Before Fixing the Leak

Before starting any plumbing repair, especially under the sink, taking appropriate safety measures is essential. Working with water, pipes, and potentially hazardous tools requires caution to avoid accidents and further damage. This section will guide you through the necessary safety steps and preparations to ensure that your repair process is as smooth and risk-free as possible.
Shut Off the Water Supply
The first and most critical step before attempting to fix any leak is to shut off the water supply. Leaving the water running can cause flooding, which not only makes the repair more challenging but can also result in damage to the surrounding areas.
To shut off the water, locate the valves underneath the sink. There should be two valves: one for the hot water and one for the cold water. Turn both valves clockwise until they are fully closed.
If you cannot find these valves, you may need to shut off the main water supply to your home. Once the water is off, open the faucet to drain any remaining water from the pipes.
Unplug Nearby Electrical Appliances
If there are any electrical appliances, outlets, or devices near the sink, make sure to unplug them before beginning the repair. Water and electricity are a dangerous combination, and even a small amount of water can lead to electric shock or fire hazards.
Dry the area around the sink thoroughly, and if necessary, cover nearby outlets with plastic to prevent any accidental water exposure.
Clear Out the Area Under the Sink
To have easy access to the pipes and avoid damaging any personal items, it’s important to clear out the area under the sink. Remove any cleaning products, trash cans, or storage containers that may be obstructing the pipes.
Having a clean, open space will not only make the repair process easier but also help prevent accidental spills or breakage of any items stored under the sink. Make sure the area is well-lit so that you can clearly see the pipes and the extent of the leak.
Use Protective Gear
When working with plumbing repairs, wearing the proper protective gear is crucial. Even though this is a relatively simple repair, there are still potential hazards to consider. Start by wearing rubber gloves to protect your hands from sharp objects, chemicals, or grime that may have accumulated on the pipes.
If you’re using any tools, safety goggles will help protect your eyes from debris, rust, or water splashes. If you’re dealing with particularly old or corroded pipes, a dust mask may also be useful to avoid inhaling any particles released during the repair.
Turn Off the Power to the Garbage Disposal (If Applicable)
If your sink is equipped with a garbage disposal, ensure that it is disconnected from the power source before you start working. Garbage disposals can be dangerous if accidentally activated while you’re working on the pipes.
To disconnect it safely, either unplug the disposal from the electrical outlet or turn off the circuit breaker that powers the unit. Double-check to make sure the disposal cannot be switched on during the repair process.
Have Towels and a Bucket Ready
Even after turning off the water supply, there will likely be residual water left in the pipes that can leak out once you begin disassembling them. To prevent a mess, place a bucket directly under the pipes you’re working on to catch any excess water.
Having towels nearby is also helpful for cleaning up any unexpected spills or wiping down wet surfaces. These simple preparations will save you time and effort during the repair.
Tools You’ll Need to Fix the Leak
Fixing a leaking pipe under the sink requires the right tools to ensure the repair is both efficient and effective. Having the necessary equipment on hand before you start will save time and prevent any interruptions mid-repair. Discuss the essential tools for the job and their purpose, so you can be fully prepared for your plumbing project.
Adjustable Wrench: The Essential Tool for Tightening and Loosening
One of the most crucial tools for fixing a leak under the sink is the adjustable wrench. This versatile tool allows you to tighten or loosen nuts and fittings of various sizes on pipes and joints.
Whether you’re dealing with a P-trap, a drainpipe, or a supply line, an adjustable wrench will help you disassemble and reassemble the necessary components without causing damage.
It’s important to ensure the wrench is adjusted to fit snugly around the nut or bolt to avoid stripping it. If you don’t already have an adjustable wrench, it is worth investing in one, as it will come in handy for many home repair tasks.
Plumber’s Tape (Teflon Tape): Preventing Future Leaks
Plumber’s tape, also known as Teflon tape, is an essential material for creating a watertight seal on threaded pipe joints. When pipes are connected by screwing threads together, there’s often a slight gap that water can seep through.
Wrapping the threads with plumber’s tape before reconnecting the pipes ensures a tight, leak-free connection.
Teflon tape is particularly useful when working with fittings that might be prone to future leaks, such as supply lines or threaded pipe connections. It’s easy to apply—simply wrap it around the threads two or three times before screwing the pipes back together.
Pipe Wrench: Handling Larger Pipes with Ease
Particularly if the pipes under your sink are larger or more tightly connected, an adjustable wrench may not provide enough leverage. This is where a pipe wrench becomes useful.
Designed for gripping and turning pipes, the pipe wrench has serrated jaws that clamp onto the pipe and provide the necessary force for loosening or tightening fittings. It’s especially helpful for older, rusted, or corroded pipes that are difficult to move.
If your sink’s plumbing system uses large pipes, having a pipe wrench on hand can make the repair process significantly easier.
Plumber’s Putty: Sealing Joints and Fixtures
Plumber’s putty is a moldable sealing compound used to create watertight seals around fixtures like faucets, drains, and pipes. When applied to joints or areas where metal meets metal, plumber’s putty fills in any small gaps and prevents water from leaking through.
This tool is especially useful if your leak is coming from around the base of the sink drain or a similar fixture. After applying the putty, allow it to set for a few minutes before reattaching the fixture. It remains soft and pliable, making it easier to remove in case future repairs are needed.
Bucket and Towels: Containing Water and Preventing Messes
Although they may seem basic, a bucket and towels are indispensable tools when working under the sink. Even with the water supply turned off, residual water will still be trapped inside the pipes, which will spill out when you begin disassembling the plumbing.
A bucket will catch any water that leaks out, preventing it from soaking the cabinet or floor. Towels are also necessary for wiping up spills and keeping your workspace dry. It’s a good idea to have these ready before you begin the repair.
Pliers: Gripping and Holding Small Components
Pliers are useful for gripping and holding onto small parts, such as nuts, bolts, or washers, which may need to be adjusted or removed during the repair. Slip-joint pliers are particularly helpful for plumbing tasks, as they have adjustable jaws that can grip objects of different sizes.
If you’re dealing with small, hard-to-reach areas, or if a component is too tight to be removed by hand, pliers will provide the grip and control you need. They can also assist in holding pieces in place while you tighten or loosen them with a wrench.
Bucket Trap Wrench (for P-Trap Removal)
A specialized tool, the bucket trap wrench is designed for easily removing the P-trap under the sink. The P-trap is a curved section of pipe that traps debris and prevents sewer gases from entering your home.
If the leak is coming from the P-trap, or if you suspect a clog is contributing to the problem, you’ll need to remove this component to inspect it. The bucket trap wrench fits perfectly onto the trap, making it easy to unscrew and remove without damaging the pipe. Once the trap is removed, you can clean or replace it as necessary.
Utility Knife: Cutting Old Seals and Teflon Tape
A utility knife is another important tool to have on hand. In some cases, you may need to remove old seals, caulk, or plumber’s tape that has worn out or become damaged. A sharp utility knife will allow you to cut through these materials cleanly and precisely, making it easier to apply new seals or tape. Be sure to handle the knife carefully and store it safely when not in use.
Drain Snake: Clearing Blockages That May Cause Leaks
While not always necessary for fixing a leak, a drain snake can be an important tool if a clog is contributing to the problem. Sometimes, leaks are caused by backed-up pipes that can no longer handle the pressure of water.
A drain snake is a flexible tool designed to remove blockages from inside the pipes. If you suspect that a clog is part of the issue, using a drain snake to clear the pipes before addressing the leak itself can prevent the problem from recurring.
Flashlight: Illuminating Hard-to-Reach Areas
Finally, a flashlight is invaluable for seeing clearly while working under the sink, especially if your kitchen or bathroom has poor lighting. The space under the sink is often cramped and dark, making it difficult to inspect the pipes for cracks, loose connections, or signs of wear.
A good-quality flashlight will help you see exactly what you’re working on, ensuring that you don’t miss any crucial details during the repair process.
Step-by-Step Instructions to Fix a Leaking Pipe Under the Sink
Once you’ve gathered all the necessary tools and prepared your workspace, it’s time to fix the leaking pipe under your sink. Whether it’s a minor leak from a loose connection or a more serious issue like a crack in the pipe, following the correct steps will help ensure a successful repair.
Below are detailed instructions to guide you through the process, from identifying the exact source of the leak to reassembling the plumbing system.
Turn Off the Water Supply
Before starting any repairs, it’s essential to turn off the water supply to prevent further leaking and potential flooding. Most sinks have shutoff valves located under the sink where the water lines connect.
You should find two valves, one for hot water and one for cold water. Turn both of these clockwise until they are fully closed. If your sink doesn’t have individual shutoff valves, you may need to turn off the main water supply for your home.
After shutting off the water, open the faucet to drain any remaining water in the pipes. This will help reduce the risk of water spilling out when you begin disassembling the plumbing. Keep a bucket and towels nearby to catch any excess water.
Locate the Source of the Leak
With the water supply turned off, it’s time to locate the exact source of the leak. Start by inspecting the pipes under the sink, particularly around joints and connections, as these areas are prone to leaking. Pay close attention to any moisture or water droplets forming around fittings, P-traps, or supply lines.
If the leak is not immediately visible, try running your hand along the pipes to feel for dampness. A leak may be coming from a hidden crack in the pipe itself. If you’re unable to pinpoint the leak through visual inspection, you can turn the water back on briefly and observe where water starts seeping out.
Tighten Loose Connections
Many leaks under the sink are caused by loose connections between pipes, particularly around joints or fittings. If this is the case, the solution may be as simple as tightening the connections. Using an adjustable wrench or pliers, carefully tighten the loose nuts or fittings where the leak is occurring.
Take care not to overtighten, as this can damage the threads or cause cracks in older pipes. Tighten the connection just enough to stop the leak, then turn the water supply back on and test for any further leakage. If the leak persists or the connection feels too tight, you may need to disassemble the pipes to check for worn-out parts.
Inspect the P-Trap for Clogs or Damage
The P-trap, located directly beneath the sink, is a common area where leaks can occur. This curved section of pipe holds water to prevent sewer gases from entering your home, but it can also trap debris like food particles, grease, and soap scum. If your sink is draining slowly or leaking from the P-trap, a clog or crack could be the cause.
To inspect the P-trap, use a bucket wrench to unscrew the connections at either end of the trap. Once removed, clean out any debris that may be blocking the pipe. If you notice any cracks or damage, the P-trap may need to be replaced. After cleaning or replacing the trap, reattach it securely and check for leaks by turning the water back on.
Replace Worn-Out Washers and O-Rings
Leaks can also occur when washers or O-rings inside the pipe connections become worn or damaged. These small components are designed to create a watertight seal between fittings, but over time they can deteriorate, leading to leaks.
If you suspect that a worn washer or O-ring is causing the leak, disassemble the joint where the leak is located and inspect the washer. If it appears cracked, flattened, or otherwise damaged, replace it with a new one of the same size.
O-rings should also be checked and replaced if necessary. Apply plumber’s tape around the threads before reassembling the connection to create a tighter seal.
Apply Plumber’s Tape for Threaded Connections
For threaded connections, plumber’s tape (Teflon tape) is a simple but effective solution to prevent leaks. Before reconnecting any threaded pipe joints, wrap the threads of the male fitting with plumber’s tape. Be sure to wrap the tape in the direction of the threads, applying two to three layers to create a secure seal.
After applying the tape, screw the fittings back together, using your wrench or pliers to tighten them. This step ensures that no water will leak through the threads when the water supply is turned back on.
Once the connection is secure, test it by slowly turning the water back on and checking for any signs of leakage.
Repair or Replace Damaged Pipes
If the leak is coming from a crack or hole in the pipe itself, repairing or replacing the damaged section is necessary. For small cracks or pinhole leaks, a pipe repair kit or epoxy putty can provide a temporary fix. These kits typically involve applying a patch or wrapping the affected area with a sealing compound that hardens to stop the leak.
For larger cracks or significant damage, you may need to replace the section of the pipe entirely. Measure the length and diameter of the damaged pipe, and purchase a replacement section from your local hardware store. After cutting out the damaged portion with a pipe cutter or saw, install the new pipe by securing it with pipe connectors and tightening the fittings.
Reassemble the Plumbing and Test for Leaks
Once you’ve made the necessary repairs, it’s time to reassemble the plumbing system. Carefully reconnect the pipes, ensuring all fittings, washers, and O-rings are properly installed. Use your wrench or pliers to tighten each connection securely, but be cautious not to overtighten.
After reassembling the pipes, slowly turn the water supply back on. Start by opening the shutoff valves under the sink, then turn on the faucet to allow water to flow through the pipes. Check each connection for any signs of leaking, paying close attention to the areas where repairs were made. If no leaks are present, you’ve successfully fixed the problem.
Read Also: Low Water Pressure in Kitchen Sink After Replacing Water Heater
Prevention Tips to Avoid Future Leaks
After fixing a leaking pipe under the sink, it’s essential to take proactive steps to prevent future leaks. While occasional plumbing issues are inevitable, regular maintenance and adopting best practices can significantly reduce the chances of recurring problems.
Below are several key prevention strategies that can help keep your sink plumbing in excellent condition, ensuring long-term functionality and minimizing the risk of leaks.
Regularly Inspect Pipes and Connections
Frequent inspections of the pipes under your sink can help you spot potential problems before they escalate into major leaks. At least once every few months, take a moment to check the condition of the pipes, P-trap, and any visible joints or fittings.
Look for any signs of wear, such as corrosion, rust, or discoloration, as these are common indicators that a pipe may soon fail.
During your inspection, feel the connections for moisture or dampness, which could signal the beginning stages of a leak.
Even a small amount of condensation around fittings could indicate a slow leak that, if left unaddressed, may lead to more significant water damage over time. By identifying early warning signs and addressing them promptly, you can prevent costly repairs down the line.
Tighten Connections Periodically
Over time, the connections between pipes and fittings can loosen due to the natural expansion and contraction of materials. This is particularly common in areas where hot and cold water lines are frequently used. Loose connections can lead to slow leaks that may go unnoticed for long periods.
To prevent this, it’s a good practice to periodically tighten the nuts, bolts, and fittings under your sink. Use a wrench or pliers to gently tighten any connections that feel loose.
However, avoid overtightening, as this can cause the threads to wear down or damage the pipes. Regular tightening ensures that all connections remain secure and watertight.
Avoid Using Harsh Chemical Drain Cleaners
Although chemical drain cleaners are often marketed as quick solutions for clogged drains, they can do more harm than good when it comes to your plumbing system. Many of these products contain harsh chemicals that can corrode pipes, especially if used frequently or left in the pipes for extended periods. Corrosion weakens the pipe material, making it more susceptible to cracks and leaks.
Instead of relying on chemical cleaners, opt for safer alternatives like a plunger or a drain snake to clear clogs. You can also use natural solutions like a mixture of baking soda and vinegar to break down minor blockages without damaging your pipes.
Prevent Clogs with Proper Sink Usage
Clogged drains are a common cause of leaks, particularly when debris builds up in the P-trap or other areas of the plumbing system. Preventing clogs starts with proper sink usage.
Avoid disposing of items that can cause blockages, such as grease, coffee grounds, food scraps, and fibrous materials. These substances can accumulate in the pipes, leading to clogs that increase pressure on the plumbing and cause leaks.
For kitchen sinks, using a drain strainer can help catch food particles and debris before they enter the pipes. In bathroom sinks, avoid washing hair or other items down the drain, as these can easily get trapped in the P-trap. By being mindful of what goes down the sink, you can keep your plumbing clear and reduce the risk of future leaks.
Replace Worn-Out Washers and O-Rings
Washers and O-rings play a crucial role in maintaining a watertight seal between pipe connections. However, these components can wear out over time, especially with frequent use or exposure to high water pressure. Worn-out washers and O-rings are one of the most common causes of leaks, as they allow water to seep through the gaps in fittings.
To prevent this issue, regularly inspect the washers and O-rings under your sink and replace them as soon as they show signs of wear. If you notice that a connection is leaking or that water is seeping from a joint, the washer or O-ring may need to be replaced. By keeping these components in good condition, you can avoid unnecessary leaks and prolong the lifespan of your plumbing system.
Install Water Leak Detectors
Installing water leak detectors under your sink is a proactive way to catch leaks early, especially in areas that are difficult to monitor regularly. These devices are designed to detect moisture and alert you when water is present where it shouldn’t be.
Some advanced models can even send notifications to your smartphone, allowing you to take action before a small leak turns into a major problem.
Water leak detectors are particularly useful in kitchens and bathrooms, where plumbing systems are more prone to leaks due to frequent usage. By investing in these devices, you can gain peace of mind knowing that you’ll be alerted to potential leaks as soon as they occur.
Maintain Water Pressure at Safe Levels
High water pressure may seem like a minor concern, but over time, it can place excessive stress on your pipes and cause them to weaken or burst. Excessive water pressure is a common cause of leaks, especially in older homes with aging plumbing systems.
To prevent damage from high water pressure, it’s important to maintain your home’s water pressure at a safe level, typically between 40 and 60 psi (pounds per square inch).
If you suspect that your water pressure is too high, you can use a water pressure gauge to measure it. In cases of high pressure, installing a pressure regulator can help protect your pipes from unnecessary strain.
Upgrade Older Plumbing Materials
If your home’s plumbing system is outdated, the materials used in the pipes may be prone to corrosion, cracking, or other forms of deterioration. Older materials like galvanized steel, for example, are more likely to rust and cause leaks compared to modern materials like copper or PEX (cross-linked polyethylene).
Upgrading your plumbing system with newer, more durable materials can help prevent leaks in the long term. While this may involve a significant upfront cost, it’s a worthwhile investment in the health and safety of your home’s plumbing.
If you’re unsure whether your plumbing needs an upgrade, consulting a licensed plumber can provide valuable insight into the condition of your system and whether it’s time for replacement.
Seal Pipe Joints and Connections Properly
Even when pipes are securely connected, small gaps at the joints can lead to slow leaks over time. Applying thread sealant (pipe dope) or plumber’s tape to threaded connections during installation can help create a tight, watertight seal. These materials fill in any gaps between the threads, preventing water from escaping and reducing the risk of future leaks.
Be sure to reapply plumber’s tape or thread sealant whenever you disassemble and reconnect pipes during maintenance or repairs. This simple step can go a long way in preventing leaks and ensuring your plumbing remains leak-free for years to come.
Eco-Friendly Tips for Pipe Maintenance
Maintaining your pipes in an environmentally conscious way not only helps protect the planet but also ensures the longevity of your plumbing system. By making small, eco-friendly adjustments to your pipe maintenance routine, you can reduce water waste, minimize the use of harmful chemicals, and conserve resources. Below are some practical strategies that combine effective pipe care with a commitment to sustainability.
Reduce Water Waste with Timely Leak Repairs
One of the most significant ways to practice eco-friendly pipe maintenance is by addressing leaks as soon as they appear. Even a small, unnoticed leak can waste gallons of water each day, which adds up to a substantial amount over time. By promptly repairing leaks, you can conserve water and reduce the strain on local water systems.
In addition to fixing visible leaks, it’s important to monitor your water usage for signs of hidden leaks, which can occur behind walls or under floors. An unusually high water bill may indicate that there’s a slow leak somewhere in your home. By detecting and repairing leaks early, you not only save water but also protect your home from potential water damage.
Opt for Natural Drain Cleaners
Many commercial drain cleaners contain harsh chemicals that can harm both your plumbing system and the environment. These chemicals often end up in local water sources, where they can negatively impact wildlife and ecosystems. To maintain your pipes in a more eco-friendly manner, opt for natural alternatives when cleaning your drains.
Simple household ingredients like baking soda, vinegar, and hot water can be used to effectively clear minor clogs and maintain smooth water flow. The fizzing reaction between baking soda and vinegar helps break down debris and buildup inside the pipes without introducing harmful toxins. This approach not only keeps your plumbing safe from corrosion but also reduces the release of hazardous chemicals into the environment.
Use Water Softeners for Hard Water Issues
If your home is in an area with hard water, the high concentration of minerals like calcium and magnesium can cause scale buildup inside your pipes. Over time, this buildup can reduce water flow, damage plumbing fixtures, and lead to clogs. Using a water softener is an eco-friendly solution to prevent these issues.
Water softeners work by removing excess minerals from the water, reducing the likelihood of scale formation in your pipes. By softening your water, you improve the efficiency of your plumbing system, extend the lifespan of your pipes and fixtures, and reduce the need for harsh descaling chemicals. Additionally, water softeners help appliances like dishwashers and water heaters run more efficiently, further conserving energy and water.
Install Low-Flow Fixtures
Low-flow fixtures are an eco-friendly upgrade that can greatly reduce water consumption in your home. By installing low-flow faucets, showerheads, and aerators, you can significantly cut down on the amount of water that flows through your pipes, reducing wear and tear on the system.
Low-flow fixtures are designed to maintain water pressure while using less water overall, making them an efficient option for both environmental conservation and plumbing maintenance. Reducing water flow through your pipes helps prevent unnecessary strain on your plumbing system, minimizing the risk of leaks caused by high pressure or overuse.
Recycle Old Plumbing Materials
When upgrading or replacing sections of your plumbing system, it’s important to dispose of old materials in an environmentally responsible way. Many plumbing materials, such as copper, brass, and certain types of plastic, can be recycled instead of ending up in landfills. By recycling old pipes and fittings, you contribute to reducing the demand for new raw materials and minimize the environmental impact of waste.
If you’re working with a plumber, ask about their recycling policies and whether they can take your old plumbing materials to a recycling facility. Some plumbing companies specialize in eco-friendly practices and can ensure that used materials are properly recycled. Taking this extra step helps support sustainable practices within the home improvement industry.
Harvest and Reuse Greywater
Greywater systems are an innovative and eco-friendly way to make use of the water that would otherwise be wasted from sinks, showers, and washing machines. This gently used water can be filtered and reused for non-potable purposes like irrigation or flushing toilets, reducing your household’s overall water consumption.
Installing a greywater system not only reduces the amount of wastewater sent to treatment plants but also alleviates pressure on your plumbing system. By reusing water where appropriate, you can prevent overloading your pipes and reduce the likelihood of leaks caused by excessive use.
Regularly Maintain Pipes with Environmentally Friendly Products
Routine pipe maintenance is essential for preventing clogs and keeping your plumbing in top condition. When selecting products for cleaning or maintaining your pipes, choose those that are labeled eco-friendly or biodegradable. These products are designed to minimize harm to the environment while effectively maintaining your plumbing system.
Look for enzyme-based drain cleaners, which use natural bacteria to break down organic materials in your pipes. Unlike traditional chemical cleaners, enzyme-based solutions are non-toxic and safe for both your plumbing and the environment.
Incorporating these products into your regular maintenance routine allows you to keep your pipes clear without contributing to pollution or environmental degradation.
Reduce Plastic Pipe Usage Where Possible
While plastic pipes like PVC (polyvinyl chloride) are commonly used in plumbing systems due to their affordability and durability, they come with environmental drawbacks.
The production of plastic pipes generates a significant amount of greenhouse gas emissions, and plastic materials can take hundreds of years to break down in landfills.
Whenever possible, consider using more sustainable materials like copper, stainless steel, or PEX, which have a lower environmental impact and are often more recyclable. While these materials may be more expensive upfront, they offer long-term durability and are a more eco-friendly choice for your home’s plumbing system.
Use Solar Water Heaters to Lighten the Load on Your Pipes
Solar water heaters are an excellent way to reduce your reliance on conventional energy sources and minimize the load on your plumbing system. By using solar energy to heat water, you can lower your energy bills and reduce the strain on your water heater and associated piping.
Conventional water heaters often require frequent maintenance and can cause excessive pressure on your plumbing system if they’re overworked. By switching to a solar water heater, you reduce the amount of hot water that passes through your pipes, thereby lowering the risk of leaks and extending the lifespan of your plumbing system.
Signs of a Larger Plumbing Issue

Leaks under the sink may seem like a minor inconvenience at first, but in many cases, they can be a sign of a larger underlying problem within your plumbing system. Recognizing the early warning signs of a more serious issue can help prevent significant damage and costly repairs down the road. Below are the key indicators that the leak you’re dealing with might be part of a bigger plumbing concern.
Persistent Low Water Pressure
If you notice that water pressure throughout your home is consistently low, this could be a red flag that something is wrong beyond a simple leak under your sink. Low water pressure can result from several issues, including clogs, pipe corrosion, or even a significant leak somewhere in your plumbing system.
If the low pressure persists after addressing visible leaks or cleaning aerators on faucets, it might indicate that there’s a hidden problem that needs further investigation.
One potential cause is a crack or break in the main water line or a blocked pipe deep within the system. These issues may not be immediately obvious but can lead to more serious damage over time if left unresolved. Monitoring your home’s water pressure and noting any consistent drops can be an early indicator of a bigger plumbing problem.
Water Stains or Mold Growth
Water stains on walls, ceilings, or floors near your sink could suggest that the leak under your sink is part of a larger issue. Water damage can spread quickly, especially if the source of the leak is hidden or has been neglected for a while. Even if the leak seems minor, the water may be seeping into unseen areas, causing extensive damage over time.
Mold growth is another critical sign of a plumbing issue that extends beyond a simple leak. Mold thrives in damp, humid environments, and the presence of mold near your sink or in other areas of your home indicates that there may be hidden leaks or persistent moisture. Mold not only damages your home’s structure but also poses health risks, making it important to address the root cause of the moisture as soon as possible.
Frequent Pipe Clogs
Occasional clogs are normal in any plumbing system, but if you experience frequent clogs in your kitchen or bathroom sinks, it could point to a larger plumbing issue. Clogs that persist despite regular cleaning and maintenance might indicate that there is a deeper blockage in your plumbing system. This could be due to issues such as tree roots growing into the pipes, debris buildup, or deteriorating pipes.
Clogs can cause pressure to build up in your plumbing system, leading to cracks or breaks in the pipes. If your pipes are constantly clogging, especially in multiple areas of the home, it’s a sign that the problem may be systemic and not limited to just one pipe or fixture.
Unusual Sounds from Pipes
While some noise from your plumbing system is normal, such as the occasional sound of water running through the pipes, certain noises can indicate a larger issue. Banging, gurgling, or hissing sounds coming from your pipes could be signs of a problem that requires immediate attention.
Banging sounds, often referred to as “water hammer,” occur when the flow of water is suddenly interrupted, causing a pressure surge that makes the pipes rattle. This can be a sign of loose pipes or problems with your water pressure.
Gurgling sounds, especially when water is draining, might indicate a blockage or improper venting in your plumbing system. Hissing sounds could signal a leak in the water supply line. In any of these cases, the noises suggest that your plumbing system is experiencing stress, which could lead to more serious damage if left unaddressed.
Slow Draining Water
If the water in your sink takes an unusually long time to drain, it could be a sign of a larger plumbing problem. While slow drains are often caused by minor blockages, such as hair or food particles, they can also be a symptom of more severe issues like broken or damaged pipes. When pipes are damaged, water flow can become obstructed, leading to sluggish drainage in multiple areas of the home.
If you’ve cleared out visible clogs and the slow drainage persists, it’s worth considering that the issue may stem from a deeper blockage or a broken pipe further down the system. In these cases, the slow draining water can also put extra strain on your plumbing system, making it more prone to leaks and other damage.
Unexplained Increases in Your Water Bill
An unexpected spike in your water bill, especially if your water usage has remained the same, can indicate a hidden leak or other larger plumbing issue. Even if the leak under your sink appears small, there may be other leaks in your home that are contributing to water loss. A constantly running toilet, a broken irrigation system, or a leak in the main water line could all be responsible for a rise in your bill.
Monitoring your water usage closely and comparing it to your billing statements can help identify when something is off. If you suspect a hidden leak, it’s important to have a plumber inspect your home’s plumbing system to pinpoint the source and prevent further water waste and damage.
Corroded or Rusted Pipes
Corrosion or rust on your pipes is a clear sign that your plumbing system may be experiencing more significant issues. Over time, pipes can deteriorate due to exposure to water, air, and certain minerals in the water supply.
If you notice rust or corrosion on pipes under your sink or elsewhere in your home, it could indicate that your plumbing system is aging and at risk of developing leaks or even bursting.
Corroded pipes are more susceptible to cracks and holes, which can lead to both minor and major leaks. If the pipes under your sink are rusting, it’s likely that other areas of your plumbing system are also affected, especially if your home has older pipes. Addressing corrosion early can prevent more serious damage and costly repairs in the future.
Sewage Odors
The smell of sewage coming from your sink or drains is a sign of a significant plumbing issue that needs immediate attention. Sewer gases are not only unpleasant but can also be harmful to your health. These odors usually indicate that there’s a problem with the plumbing vents or that there’s a clog in the sewer line.
If the leak under your sink is accompanied by a foul odor, it’s essential to have your plumbing system checked for blockages or other issues in the sewer line.
These odors can be a sign of a more serious issue like a broken sewer pipe or a malfunctioning septic system, both of which require professional intervention to fix.
Foundation or Wall Cracks
Cracks in your home’s foundation, walls, or floors can sometimes be linked to plumbing problems. Water leaks, especially those that go undetected for a long time, can cause the soil beneath your home to shift, leading to cracks in the foundation or walls.
While small cracks are common in many homes, larger or expanding cracks could signal that there’s a significant plumbing issue at play.
Leaks under the sink, if left unresolved, can contribute to this type of damage over time. By addressing plumbing issues early, you can prevent water from seeping into the foundation and causing structural damage that is costly to repair.
Conclusion
Addressing leaks under your sink is vital for maintaining a safe and healthy home environment. Timely repairs can prevent water damage, mold growth, and costly plumbing issues. Remember to regularly check for signs of leaks and engage in preventive maintenance to keep your plumbing system in optimal condition.
While many minor leaks can be managed with DIY repairs, it’s crucial to recognize when professional help is needed. Persistent leaks, unusual odors, or visible damage are signs that a qualified plumber should assess your plumbing situation.
Taking action promptly not only protects your property but also promotes peace of mind. By being informed and proactive about plumbing maintenance, you can ensure a comfortable and functional living space for you and your family.

