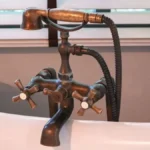
A leaky bathtub faucet wastes water, increases utility bills, and can lead to mold growth or water damage over time. If your bathtub faucet with two handles is dripping, the issue is likely due to worn-out washers, faulty valve seats, or damaged seals. Fortunately, fixing it is a straightforward DIY task that requires basic tools and minimal plumbing experience.
This guide explains how to fix a leaky bathtub faucet with two handles step by step. It covers the tools needed, how to identify the cause of the leak, and how to replace faulty components. Following these instructions will help stop the leak, prevent further damage, and restore your faucet’s proper function.
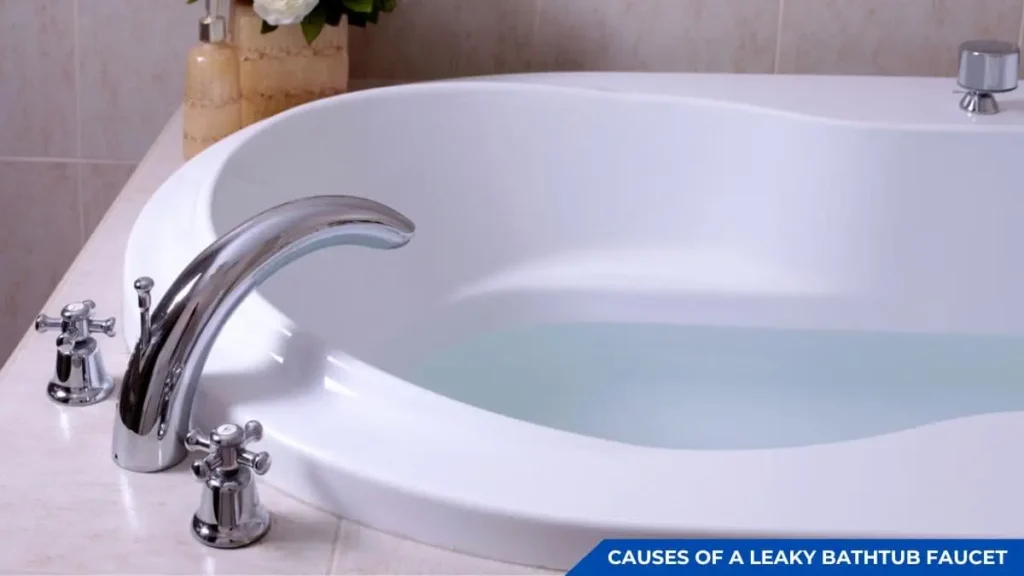
Common Causes of a Leaky Bathtub Faucet with Two Handles
A leaky bathtub faucet with two handles usually results from worn-out or faulty internal components. Identifying the cause of the leak is essential for an effective repair. Here are the most common reasons:
Worn-Out Washers
Washers inside the faucet handle create a watertight seal when the faucet is turned off. Over time, they deteriorate due to constant friction against the valve seat, leading to leaks.
Symptoms: A steady drip from the spout, even when the handles are fully closed.
Damaged Valve Seats
The valve seat connects the faucet and the spout. Mineral deposits from hard water can corrode or wear down the valve seat, preventing a proper seal.
Symptoms: Leaks that persist even after replacing the washers.
Faulty Stem or Cartridge
In a two-handle faucet, each handle controls either hot or cold water using a stem (in compression faucets) or a cartridge (in cartridge faucets). A worn-out or cracked stem/cartridge prevents the faucet from shutting off completely.
Symptoms: Water dripping from one side of the faucet, even when the handle is fully turned off.
Loose or Worn Packing Nut
The packing nut secures the faucet stem inside the handle. If it becomes loose or worn, water can leak around the base of the handle.
Symptoms: Water pooling around the faucet handles when the water is running.
Deteriorated O-Rings
O-rings are rubber seals that prevent leaks around the faucet stem. Over time, they can dry out, crack, or lose elasticity, leading to leaks
Symptoms: Dripping near the handle or base of the faucet.
High Water Pressure
Excessively high water pressure can force water through weak seals and gaskets, causing persistent drips even when the faucet is turned off.
Symptoms: The leak worsens at night when overall water demand in the household is lower.
Recommended Read: Moen Bathroom Faucet Has Low Water Pressure
Tools and Materials Needed
Repairing a leaky bathtub faucet with two handles requires the right tools and materials to ensure a proper fix. Gathering these items beforehand will make the repair process smoother and more efficient.
Essential Tools
- Adjustable Wrench – Used to loosen and tighten nuts and bolts, including the packing nut and faucet components.
- Phillips and Flathead Screwdrivers – Needed to remove faucet handles and other screws.
- Allen Wrench (if required) – Some faucet handles are secured with hex screws, which require an Allen wrench for removal.
- Pliers (Slip-Joint or Needle-Nose) – Helps grip and remove small components like O-rings and washers.
- Seat Wrench (if applicable) – Required to remove and replace the valve seat inside the faucet body.
- Plumber’s Grease – Lubricates O-rings and washers for a watertight seal and smooth operation.
- Pipe Thread Seal Tape (Teflon Tape) – Ensures a tight seal on threaded connections to prevent leaks.
- Bucket or Towel – Helps catch any water drips and keeps the work area dry.
Replacement Parts and Materials
- Washers – Rubber or nylon washers are essential for sealing compression faucets and preventing leaks.
- O-Rings – Small rubber rings that create a tight seal around the faucet stem, preventing leaks around the handle.
- Valve Seats (if needed) – If the existing valve seat is damaged, replacing it will help restore a proper seal.
- Cartridges or Faucet Stems – Depending on your faucet type, you may need to replace the entire cartridge or stem if it is worn out.
- Packing Nuts (if damaged) – If the leak is caused by a loose or corroded packing nut, a replacement may be necessary.
- White Vinegar (for cleaning) – Helps remove mineral deposits and corrosion from faucet components.
Fix a Leaky Bathtub Faucet with Two Handles: Step-by-Step
Fixing a leaky bathtub faucet with two handles involves a systematic approach to identifying and replacing the faulty components. Below is a detailed step-by-step guide to help restore proper functionality to your faucet.

Step 1: Turn Off the Water Supply
Before starting any repairs, the water supply must be turned off to prevent flooding and water damage. Locate the shutoff valves beneath the sink or near the water heater. If individual shutoff valves are not available for the bathtub, turn off the main water supply to the house.
After shutting off the water, turn on both hot and cold water handles to drain any remaining water from the faucet. This step prevents water from spilling when disassembling the faucet. Place a bucket or towel beneath the work area to catch any drips.
Step 2: Remove the Faucet Handles
The handles must be removed to access the internal components causing the leak. Look for a small screw securing each handle—this is typically located under a decorative cap or on the side of the handle. Use a flathead screwdriver to carefully pry off the cap if necessary.
Once exposed, use a Phillips head screwdriver or an Allen wrench to unscrew the handle fastener. After loosening the screw, gently pull the handle away from the faucet stem. If the handle is stuck due to mineral buildup, apply a few drops of white vinegar and let it sit for a few minutes before trying again.
Step 3: Inspect and Replace the Washer or O-Ring
A worn-out washer or O-ring is one of the most common causes of a leaky bathtub faucet. After removing the handle, use an adjustable wrench to unscrew the packing nut and extract the faucet stem.
Inspect the washer located at the base of the stem. If it appears worn, cracked, or hardened, replace it with a new washer of the same size. Apply plumber’s grease before reinstalling it to ensure a watertight seal.
Similarly, check the O-ring near the top of the stem. A damaged O-ring can cause leaks around the handle rather than the spout. If necessary, replace it with a new one and lubricate it with plumber’s grease for smooth operation.
Step 4: Inspect and Clean the Valve Seat
The valve seat is a metal component inside the faucet body that forms a seal with the washer. If the seat is corroded or rough, it can prevent the washer from sealing properly, leading to leaks.
Shine a flashlight into the faucet body to inspect the valve seat. If there are visible grooves or mineral buildup, use a seat wrench to remove the valve seat. Clean it with white vinegar or a seat grinder tool to smooth out any rough edges. If the seat is severely damaged, replacing it is the best option to prevent future leaks.
Step 5: Replace the Faucet Cartridge (if applicable)
Some two-handle faucets use cartridges instead of traditional compression washers. If your faucet has a cartridge system, inspect it for wear or cracks.
To replace the cartridge, pull it straight out from the faucet body after removing the retaining clip or nut. Ensure the replacement cartridge matches the old one, and insert it in the correct orientation. Use plumber’s grease to lubricate the seals before reassembling.
Step 6: Reassemble the Faucet and Test for Leaks
After replacing the faulty components, reassemble the faucet in the reverse order of disassembly. Tighten the packing nut securely but avoid overtightening, as it can damage internal components.
Reattach the faucet handles and secure them with screws. If decorative caps were removed, press them back into place.
Turn on the water supply and gradually open the faucet handles to check for leaks. Allow the water to run for a few minutes while inspecting for any drips around the spout or handles. If leaks persist, ensure all connections are properly tightened and verify that the correct replacement parts were used.
If you’re dealing with bathtub faucet issues, including those common in older models like the 1950s bathtub faucets, the process may vary slightly. For instance, vintage faucets often require special attention to parts like the valve stems or washers. For detailed steps on repairing a 1950s bathtub faucet, check out our guide on 1950s Bathtub Faucet Repair for more tips and insights on restoring these classic fixtures.
Preventative Maintenance Tips
Regular maintenance of a bathtub faucet with two handles can prevent leaks, extend the lifespan of the fixture, and reduce the need for frequent repairs. Implementing simple maintenance practices helps keep the faucet in optimal condition.

Check and Replace Washers and O-Rings Periodically
Washers and O-rings deteriorate over time due to constant water pressure and friction. Inspect these components at least once a year and replace them if signs of wear, cracking, or hardening appear. Using high-quality rubber washers and applying plumber’s grease can improve durability and performance.
Clean the Faucet Aerator and Spout
Mineral deposits from hard water can clog the faucet aerator and create pressure imbalances that contribute to leaks. Remove the aerator and soak it in white vinegar for 30 minutes to dissolve buildup. Wipe the spout interior with a soft brush to prevent blockages that could affect water flow.
Inspect and Clean the Valve Seat
A corroded or damaged valve seat can lead to persistent leaks even after replacing washers. Periodically inspect the valve seat for mineral buildup or rough edges. If necessary, use a seat grinder tool to smooth the surface or replace the valve seat to maintain a tight seal.
Avoid Overtightening Handles
Turning faucet handles too tightly can accelerate wear on internal components, including washers and stems. Close the handles firmly but gently to prevent unnecessary stress on the faucet mechanism. If water continues to drip when the handle is fully closed, investigate the issue instead of forcing the handle tighter.
Use a Water Softener to Prevent Mineral Buildup
Hard water contains high levels of calcium and magnesium, which can cause limescale buildup inside the faucet. Over time, this buildup can clog passages, corrode metal components, and lead to leaks. Installing a water softener reduces mineral deposits, helping the faucet function efficiently for a longer period.
Address Small Leaks Immediately
Even a minor drip can worsen over time and lead to higher water bills, mold growth, and fixture damage. If you notice a small leak, inspect the faucet immediately to identify and fix the underlying cause before it escalates into a more significant issue.
Frequently Asked Questions (FAQs)
How do I know if my bathtub faucet leak is caused by a washer or cartridge issue?
A worn-out washer typically causes a slow, steady drip from the spout and is common in compression-style faucets with separate hot and cold handles. A faulty cartridge, found in newer two-handle faucet designs, may cause inconsistent water flow, difficulty turning handles, or leaks even when the faucet is fully closed. Inspecting the internal components will help determine the exact cause.
Can I fix a leaky bathtub faucet with two handles without turning off the water?
No. Turning off the water supply is essential to prevent water from gushing out when disassembling the faucet. Locate the shutoff valves under the sink or turn off the main water supply to ensure a safe and controlled repair process.
How often should I replace the washers and O-rings in my bathtub faucet?
Washers and O-rings should be inspected annually and replaced every 2–5 years, depending on water quality and usage. If the faucet starts dripping or the handles become harder to turn, replacing these components can often fix the issue.
What should I do if my faucet still leaks after replacing the washers and O-rings?
If leaks persist after replacing washers and O-rings, check the valve seat for corrosion or debris buildup. Clean or replace the valve seat as needed. If the issue continues, the problem may be with the faucet cartridge, stem assembly, or improper installation of replacement parts.
Why is my bathtub faucet leaking even when both handles are turned off?
A leak despite closed handles indicates a worn-out valve seat, faulty cartridge, or damaged stem assembly. Hard water deposits or internal corrosion can prevent a tight seal, allowing water to pass through. Disassembling the faucet and inspecting these components will help identify the issue.
Conclusion
Fixing a leaky bathtub faucet with two handles is a straightforward DIY task that can save you money and prevent water waste. By identifying the cause—whether it’s a worn-out washer, O-ring, faulty cartridge, or corroded valve seat—you can apply the right solution and restore proper functionality to your faucet.
Using basic tools like a wrench, screwdriver, and plumber’s grease, you can complete the repair in a few simple steps. Turning off the water supply, carefully disassembling the faucet, inspecting and replacing faulty components, and reassembling everything correctly will ensure a long-lasting fix.
To prevent future leaks, regular maintenance is key. Cleaning mineral deposits, checking for signs of wear, and replacing small components before they fail can help extend the life of your faucet. If you encounter persistent leaks or damaged parts beyond simple repairs, consulting a professional plumber may be the best option.
A properly functioning faucet not only conserves water but also enhances the efficiency of your plumbing system. With the right knowledge and tools, you can confidently tackle this common household issue and keep your bathtub faucet in excellent working condition.
You May Also Read: Grohe Kitchen Faucet Removal