The underside of cabinets is often overlooked in home design, yet it plays a significant role in the overall aesthetics and functionality of your kitchen or bathroom. Exposed cabinet undersides can reveal unsightly gaps, wires, or pipes, detracting from the polished look of your space. Covering the underside of cabinets is a simple yet impactful DIY project that can transform the appearance of your room, hide imperfections, and even protect against moisture and dust.
Whether you’re a seasoned DIY enthusiast or a homeowner looking for an affordable upgrade, this guide will walk you through everything you need to know. From materials and step-by-step instructions to design tips and cost considerations, you’ll learn how to achieve a professional-looking finish that enhances your space. Let’s dive into the ultimate resource for covering the underside of cabinets and unlock the potential of this often-neglected area.
Why Cover the Underside of Cabinets?
Covering the underside of cabinets is more than just a cosmetic upgrade—it’s a practical solution that enhances both the appearance and functionality of your kitchen or bathroom. Here’s why this simple project is worth your time and effort:
Improves Aesthetics
Exposed cabinet undersides can create an unfinished look, especially if they reveal gaps, uneven edges, or visible hardware. By covering these areas, you create a seamless, polished appearance that elevates the overall design of your space.
Hides Unsightly Elements
Cabinet undersides often expose wires, pipes, or structural components that can detract from the room’s visual appeal. A well-installed cover conceals these elements, creating a cleaner and more organized look.
Protects Against Moisture and Dust
In areas like kitchens and bathrooms, cabinet undersides are prone to moisture buildup and dust accumulation. Adding a cover acts as a protective barrier, preventing damage and making cleaning easier.
Adds a Custom, High-End Look
Covering the underside of cabinets allows you to incorporate design elements like decorative trim, beadboard, or integrated lighting. These details can give your space a custom, high-end feel without the cost of a full renovation.
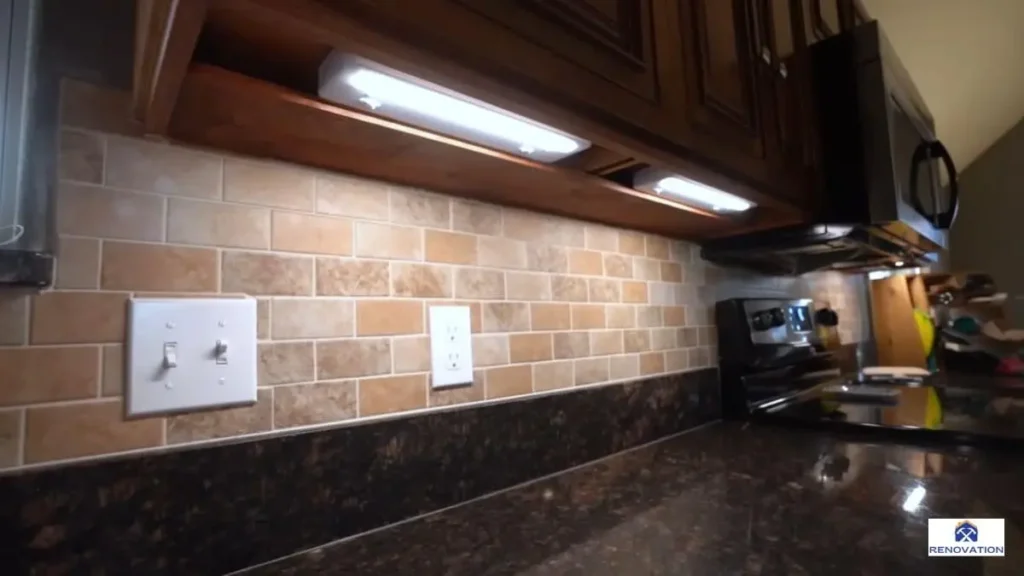
Enhances Functionality
If you choose to add under-cabinet lighting, covering the underside provides a clean surface for installation. This not only improves visibility but also adds a modern, functional touch to your space.
Materials Needed for Covering Underside of Cabinets
To cover the underside of your cabinets effectively, you’ll need a selection of materials and tools. The right supplies ensure a professional finish and make the installation process smoother. Here’s a comprehensive list of what you’ll need:
1. Primary Materials
Plywood or MDF Boards: These are affordable and easy to cut, making them ideal for creating a smooth, durable cover.
Beadboard or Veneer: For a decorative touch, beadboard adds texture, while veneer offers a sleek, finished look.
Adhesive: Construction adhesive or liquid nails will securely attach the material to the cabinet underside.
Nails or Screws: These provide additional support for a sturdy installation.
2. Finishing Supplies
Caulk: Use caulk to seal gaps and create a seamless appearance.
Paint or Stain: Choose a finish that matches your cabinets or complements your room’s design.
Sandpaper: Smooth rough edges and prepare surfaces for painting or staining.
3. Tools
Measuring Tape: Accurate measurements are essential for a precise fit.
Saw: A handsaw or circular saw will help you cut materials to the correct size.
Level: Ensure your cover is installed evenly.
Paintbrushes or Rollers: For applying paint or stain evenly.
4. Optional Materials
Decorative Trim or Molding: Add a custom, high-end look with crown molding or other trim pieces.
LED Strip Lights: Enhance functionality and aesthetics with under-cabinet lighting.
Laminate Sheets: For a durable, easy-to-clean surface.
Gathering these materials beforehand will streamline the process and help you achieve a polished, professional result. Whether you’re aiming for a simple, budget-friendly solution or a more elaborate design, having the right supplies is the first step toward success.
Step-by-Step Instructions to Cover Underside of Cabinets
Covering the underside of cabinets is a straightforward DIY project that can be completed in a few hours with the right tools and materials. Follow these step-by-step instructions to achieve a professional-looking finish:
1. Measure the Underside of Cabinets
Start by measuring the length and width of the cabinet underside you plan to cover. Use a measuring tape to ensure accuracy, and write down the dimensions. If your cabinets have irregular shapes, take multiple measurements to account for any variations.
2. Choose and Cut the Material
Select your preferred material, such as plywood, MDF, or beadboard. Transfer the measurements onto the material and use a saw to cut it to size. For precise cuts, mark the cutting lines with a pencil and double-check measurements before cutting.
3. Sand and Finish the Material
Once the material is cut, use sandpaper to smooth any rough edges or surfaces. This step ensures a clean finish and prepares the material for painting or staining. If you’re using beadboard or veneer, sanding may not be necessary.
4. Attach the Material to the Underside
Apply construction adhesive or liquid nails to the back of the material. Carefully position it against the cabinet underside, ensuring it aligns evenly. Use nails or screws for additional support, spacing them evenly along the edges. A level can help you confirm the material is straight before securing it permanently.
5. Add Finishing Touches
Fill any gaps between the material and the cabinet with caulk for a seamless look. If desired, paint or stain the cover to match your cabinets or room decor. For added elegance, install decorative trim or molding along the edges.
6. Optional: Install Under-Cabinet Lighting
If you’re incorporating LED strip lights, attach them to the underside of the cover before securing the material. This step enhances both functionality and aesthetics, providing a modern touch to your space.
Read Also: The Cheapest Way to Reface Kitchen Cabinets
Design Tips for a Professional Look
Covering the underside of cabinets is an opportunity to elevate the design of your kitchen or bathroom. With a few thoughtful touches, you can achieve a polished, custom look that complements your space. Here are some design tips to consider:
Match Colors and Finishes
Choose a paint or stain that matches your existing cabinets or walls. This creates a cohesive look and ensures the covered underside blends seamlessly with the rest of the room. For a modern twist, consider a contrasting color that adds visual interest.
Incorporate Texture with Beadboard or Veneer
Beadboard adds a classic, textured look, while veneer provides a sleek, contemporary finish. Both materials are easy to install and can transform the underside of your cabinets into a design feature.
Add Decorative Trim or Molding
Installing crown molding or trim along the edges of the cover adds a high-end, custom touch. Choose a style that complements your cabinetry, such as simple, clean lines for modern spaces or ornate designs for traditional kitchens.
Integrate Under-Cabinet Lighting
LED strip lights not only enhance functionality but also create a warm, inviting ambiance. Install the lights along the underside of the cover to illuminate countertops and highlight the new design element.
Use Durable, Easy-to-Clean Materials
In high-moisture areas like kitchens and bathrooms, opt for materials like laminate or moisture-resistant MDF. These options are durable, easy to clean, and maintain their appearance over time.
Keep Proportions in Mind
Ensure the thickness of the cover material aligns with the overall proportions of your cabinets. A cover that’s too thick or too thin can look out of place. Aim for a balanced, harmonious appearance.
Experiment with Patterns
For a unique look, consider using patterned materials like geometric designs or wood grain finishes. These can add personality and make the underside of your cabinets a focal point in the room.
Cost Considerations for Covering Underside of Cabinets
Covering the underside of cabinets is an affordable way to upgrade your kitchen or bathroom, but costs can vary depending on the materials and design choices you make. Here’s a breakdown of the cost considerations to help you plan your project:
Budget-Friendly Options
Using materials like plywood or MDF is the most cost-effective approach. These materials are inexpensive, easy to work with, and can be painted or stained to match your cabinets.
- Plywood: $20–$40 per sheet
- MDF: $25–$50 per sheet
Mid-Range Options
For a more decorative finish, consider beadboard or veneer. These materials add texture and style without breaking the bank.
- Beadboard: $20–$50 per sheet (varies by quality and design)
- Veneer: $30–$70 per sheet (for a sleek, polished look)
High-End Options
If you’re aiming for a custom, high-end look, materials like solid wood or premium laminate are excellent choices.
- Solid Wood: $50–$150 per sheet
- High-Quality Laminate: $40–$100 per sheet
- Decorative Trim or Molding: $1–$5 per linear foot
Additional Costs
- Adhesive and Fasteners: Construction adhesive costs $5–$10 per tube, and nails or screws range from $5–$15 per box.
- Paint or Stain: $20–$50 per gallon, depending on the brand and quality.
- Lighting: LED strip lights range from $20–$100, depending on length and features.
DIY vs. Professional Installation
While DIY installation can save you money, hiring a professional may be necessary for complex designs or if you lack the necessary tools.
- Professional Labor Costs: $50–$100 per hour, depending on your location and project scope.
If you’re also budgeting for a full kitchen upgrade, you might be wondering about the cost of 10×10 kitchen cabinets. Check out our detailed breakdown on 10×10 Kitchen Cabinets Cost to get a better idea of pricing and options for your renovation.
Maintenance Advice
Once you’ve covered the underside of your cabinets, proper maintenance ensures the finish remains attractive and functional for years to come. Here are some practical tips to keep your cabinet covers in excellent condition:
Regular Cleaning
Dust and grease can accumulate on the underside of cabinets, especially in kitchens. Wipe the surface regularly with a damp cloth or a mild cleaning solution. For textured materials like beadboard, use a soft-bristle brush to remove debris from grooves.
Protect Against Moisture
In areas prone to moisture, such as kitchens and bathrooms, ensure the material used is moisture-resistant. Wipe away spills or condensation promptly to prevent damage. Applying a sealant or waterproof paint can provide an extra layer of protection.
Inspect for Wear and Tear
Periodically check the covered underside for signs of damage, such as peeling paint, warping, or loose edges. Address any issues immediately to prevent further deterioration.
Touch Up Paint or Stain
Over time, painted or stained surfaces may show signs of wear. Keep some extra paint or stain on hand for touch-ups. Lightly sand the area before applying a fresh coat to ensure a smooth finish.
Maintain Under-Cabinet Lighting
If you’ve installed LED strip lights, clean the fixtures regularly to prevent dust buildup. Check the wiring and connections periodically to ensure the lights are functioning properly.
Avoid Harsh Chemicals
When cleaning, avoid abrasive cleaners or harsh chemicals that could damage the finish. Stick to gentle, non-abrasive solutions to preserve the appearance of your cabinet covers.
Frequently Asked Questions (FAQ)
Covering the underside of cabinets is a popular DIY project, but it’s natural to have questions before getting started. Here are answers to some of the most common questions:
How do I hide gaps or uneven edges?
Use caulk to fill gaps between the cover and the cabinet. For uneven edges, sand the material smooth before installation and consider adding decorative trim to conceal imperfections.
Can I add lighting after covering the underside?
Yes, you can add LED strip lights after covering the underside. However, planning for lighting during the initial installation makes the process easier and ensures a cleaner look.
How long does this project take?
The time required depends on the complexity of the design and your skill level. On average, covering the underside of cabinets takes 4 to 6 hours, including measuring, cutting, and installation.
Will covering the underside of cabinets increase home value?
While this project may not significantly increase home value, it enhances the overall appearance and functionality of your kitchen or bathroom, which can appeal to potential buyers.
Can I use this method for both kitchen and bathroom cabinets?
Yes, this method works for both kitchen and bathroom cabinets. However, in high-moisture areas like bathrooms, choose moisture-resistant materials and finishes to prevent damage.
Conclusion
Covering the underside of cabinets is a simple yet transformative DIY project that can significantly enhance the aesthetics and functionality of your kitchen or bathroom. By hiding unsightly gaps, wires, or pipes, you create a polished, cohesive look that elevates the entire space. Whether you opt for budget-friendly plywood, decorative beadboard, or high-end veneer, this project offers endless possibilities to match your style and budget.
From measuring and cutting materials to adding finishing touches like paint or lighting, each step brings you closer to a professional-looking result. With proper maintenance, your cabinet covers will remain durable and attractive for years to come.
Ready to take on this rewarding project? Gather your materials, follow the steps outlined in this guide, and enjoy the satisfaction of creating a custom, high-quality finish for your home. Don’t forget to share your before-and-after photos or ask questions in the comments—we’d love to see your creativity in action!