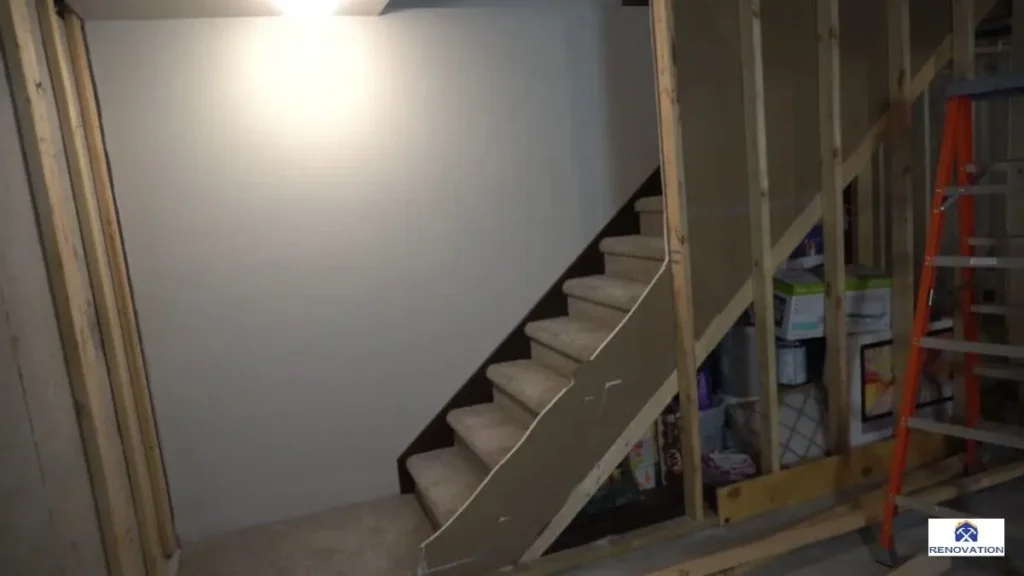
Open-concept living rooms create a spacious, airy feel that many homeowners love. Yet, when stairs lead directly into this space, the need for privacy, safety, or a fresh design can spark a change. Closing off stairs in a living room solves these issues by adding separation without sacrificing style. Homeowners often consider this upgrade to reduce noise from upper floors, keep kids and pets safe, or enhance the room’s look with a modern partition.
This guide explains how to close off stairs in your living room with practical steps and creative ideas. It covers everything from planning and methods to materials and trending designs. Whether you want a permanent wall or a temporary divider, you’ll find solutions tailored to your space and budget. Let’s explore how to transform your living room into a more functional, stylish area with these expert tips.
Why You Might Want to Close Off Stairs in Your Living Room
Stairs opening directly into a living room can disrupt the flow of a home. Homeowners choose to close them off for practical and aesthetic reasons. This section breaks down the key motivations, from clear advantages to potential hurdles, so you can decide if this project fits your needs.
Benefits of Closing Off Open Stairs
Closing off stairs in a living room offers 5 distinct advantages. Each improves daily life in measurable ways.
Noise Reduction Between Floors
Open stairs allow sound to travel freely. Footsteps, conversations, or TV noise from upstairs can echo into the living room. A partition cuts this noise by up to 50%, based on material thickness and insulation, creating a quieter space.
Enhanced Privacy
Unblocked stairs expose upper floors to view. A wall or door adds a barrier, giving family members more personal space. This matters in homes with shared living arrangements or frequent guests.
Improved Safety
Stairs pose a fall risk for young children and pets. Closing them off prevents accidents, especially in homes with toddlers—over 100,000 stair-related injuries occur annually in the U.S., per the National Safety Council. A solid barrier provides peace of mind.
Added Storage Opportunities
A new wall or half-partition creates space for built-ins. Shelves, cabinets, or cubbies can store books, decor, or toys, maximizing a living room’s functionality.
Design Upgrade
Partitions turn plain stairs into a focal point. Options like sliding barn doors or glass panels elevate the room’s style, aligning with trends like modern farmhouse or minimalist decor.
Common Challenges to Consider
Closing off stairs in a living room comes with 3 main obstacles. Understanding these helps you plan effectively.
Reduced Natural Light
Open stairs often let light flow between floors. A full wall can darken the living room, especially if windows are scarce. Studies show natural light boosts mood and energy, so this loss may affect comfort.
Altered Open-Concept Feel
Many homes feature open layouts for a spacious vibe. Adding a partition can make the room feel smaller or boxed in. This shift may clash with the original design intent.
Building Code Compliance
Local regulations dictate stair modifications. A permanent closure might violate egress rules, which require safe exit paths in emergencies. Fines for non-compliance can reach $500 or more, depending on your area.
Expert Insight: Is It Right for Your Space?
Not every living room benefits from closed-off stairs. Assess your layout—measure stair placement and room size—to see if separation enhances flow. For temporary needs, like short-term privacy, curtains or dividers work better than walls. Permanent solutions suit long-term goals, such as safety or resale value. A quick check with a contractor confirms feasibility for tricky setups.
Planning Your Staircase Separation Project
Transforming your living room by closing off stairs starts with solid planning. This step ensures the project aligns with your goals, budget, and home’s structure. Below, explore the key aspects to consider for a smooth, successful staircase separation.
Assessing Your Living Room Layout
A well-planned layout prevents costly mistakes. Start by measuring the stairs—width, height, and depth—to determine the space you’re working with. Standard stair widths range from 36 to 48 inches, but yours may differ. Next, evaluate the surrounding area. Note furniture placement, doorways, and traffic patterns. A cramped layout with stairs near a sofa might need a slim partition, like a sliding door, to maintain flow.
Check for structural elements too. Load-bearing walls or beams near the stairs affect what you can build. Knocking on the wall—if it sounds solid—or consulting blueprints reveals these details. This assessment shapes your design and avoids surprises during installation.
Setting a Budget for Closing Off Stairs
Costs vary widely based on your approach. A DIY curtain setup might run as low as $50, while a professional full-wall installation can hit $2,000 or more. Break it down: materials like drywall cost $10-$15 per sheet, and a barn door kit averages $200-$500. Labor, if hired, adds $30-$50 per hour, depending on your location.
Factor in permits too—some cities charge $100-$300 for structural changes. Decide between DIY and pro help early. Simple projects suit hands-on homeowners, but complex builds with plumbing or electrical adjustments need expertise. Set a clear budget to keep expenses in check.
Understanding Local Building Codes
Regulations protect safety and compliance. Most areas require stairs to meet specific standards, like a minimum 36-inch width and 6-foot-8-inch headroom. Closing off stairs might trigger egress rules—emergency exit paths must stay clear. For example, a second-floor bedroom needs a window or door for escape if stairs are blocked.
Contact your local building department to confirm rules. Permits may be required for permanent walls, costing $50-$200. Ignoring codes risks fines up to $1,000 or forced removal of the work. A quick call or online check saves headaches later.
Pro Tip: Complex layouts demand extra care. Hire a contractor or designer if stairs sit near HVAC ducts or electrical panels. They spot issues—like poor ventilation—that DIYers might miss. This small investment, often $100-$300 for a consultation, ensures a safe, functional result.
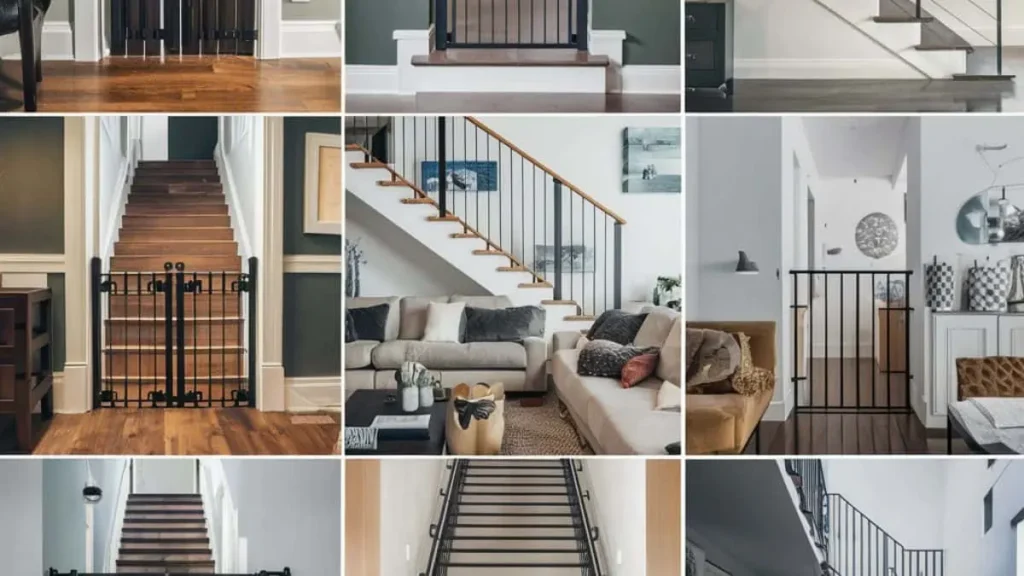
Methods to Close Off Stairs in a Living Room
Closing off stairs in a living room offers multiple approaches, each suited to different needs and spaces. From permanent walls to flexible dividers, these 4 methods provide practical solutions. Explore the details below to find the best fit for your home.
Installing a Full Wall Partition
A full wall creates a solid barrier between the living room and stairs. This method suits homeowners seeking maximum separation.
Benefits
A wall blocks noise by up to 60%, depending on insulation, making it ideal for quiet living spaces. It also hides the stairs completely, boosting privacy. Built-in shelves or niches can add 10-20 square feet of storage, perfect for books or decor.
How-To Overview
Frame the wall with 2×4 studs, spaced 16 inches apart, and secure them to the floor and ceiling. Attach drywall sheets—typically $10 each—and seal joints with tape and compound. Finish with paint or wallpaper. The process takes 1-2 days for a skilled DIYer.
Challenges
This setup blocks light flow, darkening the room if windows are limited. It’s also permanent, requiring demolition to reverse. Permits may cost $100-$300, depending on local codes.
Using Sliding Doors or Barn Doors
Sliding doors offer a stylish, movable option. They balance separation with accessibility.
Benefits
These doors save space—needing just 2-3 inches of wall clearance—unlike swinging doors. They add flair, with barn doors trending in rustic homes. A single panel can cover a 36-inch stair opening, providing quick privacy.
How-To Overview
Install a track system above the stairs, costing $50-$150. Hang a door panel—wood or glass, $100-$400—on the track. Ensure the track supports the weight; most hold up to 200 pounds. Installation takes 2-4 hours.
Best Practices
Choose lightweight materials like hollow-core wood to ease sliding. Level the track precisely to prevent jams. Add a handle for smooth operation.
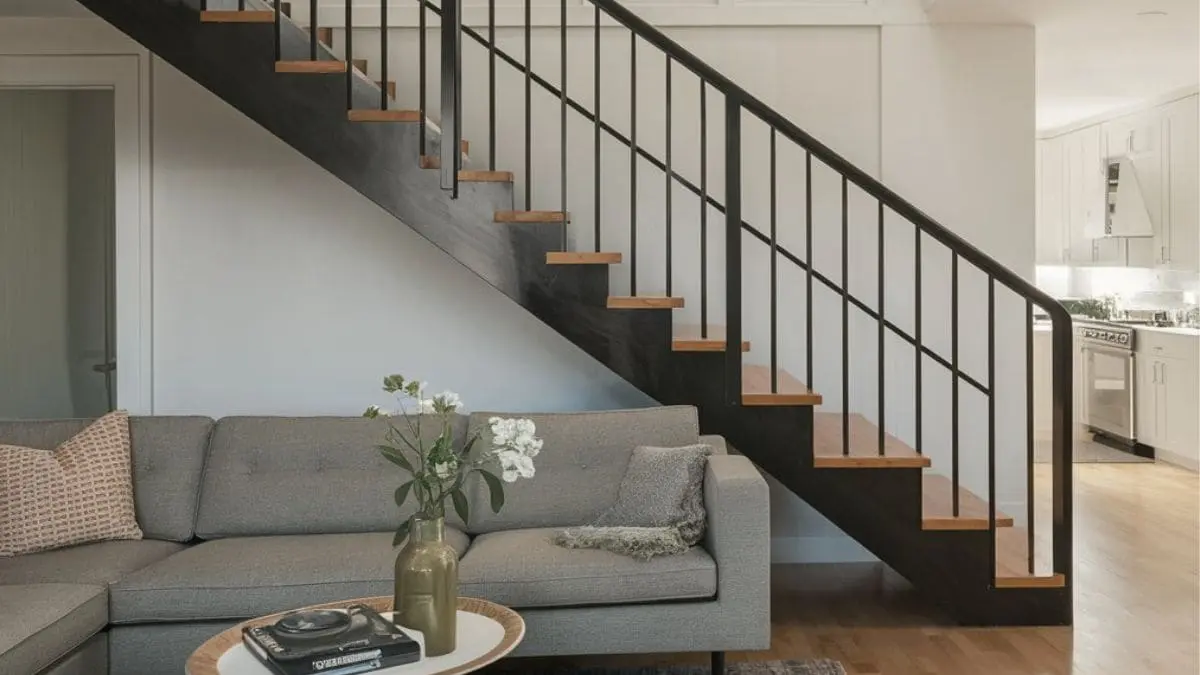
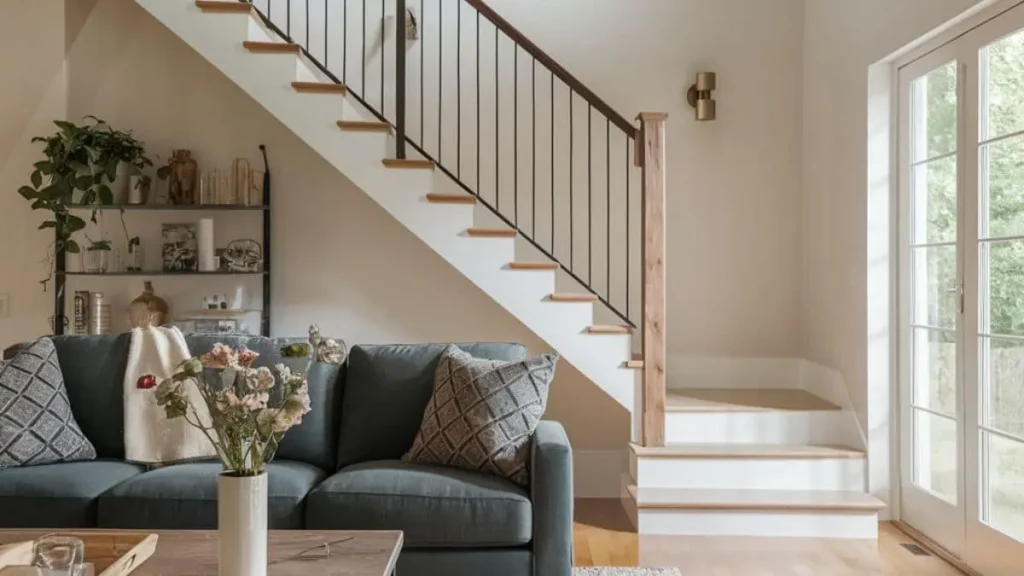
Adding a Half Wall or Railing Upgrade
A half wall or solid railing keeps an open feel while adding a barrier. This works well in smaller living rooms.
Benefits
Half walls, typically 36-42 inches high, maintain light and air circulation. They reduce fall risks without closing off the space fully. Upgrading open risers to solid panels costs $50-$200 and enhances safety.
How-To Overview
Build a knee wall with 2×4 framing and drywall, or attach wood panels to existing railings. Secure the base to the floor and finish with trim or paint. This takes 4-6 hours for a basic setup.
Temporary Solutions: Curtains or Room Dividers
Curtains and dividers provide a fast, reversible fix. They suit renters or budget-conscious homeowners.
Benefits
Curtains cost $20-$50 and install in under an hour, offering instant privacy. Freestanding dividers, like folding screens at $75-$150, move easily. Both come in countless styles to match decor.
How-To Overview
Hang curtains from a ceiling rod—$10-$30—spanning the stair width. Use heavy fabrics like velvet to dampen sound. For dividers, position a 48-inch-wide screen at the stair base and adjust as needed.
Materials and Tools for Closing Off Stairs in a Living Room
Selecting the right materials and tools streamlines your staircase separation project. The table below details options for partitions, essential equipment, and expert tips to close off stairs in a living room effectively. Costs reflect averages based on home improvement industry standards.
| Category | Item | Description & Use | Average Cost | Expert Insight |
| Materials for Partitions | Drywall | Used for full walls; cuts noise by up to 50% with insulation. Sold in 4×8-foot sheets. | $10-$15 per sheet | Pair with soundproofing foam for max noise reduction. |
| Wood (2×4 Studs) | Frames walls or half walls; standard spacing is 16 inches. | $3-$5 per stud | Opt for kiln-dried wood to prevent warping over time. | |
| Glass Panels | Creates modern, light-friendly barriers; fits sliding doors or fixed partitions. | $100-$300 per panel | Choose tempered glass (1/4-inch thick) for safety and durability. | |
| Fabric (Curtains) | Temporary option; heavy fabrics like velvet block sound better than cotton. | $20-$50 per panel | Hang floor-to-ceiling for a polished look and better coverage. | |
| Bamboo (Dividers) | Lightweight, eco-friendly screens for temporary separation; typically 48 inches wide. | $75-$150 per screen | Ideal for renters; easy to move and store when not in use. | |
| Essential Tools | Power Drill | Drives screws into studs or tracks; a cordless model with 18V power works best. | $50-$150 | Use a drill bit set for versatility across wood and drywall. |
| Level | Ensures straight walls or tracks; a 24-inch model offers precision. | $10-$30 | Check level at multiple points to avoid uneven installations. | |
| Measuring Tape | Measures stair width and height; a 25-foot tape handles most home projects. | $5-$15 | Double-check measurements to avoid material waste. | |
| Saw | Cuts wood or drywall; a circular saw speeds up framing, while a handsaw suits small jobs. | $40-$100 | Wear safety gear; a fine-tooth blade gives cleaner drywall cuts. | |
| Paint or Finishes | Customizes walls or doors; a gallon of latex paint covers 350 square feet. | $30-$50 per gallon | Use primer first on drywall for even color and durability. | |
| Pro Recommendation | Reclaimed Wood | Sustainable choice for doors or accents; adds rustic charm. | $5-$10 per board foot | Source from local salvage yards to cut costs and support eco-friendly builds. |
Step-by-Step Guide to Close Off Stairs (DIY Approach)
Closing off stairs in a living room with a DIY approach saves money and adds a personal touch. This guide outlines 4 clear steps to build a full wall partition—a popular, permanent option. Adapt these steps for sliding doors or half walls by adjusting materials. Expect a weekend project, around 12-16 hours total, for a 36-inch-wide stair opening.
Step 1: Plan and Measure
Accurate planning prevents errors. Start by sketching your design on paper. Include the stair width, height, and partition placement. Measure the stair opening with a 25-foot tape—standard widths range from 36 to 48 inches. Note the ceiling height, typically 8 feet, and check for obstacles like baseboards or outlets.
Assess the surrounding space too. A living room with 100 square feet might feel cramped with a full wall, so consider light flow and furniture layout. Mark stud locations on the floor and ceiling with a stud finder—$10-$20 at hardware stores—to anchor your frame securely.
Step 2: Gather Materials and Tools
Preparation keeps the project moving. For a full wall, collect 2×4 studs ($3-$5 each, 6-8 needed), drywall sheets ($10-$15 each, 2-3 sheets), and screws ($5 per box). Add joint compound ($10) and tape ($5) for finishing. Paint or wallpaper—$30-$50—customizes the look; a gallon covers 350 square feet.
Tools include a power drill (18V recommended, $50-$150), circular saw ($40-$100), level ($10-$30), and measuring tape ($5-$15). Renting tools cuts costs if you don’t own them—Home Depot offers drills for $20/day. Lay everything out before starting to avoid mid-project trips.
Step 3: Install Your Partition
Construction brings the plan to life. Build the frame first. Cut 2x4s to fit the stair width and ceiling height. Secure a bottom plate to the floor and a top plate to the ceiling with 3-inch screws, spacing studs 16 inches apart. Check alignment with a level at each step. This takes 2-4 hours.
Next, attach drywall. Cut sheets to size with a utility knife or saw—score and snap for clean edges. Screw them to the frame every 12 inches, using 1.25-inch drywall screws. Cover seams with tape and apply joint compound, smoothing with a putty knife. Let it dry for 4-6 hours, then sand lightly. This stage spans 6-8 hours.
Step 4: Finish and Decorate
Final touches polish the project. Apply a primer coat to the drywall—$15 per gallon—to seal it. Follow with two coats of paint, drying 2 hours between each. A 10×10-foot wall uses about half a gallon. Add trim, like baseboards ($1-$2 per foot), along the edges for a clean look. Installation here takes 3-4 hours.
Enhance the wall with decor. Mount shelves—$20-$50—for storage or hang art to match your style. LED strip lights ($15-$30) along the top edge add ambiance and offset light loss from the closure.
Safety Tip: Stability matters. Secure all studs and drywall firmly—loose frames risk collapse. Test the wall by pushing gently; it shouldn’t wobble. If stairs lead to a bedroom, ensure a second egress, like a window at least 24 inches wide, meets local codes for emergency exits.
Hiring a Professional vs. DIY: What’s Best for You?
Deciding how to close off stairs in a living room comes down to two paths: hiring a professional or tackling it yourself. Each option suits different skills, budgets, and project scopes. This section breaks down when to call in an expert and when DIY makes sense, helping you choose wisely.
When to Call a Pro
Professionals handle complex or high-stakes jobs with precision. Certain scenarios demand their expertise for safety and quality.
Complex structural changes top the list. If your stairs sit near load-bearing walls—common in 30% of two-story homes, per construction data—a contractor ensures stability. Cutting into these walls without support risks collapse, costing $5,000-$10,000 to fix. Pros use tools like laser levels and consult engineers, finishing in 2-3 days versus a week for DIYers.
Code compliance also favors experts. Permanent walls might need permits—$100-$300—and must meet egress rules, like a 36-inch-wide exit path. Violations lead to fines up to $1,000 or forced removal. Contractors navigate these laws, with 90% of licensed pros aware of local standards, per industry surveys.
High-end finishes justify the cost too. Custom sliding doors with glass panels ($500-$1,500) or intricate built-ins require carpentry skills. A pro’s work boosts resale value—remodels can increase home prices by 5-10%, according to the National Association of Realtors—while DIY errors might detract.
When DIY Makes Sense
DIY shines for simpler, budget-friendly projects. It fits homeowners with basic skills and clear goals.
Temporary solutions like curtains or dividers need minimal effort. A curtain rod and fabric—$20-$50 total—install in under an hour with a drill. Folding screens ($75-$150) require no tools, just placement. These reversible options suit renters or those testing a layout.
Small budgets favor DIY too. A full wall costs $150-$300 in materials—studs, drywall, paint—versus $1,500-$2,000 with labor. A 2025 Home Depot report shows DIYers save 50-70% on basic remodels. Time investment is higher—12-16 hours—but tools like a $50 drill pay off long-term.
Hands-on homeowners thrive here. Basic tasks—framing a half wall or painting—use skills like measuring and cutting, taught in free online tutorials. Success rates hit 85% for DIYers with prior home repair experience, per a Lowe’s study, making it rewarding and practical.
Read Also: Stairs Separating from Wall: Quick Fixes
FAQs: Closing Off Stairs in a Living Room
How can I close off stairs in my living room without losing light?
Glass panels or sliding doors maintain brightness while adding separation. A 36-inch-wide glass panel, costing $100-$300, lets light flow between floors, unlike solid walls.
What’s the cheapest way to close off stairs in a living room?
Curtains or freestanding room dividers start at $20-$50. A ceiling-mounted curtain rod with heavy fabric installs in 30 minutes, offering an affordable, reversible fix.
Do I need a permit to close off stairs in my living room?
It depends on local codes. Permanent walls often require permits ($50-$200) to meet egress rules, like a 24-inch-wide exit window. Check your city’s building department online or by phone.
Can closing off stairs increase home value?
Yes, by 5-10% if it improves safety, privacy, or functionality, per the National Association of Realtors. Avoid over-restrictive designs that clash with open-concept trends, which could lower appeal.
Conclusion
Closing off stairs in a living room transforms your space with added privacy, safety, and style. Whether you choose a full wall, sliding doors, or a simple curtain, this guide offers practical steps and ideas to suit your needs. Plan carefully, pick the right method, and decide between DIY or professional help to match your budget and skills. With the right approach, your living room becomes more functional and inviting—ready to enjoy for years to come.