

Stair stringers provide critical support for staircases, acting as the framework that holds each step in place. Many stair installations rely on metal brackets to secure stringers to decks, floors, or other structures. However, not all projects require brackets.
Attaching stair stringers without brackets is a common approach in residential construction, especially when builders want a cleaner appearance or a more integrated connection between the stringers and the structure. This method can also reduce hardware costs and create a more seamless transition between stairs and surrounding surfaces.
There are 4 primary methods to attach stair stringers without brackets, including direct attachment to a ledger board, securing stringers to concrete, resting stringers on a beam, or fastening them directly to side framing. Each method offers specific benefits depending on the stair design, load requirements, and material type.
This guide explains how to attach stair stringers without brackets, detailing tools, materials, and step-by-step methods to ensure safe and code-compliant installation.
The Stair Stringers and Their Role
Stair stringers are the structural components that support and shape a staircase. These long, diagonal boards run along the sides of the stairs, providing the foundation for the treads (horizontal steps) and risers (vertical portions). Without properly installed stringers, stairs cannot safely bear weight or maintain structural integrity.
There are 2 primary types of stair stringers:
- Open stringers – The treads sit on top of the notched sections cut into the stringer. This design exposes the side profile of each step, making it common for outdoor decks or modern designs.
- Closed stringers – The treads fit into routed or recessed grooves within the stringer, hiding the profile of each step. This style is common for interior stairs.
The role of stair stringers includes:
- Weight Distribution: Stringers distribute the weight of anyone using the stairs evenly across the supporting structure, reducing stress on individual steps.
- Structural Stability: They anchor stairs to the ground, deck, or framing, preventing lateral movement or shifting over time.
- Code Compliance: Most building codes require stringers to meet specific size, spacing, and load capacity requirements to ensure safe use.
Both indoor and outdoor staircases rely heavily on properly attached stringers to maintain safety, durability, and structural performance. Whether using brackets or not, securing stair stringers directly to framing, beams, or footings requires precise cuts, alignment, and fastening techniques to avoid uneven stairs, movement, or structural failure.
Tools and Materials Needed to Attach Stair Stringers Without Brackets
Attaching stair stringers without brackets requires accurate cutting and strong fastening. Below is a table of essential tools and materials needed for this process.
| Category | Tools & Materials |
| Measuring & Marking | Tape measure, speed square, pencil |
| Cutting Tools | Circular saw, handsaw, reciprocating saw (for adjustments) |
| Fasteners | Exterior-grade screws, lag bolts, structural nails |
| Drilling & Driving | Power drill, impact driver, drill bits |
| Support Materials | Pressure-treated wood (for stringers), ledger board, concrete anchors (if attaching to concrete) |
| Leveling Tools | 4-foot level, string line |
| Safety Gear | Safety glasses, gloves, hearing protection |
Methods to Attach Stair Stringers Without Brackets
Stair stringers can be securely attached without brackets using several proven methods. The best approach depends on the stair design, location, and supporting structure. Below are 4 reliable methods for attaching stair stringers without brackets, covering everything from deck stairs to enclosed indoor staircases.
1. Direct Attachment to a Ledger Board (Most Common Method)
Directly attaching stair stringers to a ledger board is the most common method for deck stairs and exterior steps connected to a structure. In this method, the top of each stringer is cut with a horizontal flat notch, allowing it to rest flush against the ledger.
To secure the stringers:
- The notched top section of each stringer sits directly against the face of the ledger board.
- Structural screws, lag bolts, or carriage bolts fasten the stringers through the face into the ledger.
- Pre-drilling the holes helps prevent wood splitting and ensures the fasteners sit flush.
This method works best when the ledger is properly anchored to the structure, such as a deck rim joist, ensuring the ledger can bear the stair load. Stringers must align evenly and sit at the correct pitch to ensure proper step height and tread depth.
Key benefits:
- Strong, direct connection to the structure.
- No visible hardware, creating a clean appearance.
- Works well for outdoor stairs with wood framing.
The ledger board must be pressure-treated for outdoor use, and fasteners must be corrosion-resistant for long-term durability.
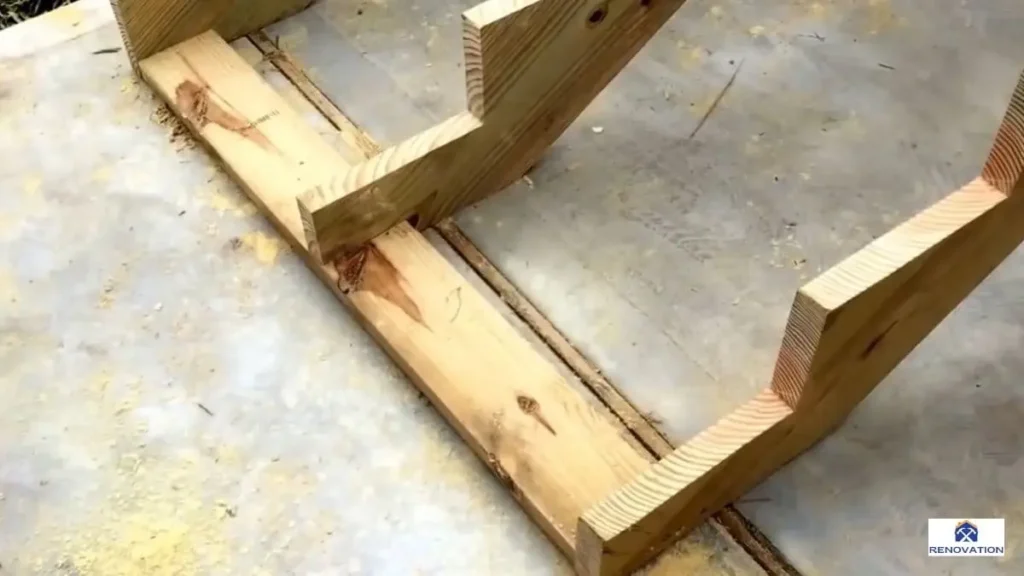
2. Attaching to a Concrete Slab (For Ground-Level Stairs)
When building stairs that terminate on a concrete pad or slab, stringers can be attached directly to the concrete using anchors and treated wood plates. This method is common for stairs leading down to patios, sidewalks, or driveways.
The process involves 3 steps:
- A treated 2×6 or 2×8 plate is securely fastened to the concrete slab using concrete anchors or wedge bolts.
- The base of each stringer is notched to fit over the plate, allowing the stringers to sit firmly on the slab.
- Screws or lag bolts are driven through the side of each stringer into the plate for lateral stability.
This attachment method ensures the stringers resist lateral shifting while distributing weight evenly onto the slab. It’s important to check that the concrete surface is level and free of cracks before installation.
For long-term durability, all wood used at the base must be pressure-treated for ground contact, and all fasteners must be rust-resistant.
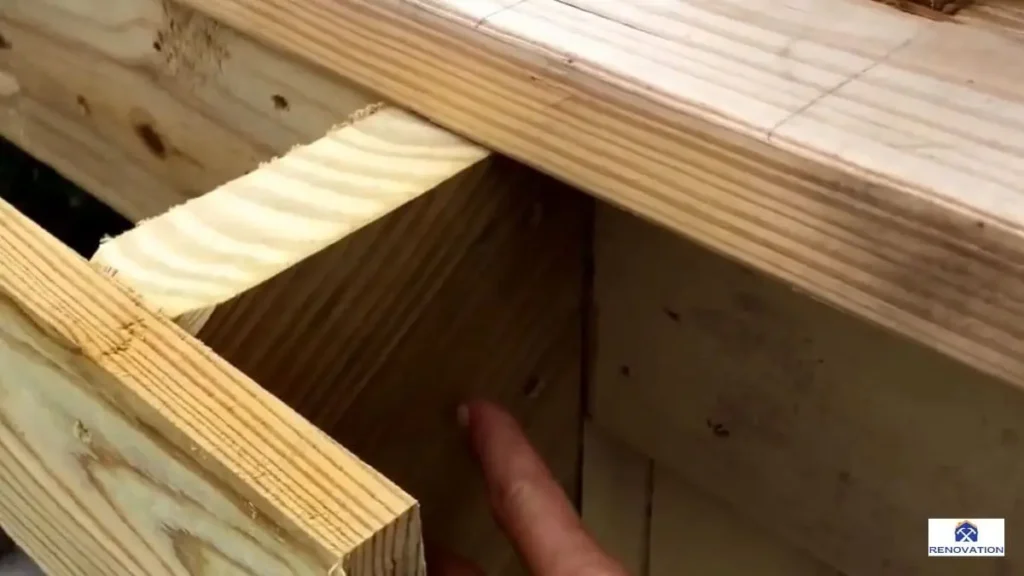
3. Notched Stringer Over Support Beam (For Deck Stairs)
For deck stairs, especially freestanding staircases, stringers can rest directly on a support beam or joist. This method avoids the need for brackets by using notched stringers that fit directly over the beam.
Installation involves cutting each stringer with a horizontal notch at the base, allowing the stringers to sit securely on the beam. Once positioned, the stringers are fastened to the beam using screws, lag bolts, or structural nails driven at an angle (toe-screwing) to hold them in place.
Key considerations:
- The beam must be wide enough to support the full width of each stringer.
- Stringers must sit flush across the entire beam surface to avoid movement.
- For extra security, blocking or cleats can be installed on the sides of the stringers to prevent lateral movement.
This method works well for stairs on raised decks where the lower end of the stairs rests on a horizontal beam rather than the ground. Like all exterior connections, fasteners and wood must be weather-resistant.
4. Side Mount to Framing (For Enclosed Stairs)
For interior stairs framed within walls, stringers can be attached directly to the side framing using ledger strips or framing screws. This method eliminates the need for brackets while providing a hidden, secure attachment.
The process involves installing a continuous ledger strip along each wall or side framing member. The stringers sit directly on these strips, which are securely fastened to the framing using structural screws. Additional screws or nails are driven through the sides of the stringers into the studs or framing for extra stability.
This approach is commonly used for basement stairs, attic stairs, or staircases enclosed between walls. It provides strong side-to-side bracing, keeping stringers locked in place within the stair opening.
Advantages include:
- No exposed hardware.
- Secure attachment directly to the structure.
- Excellent lateral support from the enclosing walls.
If you’re attaching stair stringers directly to a joist, understanding the right techniques, fasteners, and code requirements is equally important to create a secure and durable connection. For detailed steps, check out our comprehensive guide on how to attach stair stringers to joist, which covers best practices for both interior and exterior stair installations.
Best Practices for Secure Stair Stringer Installation
Attaching stair stringers without brackets requires careful attention to detail to ensure the stairs are structurally sound and safe for long-term use. Following best practices during installation helps prevent issues like shifting, sagging, or uneven steps. These methods apply whether the stringers connect to a ledger board, concrete slab, support beam, or side framing.
Use High-Quality, Pressure-Treated Lumber
Stair stringers, especially for outdoor stairs, must withstand moisture, ground contact, and heavy foot traffic. Pressure-treated lumber rated for structural use (such as #2 or better Southern Yellow Pine) resists rot and insect damage. For interior stairs, dry, straight framing lumber ensures accurate cuts and reduces the risk of warping.
Ensure Precise Stringer Cuts and Consistent Step Dimensions
Accurate stringer layout and cutting directly impact the strength and safety of the stairs. Each riser and tread must be uniform to avoid uneven steps, which can lead to tripping hazards. Stringers should also maintain full contact with the supporting surface, whether it’s a ledger, concrete pad, or support beam. Gaps between the stringer and support can lead to movement and instability.
Pre-Drill Fastener Holes to Prevent Splitting
When driving screws or lag bolts directly into stringers, pre-drilling prevents wood from splitting, particularly near the stringer ends. This step ensures fasteners grip securely without weakening the stringer edges.
Use Proper Fasteners for Each Connection Type
Structural screws, lag bolts, or carriage bolts provide the strongest connection between stringers and supporting structures. All fasteners must be long enough to penetrate deep into the ledger, concrete plate, or framing for maximum holding power. For outdoor stairs, fasteners should be galvanized, stainless steel, or rated for exterior use to resist corrosion.
Check and Reinforce Lateral Stability
Even when securely fastened, stringers can shift over time if lateral movement isn’t controlled. Installing blocking between stringers near the top and bottom helps prevent twisting or separation. For enclosed stairs, side framing and ledger strips add lateral bracing, keeping stringers tightly in place.
Common Challenges When Attaching Stair Stringers Without Brackets
Attaching stair stringers without brackets can result in several challenges, especially if proper techniques, tools, and materials aren’t used. Unlike pre-made brackets that simplify attachment and distribute weight evenly, direct mounting methods rely entirely on precise cuts, strong fasteners, and accurate positioning. Below are the most common challenges faced during installation.
Achieving Strong, Load-Bearing Connections
Without brackets, the strength of the connection between the stringers and the supporting structure depends entirely on fastener placement, stringer contact area, and the type of wood used. If fasteners miss the framing, are undersized, or don’t penetrate deeply enough, the stringer may loosen over time.
For outdoor stairs, moisture and wood expansion can gradually weaken even properly installed fasteners, especially if they are not corrosion-resistant. Interior stairs may face similar issues if stringers are attached to drywall or thin framing instead of solid structural members.
Ensuring Perfect Alignment
Stringers must align perfectly with each other to create level, evenly spaced steps. Without brackets to hold the stringers in a fixed position, slight variations in cut angles or fastener positioning can cause one stringer to sit slightly higher or lower than the others. This results in uneven treads, which are a safety hazard.
The challenge increases when attaching to irregular surfaces like uneven concrete slabs or weathered deck framing, where stringers may need shimming or trimming for a snug fit.
Maintaining Long-Term Stability
Brackets act as both attachment points and stabilizers, reducing lateral movement and twisting forces on stringers. Without brackets, stringers are more vulnerable to lateral shifting over time, especially under heavy use or in outdoor conditions where wood shrinks and swells.
Adding blocking or ledger strips helps, but ensuring these secondary reinforcements stay secure over the life of the stairs requires precise fastening and regular inspections.
Preventing Wood Splitting at Attachment Points
Directly fastening stringers, especially at the notches where strength is already reduced, increases the risk of splitting. This is particularly common near the top and bottom edges, where the wood grain is exposed. Pre-drilling and using appropriate fasteners reduces this risk, but if the stringer lumber has defects (like knots), splitting can still occur.
Weather and Environmental Exposure
Outdoor stair stringers attached directly to wood or concrete are exposed to water, freeze-thaw cycles, and UV radiation. Without the protective separation that brackets provide, the cut ends of stringers can absorb moisture, leading to rot or cracking.
Expert Tips for Long-Lasting Stair Stringer Installation
Achieving a durable and structurally sound stair stringer installation without brackets requires combining proper materials, correct techniques, and proactive maintenance. Professional builders rely on several key strategies to extend the lifespan of stringers and ensure long-term safety and stability.
Choose High-Quality, Durable Materials
Using pressure-treated lumber rated for ground contact or structural use is essential for exterior stairs. For interior installations, straight, kiln-dried lumber reduces warping and ensures accurate cutting. Selecting the right grade, such as #1 or #2 Southern Yellow Pine, ensures the wood has fewer knots and defects that could weaken the stringers.
For fasteners, galvanized, stainless steel, or coated structural screws or lag bolts offer superior corrosion resistance. Avoid using nails for primary attachments, as they can loosen over time.
Maximize Contact Surface for Stronger Connections
When attaching stringers to a ledger board, concrete slab, or framing members, ensure the cut ends of the stringers fit snugly against the surface. Full contact across the width and depth of the stringer distributes weight more evenly and reduces stress on fasteners.
For concrete attachments, set a treated wood plate into the concrete to provide a solid nailing or screwing surface, reducing the risk of moisture damage at the connection point.
Reinforce with Additional Blocking and Support
Adding blocking between stringers, especially at the top and bottom, helps prevent lateral shifting and keeps the stringers aligned under heavy use. When stringers rest on a concrete slab or deck framing, installing toe kicks or ledge strips further locks the stringers in place.
On longer staircases, intermediate cross-blocking at mid-span strengthens the entire stair assembly, reducing the chance of stringer flexing or twisting over time.
Apply Protective Sealers and End-Grain Treatments
The cut ends of stringers are highly susceptible to absorbing moisture, especially on outdoor stairs. Applying an end-grain sealer or waterproofing wood preservative to all cut surfaces before installation extends the life of the stringers by protecting against rot, fungal growth, and splitting.
For interior installations, sealing cut edges with primer or paint reduces the risk of swelling in humid environments.
Ensure Proper Drainage Around Exterior Stringers
Moisture buildup around the base of outdoor stairs accelerates rot and structural failure. Setting the bottom ends of the stringers on concrete footings or riser blocks rather than directly on soil prevents water absorption. Ensuring proper grading or installing gravel drainage beds beneath the stairs keeps water away from the stringers.
Safety Considerations for Stair Stringer Attachment
Attaching stair stringers without brackets can be safe and code-compliant when performed correctly, but there are important safety factors to account for during both installation and long-term use. Ensuring each connection meets structural standards helps prevent accidents, especially on stairs exposed to heavy foot traffic, outdoor weather, or uneven surfaces.
Confirm Load-Bearing Capacity
Each stringer must support both the weight of the treads and risers and the live load created by users. Residential stairs are typically designed for a minimum live load of 40 pounds per square foot (PSF), though outdoor stairs may require higher ratings. When attaching stringers directly to a ledger board, concrete slab, or framing, verify that both the fasteners and the underlying structure can safely support the required load.
Use Structural Fasteners with Proper Ratings
The type and size of fasteners directly impact the safety of the attachment. 3/8-inch galvanized lag bolts, structural screws, or concrete anchors should be used instead of standard nails or drywall screws. Each fastener must penetrate deep enough into the supporting surface — at least 1.5 inches into solid wood framing or to the manufacturer’s specified depth for concrete anchors.
Pre-drilling helps prevent wood splitting and ensures secure placement. Follow all local building codes regarding fastener type, size, and spacing.
Maintain Consistent Stringer Alignment
Misaligned stringers create uneven steps, which are a leading cause of stair-related injuries. When stringers are attached directly without brackets, it’s essential to double-check their vertical and horizontal alignment before securing them. Each stringer should have consistent contact at both the top (ledger or framing connection) and bottom (ground or landing).
For exterior stairs, shifting due to soil movement, frost heave, or deck settling can gradually misalign stringers. Adding side blocking or reinforcement strips helps maintain alignment over time.
Ensure Adequate Tread Support
Treads attached to stringers rely on the strength and stability of the stringers themselves. If stringers shift, sag, or loosen, the treads can become unstable. When installing treads, use structural screws rated for tread attachment and ensure each tread is fully supported across all stringers. Avoid relying on glue or finish nails for load-bearing purposes.
On wider stairs, where more than 3 stringers may be needed, ensure the middle stringers are fully supported at both ends to prevent sagging.
Follow Local Building Code for Stair Safety
Most building codes outline specific requirements for rise, run, nosing, headroom clearance, and guardrails. Even if the stringers are securely attached, the entire staircase must meet these safety requirements to pass inspection. Standard residential stair codes typically specify:
- Maximum rise per step: 7.75 inches
- Minimum run per step: 10 inches
- Maximum variation between steps: 3/8 inch
- Minimum stair width: 36 inches
- Handrails required if the stair has 4 or more risers
Failure to meet these standards increases fall risks and may result in fines, mandatory corrections, or insurance liability issues.
Check for loose connections, wood cracking, tread movement, and uneven steps. Re-secure fasteners or replace damaged stringers or treads as needed.
Conclusion
Attaching stair stringers without brackets is a reliable and cost-effective method when done correctly. Whether securing stringers to a ledger board, concrete slab, or support beam, proper alignment, secure fasteners, and compliance with building codes are essential.
Choosing the right materials, using structural screws or bolts, and ensuring full contact between the stringers and supporting surfaces creates a strong and long-lasting stair structure. Regular inspections and maintenance further enhance safety, ensuring the stairs remain secure for years.

