

Furring strips over foam board provide a sturdy surface for attaching drywall or other finishing materials. They help create a gap for ventilation and moisture control.
Furring strips are essential for creating a stable and ventilated surface when installing foam board insulation. They ensure that drywall or other finishing materials have a solid base to attach to, preventing potential issues like bowing or warping. By maintaining a gap between the foam board and the finishing material, furring strips also facilitate better airflow, reducing the risk of moisture buildup and mold growth.
This setup is especially beneficial in areas prone to humidity, ensuring a longer lifespan for your insulation and finishing materials. Using furring strips is a practical and effective solution for enhancing the performance and durability of foam board installations.
What Are Furring Strips?

Furring strips, often known as hat channels or furring channels, are thin strips of wood or metal used to create a level surface for attaching wall panels, drywall, or other materials. These strips are essential in construction, providing a framework to support insulation and other building materials.
They are typically installed vertically or horizontally over foam board insulation, enhancing structural integrity and allowing for better air circulation behind wall coverings. By creating a space between the wall and the insulation, furring strips also help prevent moisture buildup, reducing the risk of mold and mildew.
This method ensures a more durable and long-lasting wall assembly, making it a popular choice among builders and contractors.
Benefits Of Using Furring Strips
Furring strips are an essential component in many construction and remodeling projects, offering both functional and aesthetic benefits. Here are the key advantages of using furring strips:

Creates a Level Surface
One of the primary benefits of furring strips is that they help create a smooth, even surface on uneven or irregular walls, ceilings, or floors. Whether you’re installing drywall, paneling, or siding, furring strips act as a reliable base for a professional, polished finish.
Improves Insulation and Ventilation
Furring strips create a gap between the wall or ceiling and the finish material. This space can be used to install insulation, improving energy efficiency. Additionally, the air gap enhances ventilation, which helps reduce moisture buildup and prevents issues like mold or mildew in areas prone to dampness, such as basements or bathrooms.
Supports Electrical and Plumbing Installations
When running electrical wires or plumbing pipes, furring strips provide the necessary space to accommodate these systems without cutting into existing walls. This makes installations easier and minimizes structural damage.
Increases Durability
By providing a stable base, furring strips enhance the durability of the finish materials. They reduce stress on drywall, paneling, or siding, preventing cracks or warping over time. This is especially beneficial in areas with temperature fluctuations or high humidity levels.
Cost-Effective Solution
Furring strips are an affordable way to solve a range of construction challenges. Made from inexpensive materials like wood or metal, they allow you to level surfaces, add insulation, or protect walls without breaking the budget.
Enhances Aesthetic Appeal
For decorative projects, furring strips allow for creative designs, such as accent walls, custom shelving, or layered textures. They provide the flexibility to create unique visual effects while maintaining structural integrity.
Prevents Moisture Damage
When installing siding or outdoor materials, furring strips act as a drainage plane by creating a gap for water to escape. This prevents moisture from being trapped against the wall, extending the life of the materials and protecting the underlying structure.
Simplifies Retrofits and Repairs
Furring strips make it easier to retrofit existing spaces or carry out repairs. Whether you’re modernizing an old home or fixing damaged walls, they allow you to attach new materials without significant demolition or reconstruction.
How To Install Furring Strips Over Foam Board
Installing furring strips over foam board is a crucial step when building walls with added insulation or when creating a solid surface for attaching finishes like siding, drywall, or paneling. Furring strips provide a structural framework while allowing for air circulation and helping to protect the foam board from damage. Here’s a step-by-step guide to get the job done right:
Materials and Tools You’ll Need
- Foam board insulation (already installed on your wall or surface)
- Furring strips (typically 1×3 or 1×4 boards)
- Construction adhesive
- Long screws or fasteners (sized to penetrate the foam and securely anchor into the framing behind)
- Power drill or impact driver
- Measuring tape
- Level
- Chalk line (optional but recommended)
Step 1: Measure and Plan
- Locate the wall studs or structure behind the foam board.
Use a stud finder to identify the exact locations of studs or other solid framing members behind the foam board. Mark their positions with a pencil or chalk. These will act as the anchor points for your furring strips. - Mark the spacing for furring strips.
Furring strips are typically spaced 16 inches or 24 inches apart, depending on the surface you’re attaching to. Use a measuring tape and chalk line to mark these intervals on the foam board.
Step 2: Apply Construction Adhesive
- Prepare the adhesive.
Use a strong construction adhesive designed for foam board applications. Avoid adhesives that contain solvents, as they can damage the foam. - Apply adhesive to the back of the furring strip.
Spread a bead of adhesive along the length of the furring strip. This will help hold the strips in place temporarily and provide additional support over time.
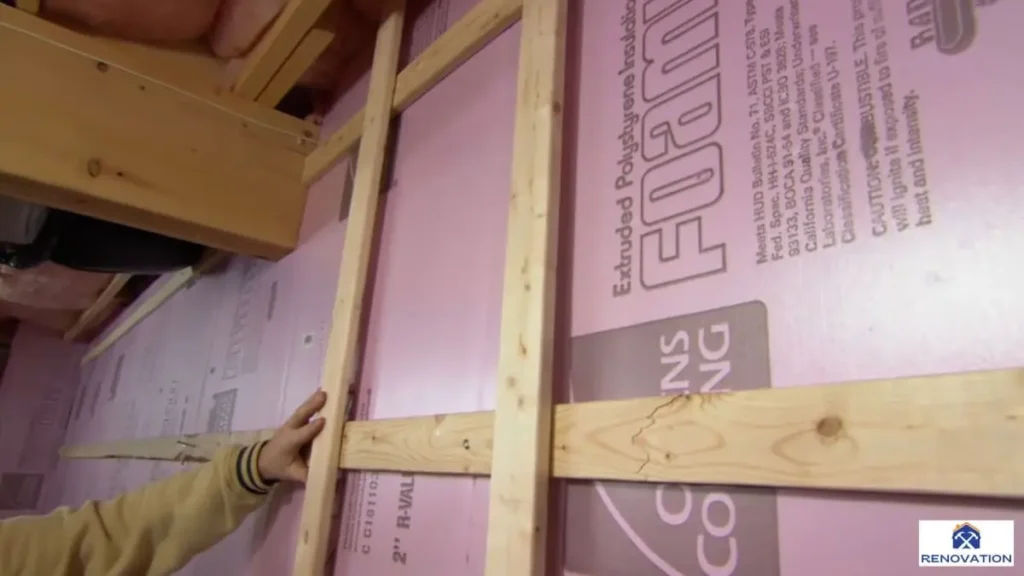
Step 3: Attach the Furring Strips
- Position the furring strips on the foam board.
Align the strips with your pre-marked intervals and press them firmly against the foam. Use a level to ensure they are perfectly vertical. - Secure with screws or fasteners.
Drill long screws through the furring strip, foam board, and into the studs or framing behind. Make sure the screws are long enough to penetrate at least 1–2 inches into the structural framing. Space the screws about 12–16 inches apart along the length of each strip for optimal stability.
Step 4: Check and Adjust
- Inspect for alignment.
Use a level to double-check that each furring strip is properly aligned and not bowing or crooked. Adjust as necessary before the adhesive sets. - Verify attachment strength.
Gently tug on each strip to ensure it is securely fastened to the wall and framing.
Step 5: Prepare for Finishing
Once all furring strips are installed, your wall is ready for the next step! You can now attach siding, drywall, paneling, or any other finishing material to the furring strips. Be sure to plan for any electrical or plumbing work that may need to be incorporated into the wall system before finishing.
Pro Tips
- Use treated wood for exterior projects. If installing furring strips in an outdoor or moisture-prone area, opt for pressure-treated lumber to prevent rot and decay.
- Insulate gaps carefully. To prevent air or moisture infiltration, seal any gaps between the foam board and furring strips with spray foam or caulk.
- Plan for ventilation. For exterior applications, consider installing furring strips in a vertical orientation to allow for proper drainage and air circulation behind the finish material.
Read Also: How to Insulate a Floor With No Crawl Space
Common Mistakes To Avoid When Installing Furring Strips
One frequent mistake during the installation of furring strips over foam board is neglecting to check the alignment and spacing. Ensuring that furring strips are evenly spaced and properly aligned is crucial for the stability of the finished wall. Another common error is using incorrect fasteners, which can compromise the integrity of the installation.
It is essential to select fasteners that are long enough to penetrate both the furring strip and the foam board into the underlying studs or structure. Additionally, failing to seal gaps between the foam board and furring strips can lead to moisture infiltration and reduced insulation efficiency.
Proper sealing with appropriate materials helps maintain the effectiveness of the foam board insulation and prevents potential issues with mold and mildew. Finally, overlooking the importance of pre-drilling holes in the furring strips can result in splitting, weakening the overall structure and making the installation process more challenging.
Comparing Furring Strips To Other Insulation Methods
When planning a home insulation project, homeowners often face the challenge of choosing the right insulation method. Furring strips, while not a direct insulation material, play a significant role in creating a framework for insulation. Here’s how they compare to other insulation methods:

Purpose and Application
Furring strips are thin, narrow strips of wood or metal used to create a gap between a wall or ceiling and the insulation material. They serve as a support structure for attaching drywall, paneling, or other finishes. While not an insulator themselves, they enhance the performance of certain insulation types by allowing for air circulation or creating space for additional insulation layers.
On the other hand, traditional insulation methods like fiberglass batts, spray foam, and rigid foam boards are specifically designed to reduce heat transfer. These materials provide direct thermal resistance (R-value), making them the primary choice for thermal insulation.
Thermal Performance
Since furring strips do not have inherent insulating properties, their effectiveness depends on the insulation materials used in conjunction with them. For example, rigid foam boards can be installed between furring strips to create a well-insulated wall system. However, other methods, such as blown-in cellulose or spray foam insulation, can be applied directly to walls or cavities without needing a furring strip framework.
Spray foam insulation, for example, forms a seamless barrier that reduces air leakage, making it a superior option for maximizing energy efficiency. In contrast, furring strips combined with insulation materials like rigid foam or fiberglass may leave small gaps where air can pass through if not installed carefully.
Cost-Effectiveness
Furring strips are generally inexpensive and widely available, which makes them a cost-effective choice when paired with economical insulation materials like fiberglass batts. This combination is particularly useful for retrofitting older homes where uneven walls or ceilings require a framework for insulation and finishing materials. However, this method may involve more labor and materials, increasing installation time and overall project costs.
Conversely, methods like spray foam or blown-in insulation are more expensive upfront but offer higher energy savings over time due to their superior insulating properties. These options are often more efficient for new construction or projects where a higher budget is available.
Versatility and Use Cases
Furring strips shine in scenarios where space is limited, such as basement finishing projects or adding insulation to existing walls without completely tearing down old drywall. They can also help level uneven surfaces, allowing for easier installation of wallboards or paneling.
However, for areas requiring maximum insulation performance, such as attics or exterior walls in colder climates, more comprehensive insulation methods like spray foam or blown-in cellulose may be better suited. These methods provide continuous coverage and higher R-values without needing additional frameworks.
Moisture Management
In spaces prone to moisture, like basements, furring strips combined with rigid foam insulation can create a moisture-resistant barrier. The gap created by furring strips can also improve ventilation, reducing the risk of mold growth. On the other hand, spray foam insulation offers an airtight seal that also acts as a vapor barrier, making it highly effective in moisture management. Fiberglass, while cost-effective, can trap moisture and become susceptible to mold if not properly installed.
Conclusion
Furring strips over foam board provide excellent support and insulation for various construction projects. They enhance durability and energy efficiency. By using furring strips, you ensure a stable and secure foundation. This method is both practical and effective, making it a valuable choice for your next building endeavor.

