Proper dryer vent installation is essential for safety and efficiency. A poorly placed vent can cause lint buildup, increase fire risk, and reduce your dryer’s performance. Homeowners often wonder whether running a dryer vent through floor joists is a practical solution, especially in homes with limited wall space.
Yes, you can run a dryer vent through floor joists, but specific building codes and safety considerations must be followed. Understanding the right materials, venting techniques, and potential challenges helps prevent hazards and ensures your dryer works optimally.
This guide covers everything you need to know about running a dryer vent through floor joists. From code requirements and installation steps to common mistakes and practical solutions, you’ll learn how to vent your dryer safely and efficiently.
The Dryer Venting Requirements
Proper dryer venting is essential for safety, efficiency, and long-term appliance performance. A well-vented dryer expels moisture, heat, and lint outside, preventing hazardous buildup and reducing drying times. Ignoring venting requirements can lead to costly repairs, energy waste, and even severe fire risks.
Why Proper Venting Is Essential
Lint buildup is a leading cause of dryer fires, with the U.S. Fire Administration reporting thousands of incidents annually. As clothes tumble, tiny fibers shed and travel through the vent system. Without proper airflow, lint can accumulate, clogging ducts and increasing fire risk.
Efficient venting also ensures dryers run smoothly. When vents are too long or obstructed, dryers work harder to push out moist air. This strain can wear down components, leading to frequent breakdowns and shorter appliance lifespans.
Meeting building codes is equally important. Local and national regulations, like the International Residential Code (IRC), set strict guidelines for vent materials, duct length, and termination points. Non-compliance can void warranties, fail inspections, and put homeowners at legal risk.
Typical Dryer Vent Pathways
The path a dryer vent takes depends on home layout, dryer placement, and structural constraints. The most common venting routes include:
- Through Exterior Walls: The shortest, most straightforward route. Vents run directly from the dryer to an outside wall, minimizing duct length and maximizing efficiency.
- Through the Roof: Often used in interior laundry rooms or multi-level homes. This method requires vertical ducting and a proper roof vent cap to prevent rain or debris entry.
- Through Crawl Spaces or Basements: In homes with raised foundations, vents may run through the floor into an accessible crawl space, then out through a side wall.
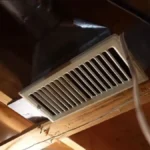
- Through Floor Joists: A less common but sometimes necessary option, especially in homes where walls or roof pathways aren’t feasible.
Can You Run a Dryer Vent Through Floor Joists?

Running a dryer vent through floor joists can be a practical solution, especially in homes with limited wall space or unique layouts. However, it’s not as simple as drilling a hole and feeding a duct through. You need to consider building codes, structural integrity, and safety risks to ensure the installation is both functional and safe. Let’s break it all down.
Is It Allowed by Building Codes?
Yes, you can run a dryer vent through floor joists, but it must meet strict building codes. Following these codes isn’t just about compliance — it protects your home from fire hazards and poor ventilation issues.
Here are the key regulations to keep in mind:
- Duct Material: Most codes require rigid or semi-rigid metal ducts. Flexible plastic or foil ducts are generally prohibited due to fire risks.
- Diameter Requirements: A standard dryer vent should be at least 4 inches in diameter to allow proper airflow and prevent lint buildup.
- Maximum Duct Length: According to the International Residential Code (IRC), the total duct length should not exceed 35 feet, subtracting 5 feet per 90-degree bend and 2.5 feet per 45-degree bend.
- Exterior Vent Termination: The vent must terminate outside, not into an attic or crawlspace, to prevent moisture buildup and mold growth.
It’s always a good idea to consult local building authorities or an HVAC expert to confirm the codes in your area before starting your project.
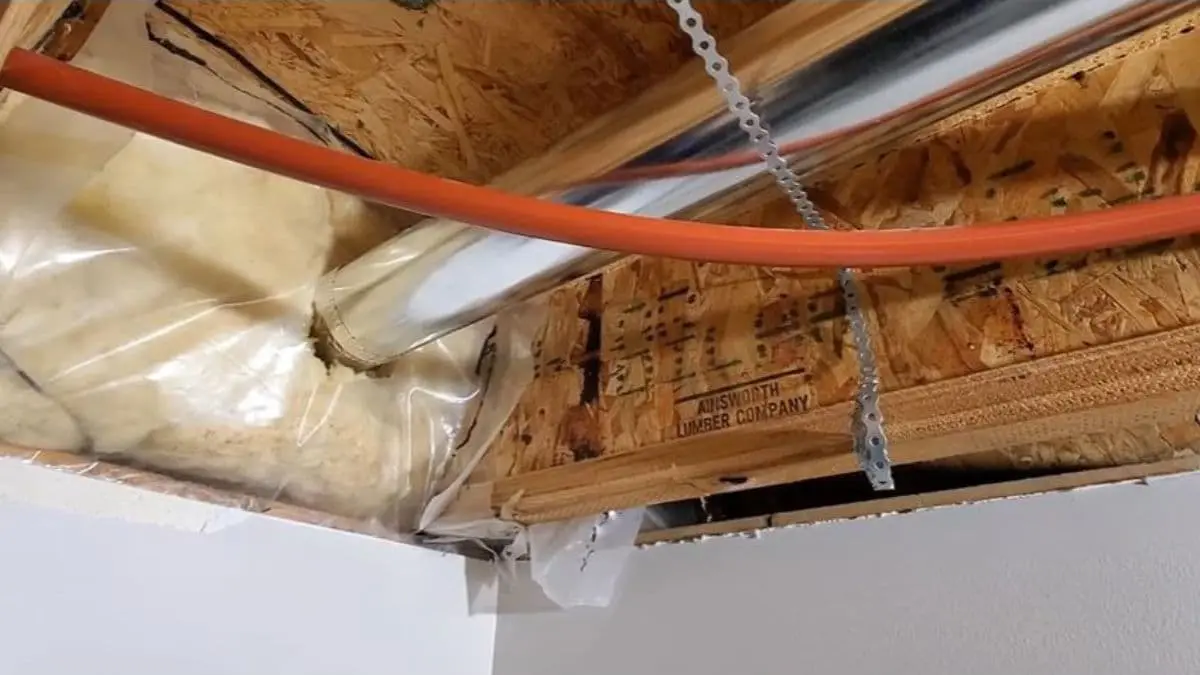
Structural Considerations
Drilling through floor joists is common practice, but there are limitations to avoid weakening your home’s structure. Joists support floors and walls, so improper drilling can cause sagging, cracking, or worse.
Key factors to consider:
- Hole Size: The hole should not exceed one-third of the joist height. For example, in a 9-inch joist, the hole should be no larger than 3 inches — which means a standard 4-inch vent requires extra care.
- Hole Placement: Holes should be drilled along the joist’s neutral axis (centerline) to minimize structural impact. Avoid drilling near the ends or in areas with concentrated loads.
- Spacing Between Holes: If you need multiple holes, space them at least 2 feet apart to distribute the load evenly.
If you’re unsure, an engineer or contractor can assess your floor structure and recommend the best approach.
Safety Concerns
Even if your installation meets code and structural guidelines, safety is a major factor. Poor venting practices can lead to dangerous outcomes.
- Lint Accumulation: Lint buildup is the leading cause of dryer fires. Running a vent through joists adds extra length and bends, increasing the chance of lint getting trapped. Using smooth-walled metal ducts and cleaning the vent regularly helps mitigate this risk.
- Moisture and Mold Growth: Dryer vents expel warm, moist air. If that air leaks into floor cavities, it can create the perfect environment for mold and wood rot. Properly sealing duct joints with foil tape (not duct tape) and using self-sealing vent caps reduces the chance of leaks.
- Fire Risk: If ducts are improperly secured or sag, lint can accumulate, reducing airflow and causing the dryer to overheat. This significantly raises the fire risk. Supporting the duct every 3–4 feet with metal straps prevents sagging and keeps airflow steady.
Recommended: Can You Run a Dryer Without the Vent Hose
Best Practices for Running a Dryer Vent Through Floor Joists

Choosing the Right Materials
Selecting the appropriate materials for your dryer vent is essential for both safety and performance.
Rigid metal ducts are the best option. They have smooth interior walls that prevent lint buildup and promote optimal airflow. Aluminum and galvanized steel are common choices, as they are durable and resistant to heat.
Avoid plastic or vinyl ducts, as they can melt or catch fire. Flexible foil ducts should also be avoided — they may seem convenient but tend to trap lint in the ridges, increasing the risk of clogs and fires.
Proper Duct Sizing and Length
The size and length of your dryer vent affect how well your dryer exhausts hot, moist air.
A 4-inch diameter duct is standard for most dryers. This size ensures sufficient airflow while meeting most building code requirements. Measure your planned vent path carefully and account for bends or elbows, which add resistance to airflow.
A typical code-compliant maximum length is 35 feet, but you must subtract 5 feet for each 90-degree elbow and 2.5 feet for each 45-degree elbow. If your vent run is longer, consider installing a vent booster fan to help maintain proper airflow.
Installation Techniques
Proper installation is key to a safe and effective dryer vent system. Follow best practices to protect your home’s structure and avoid safety risks:
- Drilling Code-Compliant Holes: When drilling through floor joists, keep holes centered vertically to avoid weakening the joist. The hole should not exceed one-third of the joist height. For example, if you have 2×10 joists (which are actually 9.25 inches tall), the hole should be no more than 3 1/16 inches in diameter.
- Supporting the Duct: Secure the duct to joists using metal straps or hangers every 4–6 feet to prevent sagging. Sagging ducts can trap lint, increasing fire risk.
- Sealing Joints Properly: Seal all duct joints with foil tape, not standard duct tape, which can degrade over time. Foil tape is heat-resistant and provides a durable seal that prevents air leaks.
- Slight Downward Slope: Maintain a slight downward slope of 1/4 inch per foot toward the vent exit to allow condensation to drain out. Accumulated moisture inside the duct can lead to mold, rust, and lint sticking to the walls.
Related Read: How to Hide Dryer Vent Hose
Alternative Venting Options
Rerouting the Vent Path
When running a dryer vent through floor joists isn’t practical or safe, rerouting the vent path might be a better option. The goal is to create the shortest, straightest path possible to minimize airflow resistance and reduce lint buildup.
Through an Exterior Wall
The most straightforward solution is to vent directly through an exterior wall. A short, direct vent path maximizes dryer efficiency and minimizes the risk of lint accumulation. If your laundry room is near an exterior wall, this is often the best approach.
Utilizing Attic or Soffit Spaces
If an exterior wall isn’t nearby, you might consider routing the vent through an attic or soffit. This method is acceptable if you use rigid metal ducting and follow building codes for vent length and slope. Be cautious about condensation — attic vents should be insulated to prevent moisture buildup, which can lead to mold or water damage.
Going Through a Crawl Space or Basement
For homes with crawl spaces or basements, running the vent downward and then horizontally to an exterior wall can work well. Just ensure the duct is properly supported, sealed, and slightly sloped to allow moisture to escape.
Installing a Ventless Dryer
If rerouting the vent is impractical or would require extensive remodeling, installing a ventless dryer is a viable alternative. Ventless dryers don’t require external ducts, making them perfect for apartments, condos, or homes where traditional venting is too complicated.
Condenser Dryers
Condenser dryers heat air, pass it through the drum to dry clothes, and then cool the air to condense moisture, which collects in a tank or drains away. These dryers are easy to install but may take longer to dry clothes compared to vented models.
Heat Pump Dryers
Heat pump dryers are more energy-efficient than condenser models. They use a heat exchanger to recycle warm air, reducing energy consumption. While more expensive upfront, they save money on energy bills over time.
When a Ventless Dryer Makes Sense
Ventless dryers are ideal if venting is unsafe or if structural constraints prevent proper duct installation. They’re also useful in small spaces, like closets or under counters, where traditional venting isn’t feasible.
Read Also: Toilet Drain Through Floor Joist
Expert Tips and Troubleshooting
How to Inspect Your Vent System
Regular inspections help prevent potential hazards and keep your dryer running efficiently. A clogged or damaged vent can cause longer drying times, higher energy bills, and even fire risks.
Visual Inspection: Start by checking the vent opening outside your home. Look for lint buildup, debris, or signs of damage. The vent flap should open freely when the dryer is running.
Drying Time Test: If clothes take longer than usual to dry, it could signal restricted airflow. A typical load should dry in 30–45 minutes. If not, your vent may need cleaning or repair.
Airflow Check: Place your hand near the exterior vent while the dryer is running. You should feel a strong, steady flow of warm air. Weak airflow suggests blockages or duct damage.
Lint Accumulation: Excess lint around the dryer or on clothing is a warning sign. Clean the lint trap after every load and inspect the vent duct at least once a year.
Moisture and Odors: If you notice excess humidity, condensation, or a musty smell, the vent may not be exhausting properly. This can cause mold growth and reduce indoor air quality.
For a more thorough assessment, consider using a vent inspection camera or an airflow meter to check the full length of the duct.
When to Call a Professional
Some vent issues go beyond simple DIY fixes. Knowing when to call an expert can save you from costly repairs and safety risks.
Complex Vent Routes: If your vent path has multiple bends, long runs, or difficult-to-access areas, a professional can optimize the setup to improve airflow and compliance with building codes.
Structural Concerns: When installing or modifying a vent through floor joists or walls, it’s best to consult a contractor or structural engineer. They ensure proper hole placement and prevent compromising your home’s integrity.
Persistent Issues: If you clean the vent but still experience poor drying performance or overheating, an HVAC technician can diagnose hidden problems, like crushed ducts or internal dryer malfunctions.
Annual Maintenance: Schedule a professional dryer vent cleaning once a year, especially if you use your dryer frequently. They use specialized tools to remove stubborn lint and inspect for wear and tear.
Staying proactive with inspections and knowing when to seek help ensures your dryer vent system remains safe, efficient, and long-lasting.
FAQ About Dryer Vent Through Floor Joist
Can a Dryer Vent Go Down Through the Floor?
Yes, a dryer vent can go down through the floor, but it must follow building codes. Use a rigid metal duct, maintain a 4-inch diameter, and keep the length within 35 feet (subtracting for bends). Proper support, sealed joints, and a slight downward slope are essential to prevent lint buildup and moisture issues.
How Big of a Hole Can You Drill in a Floor Joist for a Dryer Vent?
You can drill a hole in a floor joist for a dryer vent, but the hole should not exceed one-third of the joist height. For example, with a 2×10 joist (9.25 inches tall), the maximum hole size is about 3 1/16 inches. Always center the hole along the joist height and check local building codes.
How Far Can You Run a Dryer Vent Through Floor Joists?
Most building codes limit dryer vent runs to 35 feet. Subtract 5 feet for each 90-degree elbow and 2.5 feet for each 45-degree elbow. If your vent path is longer, consider adding a booster fan to maintain proper airflow and prevent lint accumulation.
What Happens If a Dryer Vent Is Too Long?
If a dryer vent is too long, airflow decreases, causing lint to accumulate. This buildup can lead to longer drying times, higher energy bills, and increased fire risk. It can also cause moisture to back up, potentially leading to mold or structural damage.
Is It Safe to Use Flexible Ducting for a Dryer Vent?
No, flexible ducting (especially plastic or vinyl) is not safe for dryer vents. It traps lint, increases fire risk, and restricts airflow. Always use rigid metal ducting for the safest and most efficient venting system.
You May Also Like: Running Romex Through Floor Joists
Conclusion
Running a dryer vent through floor joists is possible, but it requires careful planning, adherence to building codes, and attention to safety.
By choosing the right materials, properly sizing the duct, and following best installation practices, you can create an efficient and safe venting system.
If the path is too complex or you’re unsure about local regulations, don’t hesitate to consult a professional. Prioritizing proper venting protects your home from fire risks, boosts dryer performance, and ensures long-term peace of mind.
If you’re planning a dryer vent installation or remodel, take your time, do the research, and reach out to experts when needed. Your home — and your safety — are worth it!