Proper bathroom ventilation is essential for controlling moisture and preventing mold growth. A roof vent for a bathroom fan ensures humid air is expelled effectively, protecting your home’s structure and improving air quality. Installing a roof vent for a bathroom fan is a practical DIY project that saves money and enhances comfort.
This guide offers clear, step-by-step instructions and safety tips to help homeowners and DIY enthusiasts complete the task with confidence. Whether upgrading a bathroom or fixing poor ventilation, this process addresses moisture issues efficiently.
Why Vent a Bathroom Fan Through the Roof?
Proper ventilation is critical for a healthy and durable bathroom. Expelling humid air through a roof vent prevents moisture-related issues and maintains a comfortable indoor environment.
Benefits of Proper Ventilation
Moisture control is a primary advantage of a well-vented bathroom. Excess humidity can lead to mold and mildew, which damage walls, ceilings, and fixtures. Effective ventilation also protects wooden beams and drywall from rot, extending the lifespan of your home’s structure.
Additionally, it removes odors and improves air quality, creating a fresher space. The National Association of Home Builders found that 68% of homeowners reported better air quality after improving bathroom ventilation.
Why Choose Roof Venting?
Roof venting is often more effective than wall venting for certain home layouts. It allows humid air to exit directly upward, leveraging natural airflow. This method complies with most local bathroom fan venting code requirements, ensuring safety and efficiency.
Roof vents are ideal for homes with limited exterior wall access, such as those with adjacent structures or landscaping constraints. They also reduce the risk of moisture re-entering the home, unlike some wall vent setups.
Challenges to Anticipate
Installing a roof vent presents specific challenges. Working at heights requires careful safety measures to prevent falls. Navigating attic spaces can be tricky, especially with limited lighting or tight access points.
Ensuring a weatherproof seal with roof flashing is critical to avoid leaks that could damage the roof or interior. Proper planning and the right tools help address these obstacles effectively, making the project manageable for DIY enthusiasts.
Installing a Roof Vent for a Bathroom Fan: Step-by-Step Guide
Installing a roof vent for a bathroom fan ensures effective moisture removal and improves air quality. Here we break down the process into six clear steps, designed for DIY homeowners and entry-level contractors. Each step includes practical instructions and tips to achieve a professional, code-compliant result.
Step 1: Plan the Ventilation Route
A well-planned route ensures efficient airflow and compliance with regulations. Start by mapping the shortest, most direct path from the bathroom fan to the roof. This minimizes bends in the ducting, which can reduce airflow. Check local building codes for bathroom fan venting requirements, as some areas specify vent placement or duct materials.
Avoid positioning the vent near roof valleys or obstructions like chimneys to prevent water pooling or airflow issues. Use a measuring tape and chalk to mark the path in the attic for accuracy.
Step 2: Prepare the Bathroom Fan and Ducting
The bathroom exhaust fan must be functional before venting. Verify that the fan is securely installed and operational, with a capacity suited for the bathroom size—typically 50–100 CFM (cubic feet per minute) for standard bathrooms.
In the attic, connect a vent pipe to the fan’s outlet. Rigid ducting is preferred for better airflow, but flexible ducting works for tight spaces. Secure connections with foil tape to prevent air leaks. A Home Depot guide recommends using 4-inch diameter ducts for most bathroom fans to ensure optimal performance.
Step 3: Mark and Cut the Roof Hole
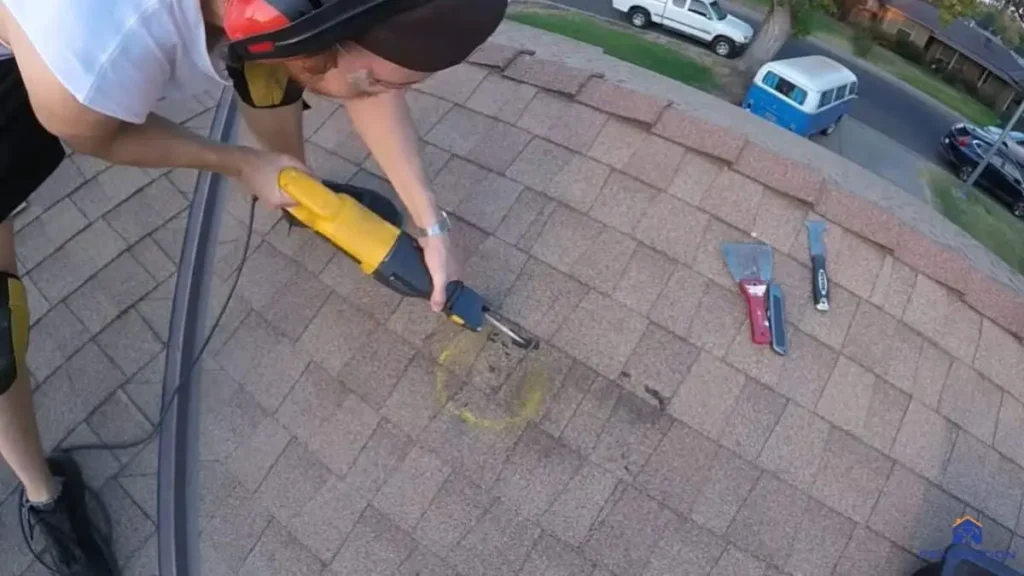
Locating and cutting the roof hole requires precision to avoid structural damage. From inside the attic, identify the vent’s exit point using the marked path. Push a nail through the roof to mark the spot externally. On the roof, use the vent cap as a template to outline the hole. Ensure the hole matches the vent pipe’s diameter, typically 4 inches.
Use a jigsaw or reciprocating saw to cut through the roofing material and sheathing. Wear safety glasses to protect against debris. Double-check measurements to avoid cutting too large a hole.
Step 4: Install Roof Flashing and Vent Cap
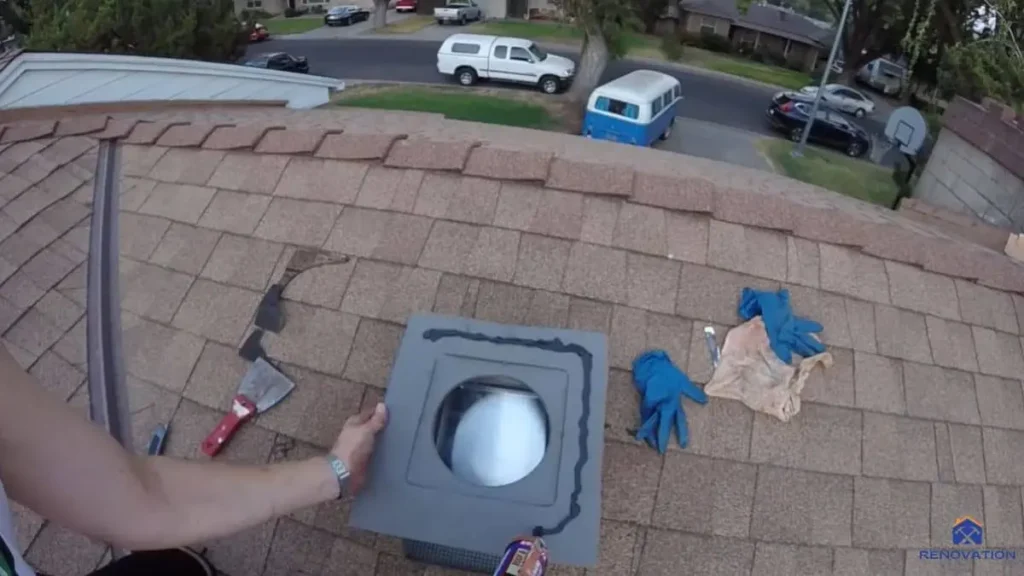
A watertight seal is essential to prevent roof leaks. Slide roof flashing under the surrounding shingles, ensuring the upper edge tucks beneath the shingle layer above. Position the vent cap over the hole and secure it with corrosion-resistant screws or nails.
Apply roofing cement around the edges of the flashing and vent cap for added protection against water infiltration. According to the roofing manual by Owens Corning, proper flashing installation reduces leak risks by 95% when combined with roofing cement.
Step 5: Connect the Vent Pipe
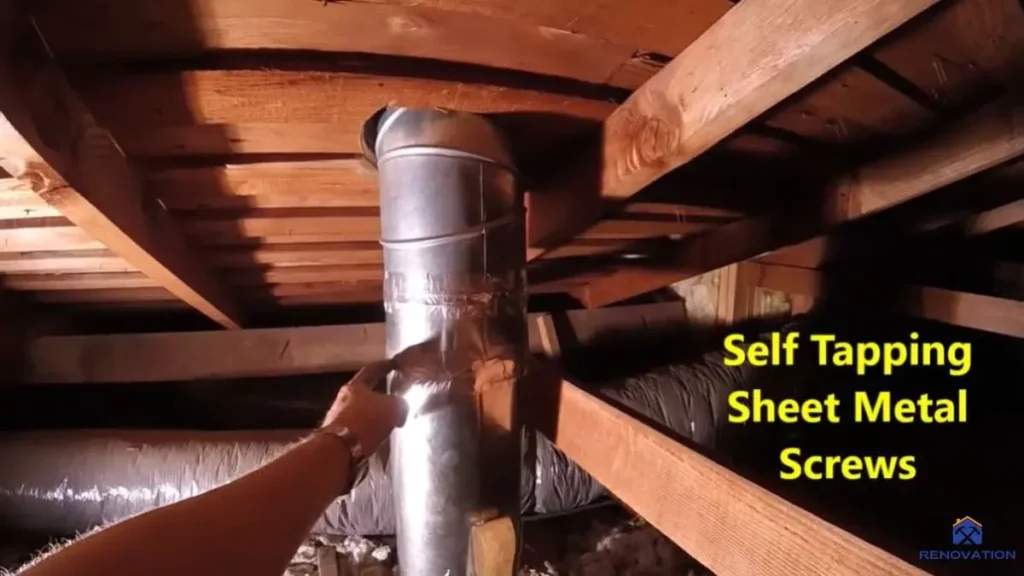
Connecting the vent pipe completes the airflow path. From the attic, run the vent pipe from the bathroom fan to the roof vent cap. Secure the pipe to the vent cap with duct tape or clamps, ensuring a tight seal. Insulate the ducting with fiberglass wrap to prevent condensation, which can lead to mold or water damage.
Keep the duct run as straight as possible, with minimal bends, to maintain strong airflow. For longer runs, use rigid ducting to reduce resistance.
Step 6: Test the System
Testing ensures the system works effectively. Turn on the bathroom fan and check for strong airflow at the roof vent cap—hold a tissue near the vent to confirm air movement. Inspect all duct connections for leaks, using a flashlight to check for gaps. Verify that the vent cap is securely fastened and weatherproof by checking for loose screws or gaps in the roofing cement. Run the fan for 10–15 minutes to ensure consistent performance and no unusual noises.
Key Tips for Success
- Use a level to ensure the vent cap sits flush with the roof.
- Check duct insulation for gaps to prevent heat loss.
- Test the system in different weather conditions to confirm reliability.
Recommended For You: Venting Bathroom Fan Through Roof
Safety Tips for Roof Vent Installation
Installing a roof vent involves working at heights and handling tools, so prioritizing safety is critical. Follow these tips to minimize risks and complete the project confidently.
Working on the Roof
Roof work carries a high risk of falls, especially on sloped surfaces. Use a fall protection harness anchored to a secure point, such as a chimney or ridge vent, to prevent injuries. Secure ladders with stable footing and ensure they extend at least 3 feet above the roof edge for safe access.
Work only in dry weather to avoid slippery surfaces, and wear non-slip shoes with good traction. The Occupational Safety and Health Administration report notes that proper fall protection reduces roofing accidents by 80%.
Attic Safety
Navigating an attic requires caution to avoid hazards. Ensure adequate lighting with a headlamp or portable work light to spot obstacles like exposed nails or insulation fibers. Ventilate the attic by opening windows or using a portable fan to maintain air quality.
Avoid stepping on unsupported areas between joists, as this can cause falls or damage to ceilings below. Use a sturdy piece of plywood as a temporary platform if needed. Wear gloves and a dust mask to protect against insulation irritation.
Electrical and Fan Safety
Working near electrical components demands strict precautions. Turn off power to the bathroom fan at the circuit breaker before starting any work to eliminate the risk of electric shock. Verify the fan is off using a non-contact voltage tester.
Follow the manufacturer’s guidelines for fan and vent compatibility to ensure safe operation. Double-check that all wiring connections are secure and insulated to prevent short circuits. These steps ensure a safe installation process and a reliable ventilation system.
FAQ: Roof Vent Installation for Bathroom Fans
How do I know if my bathroom fan needs a roof vent?
Lingering humidity, mold growth, or poor air quality indicate a need for better ventilation. Roof venting is ideal when wall venting isn’t feasible, such as in homes with limited exterior wall access or multi-story layouts. It efficiently removes moist air, reducing damage risks.
Can I install a roof vent for a bathroom fan myself?
Yes, with proper tools, safety precautions, and DIY skills, most homeowners can complete this project. Follow step-by-step guides and use safety gear like a harness. Consult a professional if unsure about roof work or local code compliance.
What size vent pipe should I use for a bathroom fan?
A 4-inch diameter pipe is standard for most bathroom fans, ensuring adequate airflow. Check your fan’s specifications for compatibility, as some high-capacity models may require larger ducts, like 6 inches, for optimal performance.
How much does it cost to install a roof vent for a bathroom fan?
DIY costs range from $50 to $200 for materials, including a vent cap, ducting, and roof flashing. Professional installation typically costs $300 to $600, depending on roof complexity and labor rates in your area.
Do I need a permit for bathroom fan roof vent installation?
Check local building codes, as permits may be required for roof modifications. Many municipalities mandate permits to ensure compliance with safety and ventilation standards. Contact your local building authority for specific requirements.
Related Read: How to Vent Multiple Bathroom Exhaust Fans
Final Thoughts
Installing a roof vent for your bathroom fan isn’t just about improving comfort—it’s about protecting your home from long-term moisture damage. With a few tools and some careful planning, this is a project a confident DIYer can tackle in a weekend.
Have questions or need help picking the right roof vent? Drop them in the comments below—we’re here to help!