Adding a deck to your home is a great way to increase outdoor living space, but when your home has a brick or brick veneer exterior, one critical step can become complicated: attaching the ledger board. Done incorrectly, it can lead to structural failure, water infiltration, or even safety hazards.
This guide explains how to securely attach a ledger board to a brick or brick veneer wall, covering tools, materials, and step-by-step instructions.
The Ledger Board and Brick Wall Connection
What Is a Ledger Board?
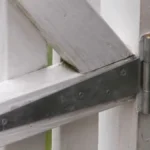
A ledger board is a flat, sturdy piece of lumber that connects a deck to a house. It acts as the primary support, transferring the deck’s weight to the house’s foundation. Typically made from pressure-treated wood or rot-resistant material, the ledger board ensures the deck remains stable. Proper attachment to a brick wall is critical to prevent shifting or collapse over time. A secure brick wall deck attachment supports heavy loads, such as furniture or people, safely.
Challenges of Attaching a Ledger Board to Brick
Attaching a ledger board to a brick house presents unique challenges. Brick walls can be solid or veneer, and each type requires different approaches. Solid brick offers a strong anchor point, but brick veneer, a thin layer over a wooden frame, needs extra care to reach the structural frame.
Moisture can seep into gaps, causing damage, so waterproofing is essential. According to the National Association of Home Builders, improper ledger installation contributes to 15% of deck failures. Securing the ledger to brick veneer or solid brick demands precise tools and techniques to ensure safety and longevity.
Tools and Materials Needed for the Job
The right tools and materials ensure a secure and efficient ledger board installation on a brick house. Below is a detailed table listing essential items for attaching a ledger board to a brick or brick veneer wall, along with their purposes.
Tools and Materials Needed for the Job
| Item | Type | Purpose |
| Masonry Drill | Tool | Drills holes into brick for anchors or lag bolts. |
| Carbide-Tipped Drill Bits | Tool Accessory | Cuts cleanly through brick; sized to match anchors or bolts. |
| Hammer Drill | Tool | Speeds up drilling for precise, clean holes in brick. |
| Level | Tool | Ensures the ledger board is horizontal for a stable deck. |
| Tape Measure | Tool | Measures ledger placement and spacing accurately. |
| Chalk Line | Tool | Marks straight lines on brick for precise ledger alignment. |
| Wrench or Socket Set | Tool | Tightens lag bolts or anchors securely into brick. |
| Pressure-Treated Ledger Board | Material | Acts as the main support; resists rot and moisture. |
| Lag Bolts | Material (Fastener) | Secures ledger to solid brick; typically ½-inch diameter, 4-6 inches long. |
| Concrete Anchors | Material (Fastener) | Provides strong attachment for brick veneer or solid brick; sleeve type. |
| Aluminum or Copper Flashing | Material | Prevents water infiltration above the ledger for waterproofing. |
| Silicone Caulk or Sealant | Material | Seals gaps around bolts and flashing to block moisture. |
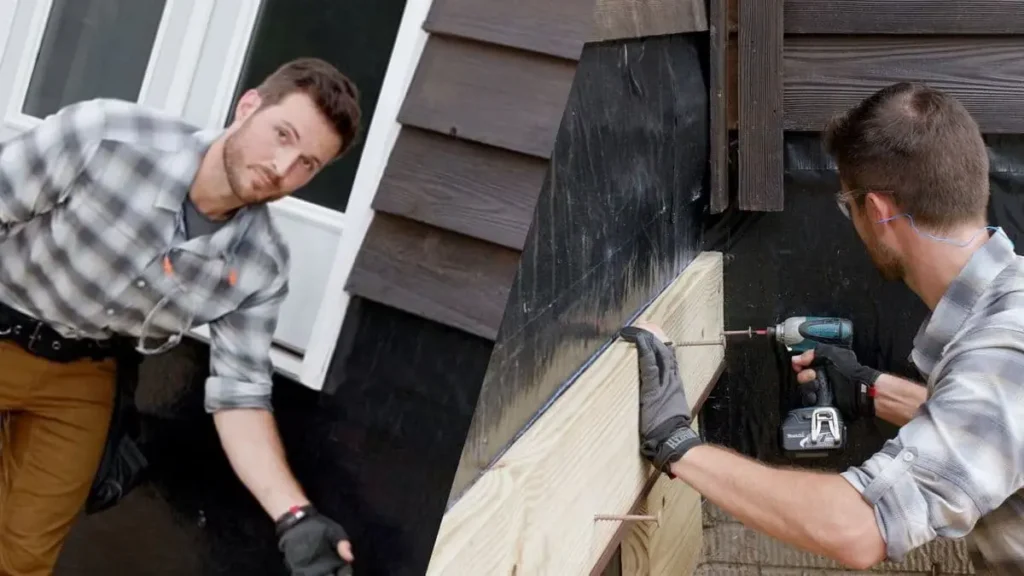
Step-by-Step Guide to Attaching a Ledger Board to a Brick House
Attaching a ledger board to a brick house requires careful planning and precise execution to ensure a safe and durable deck. Follow these steps to achieve a strong brick wall deck attachment that complies with building standards and prevents moisture damage.
Step 1: Planning and Preparation
Proper preparation sets the foundation for a successful ledger board installation. Before starting, verify the wall type and local regulations to avoid costly mistakes.
Check Local Building Codes: Most municipalities require permits for deck construction. Contact your local building department to confirm requirements for brick house ledger installation. Non-compliance can lead to fines or forced removal.
Identify Wall Type: Determine if the wall is solid brick or brick veneer. Solid brick provides a strong anchor point, while brick veneer requires anchoring to the house’s structural frame. The International Code Council emphasizes that veneer walls need bolts extending to the framing for stability.
Measure and Mark Placement: Use a tape measure and level to mark the ledger board’s position on the brick wall. A chalk line ensures a straight, level guide. Position the ledger 1-2 inches below the house’s floor joists to align with the deck’s framing.
Step 2: Installing Flashing for Waterproofing
Flashing prevents water from seeping behind the ledger board, protecting the brick wall from moisture damage. Proper flashing is critical for long-term durability.
Select Flashing Material: Choose aluminum or copper flashing for corrosion resistance. Aluminum is cost-effective, while copper offers superior durability.
Install Flashing: Place the flashing above the ledger board, tucking it under the house’s siding or exterior layer. Secure it with silicone caulk to create a watertight seal. Ensure the flashing extends at least ½ inch beyond the ledger’s edges.
Seal Gaps: Apply a bead of silicone sealant along the top edge of the flashing where it meets the brick. This step, known as flashing the ledger board brick, prevents water infiltration, which can cause rot or mold.
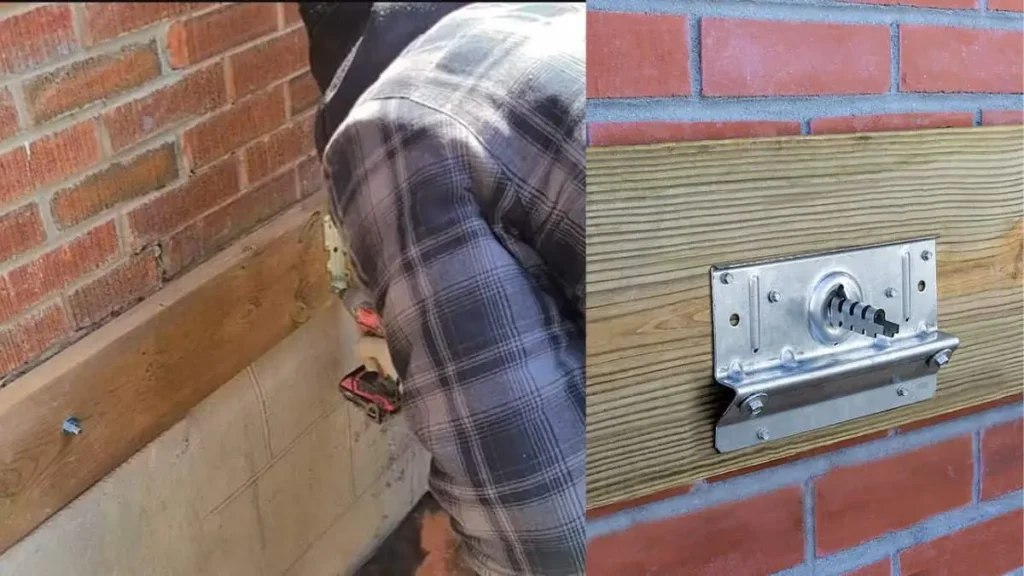
Step 3: Drilling into the Brick for Anchors
Drilling precise holes into the brick ensures secure attachment of the ledger board. Use the right tools to avoid damaging the wall or compromising the installation.
Choose the Correct Drill Bit: Select a carbide-tipped masonry drill bit that matches the diameter of your lag bolts or concrete anchors (typically ½ inch). A hammer drill speeds up the process and ensures clean holes.
Drill Holes: Mark bolt locations on the ledger board, spacing them 16-24 inches apart based on local codes. Drill through the ledger and into the brick to a depth of 4-6 inches for solid brick or until you reach the structural frame for veneer. The Fine Homebuilding guide recommends drilling at a slight downward angle to prevent water pooling.
Safety Precautions: Wear safety goggles and a dust mask to protect against brick dust. Clear debris from holes using compressed air or a vacuum for a secure anchor fit.
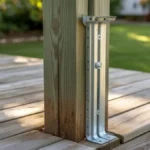
Step 4: Securing the Ledger Board
Fastening the ledger board to the brick wall requires the right anchors and proper technique to ensure a stable connection.
Select Fasteners: Use ½-inch diameter lag bolts for solid brick or sleeve-type concrete anchors for brick veneer. Corrosion-resistant materials, like galvanized or stainless steel, prevent rust. According to the Deck Magazine, sleeve anchors provide 20% more holding strength in veneer walls compared to expansion bolts.
Attach the Ledger: Align the ledger board with the drilled holes. Insert lag bolts or anchors through the board and into the brick, tightening with a wrench or socket set. Ensure bolts penetrate at least 3 inches into solid brick or reach the structural frame for veneer.
Check Alignment: Use a level to confirm the ledger is horizontal. Tighten bolts evenly to avoid warping the board. This step ensures a secure deck ledger board on a masonry wall.
Step 5: Verifying Stability and Waterproofing
Final checks ensure the ledger board is secure and protected against moisture, extending the deck’s lifespan.
Inspect Stability: Test the ledger by applying pressure to ensure it doesn’t shift. Re-tighten any loose bolts or anchors. The ledger should feel rigid and immovable.
Apply Additional Sealant: Add silicone caulk around each bolt head and along the bottom edge of the ledger where it meets the brick. This waterproofing deck ledger brick wall step prevents moisture from penetrating small gaps.
Check for Gaps: Examine the ledger and flashing for any openings where water could enter. Fill gaps with sealant to maintain a watertight seal. Regular maintenance, such as annual inspections, helps catch issues early.
Recommended Read: How to Attach a Porch Roof to a Brick House
Best Practices for a Safe and Durable Ledger Board Installation
Securing a ledger board to a brick house demands attention to detail to ensure safety and longevity. These best practices help you achieve a stable brick wall deck attachment while preventing common issues like moisture damage or structural failure. Follow these guidelines to create a durable and code-compliant installation.
Use Corrosion-Resistant Fasteners
Fasteners exposed to outdoor elements must resist rust to maintain strength. Galvanized or stainless steel lag bolts and concrete anchors are ideal for securing a ledger to brick veneer or solid brick. Stainless steel offers superior corrosion resistance, lasting up to 50 years in harsh climates. Avoid standard steel bolts, which can corrode within 5-10 years, weakening the deck’s connection.
Ensure Proper Spacing for Ventilation
A small gap between the ledger board and the brick wall allows air circulation, reducing moisture buildup. Place ½-inch spacers, such as washers, between the ledger and brick during installation. This gap, combined with proper flashing, prevents rot and mold. You should note that 30% of ledger failures stem from trapped moisture due to inadequate spacing.
Regular Maintenance Checks
Inspect the ledger board annually to ensure long-term durability. Check for loose bolts, signs of rust, or water damage around the flashing. Tighten any loose fasteners and reapply silicone caulk if cracks appear. Regular maintenance extends the ledger’s lifespan and ensures the deck remains safe for use.
Consult a Professional for Complex Installations
Brick veneer walls require anchoring to the house’s structural frame, which can be challenging for DIYers. If unsure about the wall’s load-bearing capacity or local building codes, hire a licensed contractor. Professionals ensure compliance with regulations and use specialized tools for precise anchoring. This step is critical for high-risk projects to avoid costly repairs or safety hazards.
DIY vs. Hiring a Professional
Deciding whether to attach a ledger board to a brick house yourself or hire a professional depends on your skills, tools, and the project’s complexity.
Is This a DIY-Friendly Project?
Attaching a ledger board to a brick house can be DIY-friendly for those with experience in masonry and carpentry. The task requires tools like a hammer drill, masonry bits, and a level, plus knowledge of local building codes. Basic steps include drilling precise holes, installing flashing, and securing lag bolts or concrete anchors.
However, risks like improper anchoring can lead to deck collapse, with 15% of deck failures linked to faulty ledger installation.
Brick veneer walls add complexity, as bolts must reach the structural frame, not just the veneer. If you lack confidence in assessing wall type or ensuring waterproofing, errors could cause water damage or structural issues. For simple solid brick installations, DIYers with the right tools can succeed, but complex projects benefit from professional expertise.
Cost Considerations
DIY installation saves on labor but requires investment in materials and tools. A pressure-treated ledger board costs $20-$50 for a 10-foot length, while lag bolts or concrete anchors run $10-$20 for a set of 10. Flashing and silicone caulk add $15-$30. If you don’t own a hammer drill, expect to spend $100-$200 or rent one for $30-$50 per day. Total DIY costs typically range from $150-$300, depending on the deck size.
Hiring a professional for brick house ledger installation averages $500-$1,500, based on a HomeAdvisor estimate, depending on region and project complexity. Contractors bring specialized tools and ensure compliance with building codes, reducing risks of costly repairs. Weigh the savings of DIY against the assurance of professional work, especially for brick veneer or large decks, to decide the best approach for your project.
Conclusion
Attaching a ledger board to a brick house ensures a safe and stable deck when done correctly. Key steps include planning, installing flashing, drilling precise holes, securing the ledger with corrosion-resistant fasteners, and verifying waterproofing. Prioritize safety and compliance with local building codes to prevent issues like moisture damage or structural failure.
For complex installations, such as brick veneer walls, consult a professional to ensure durability. Start planning your deck against a brick house today, or contact a contractor for expert assistance.