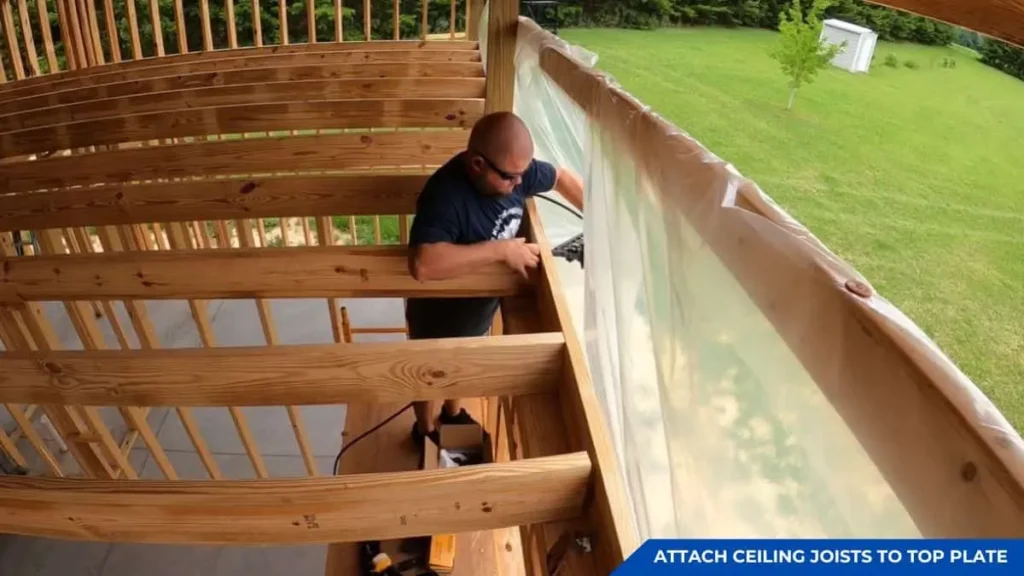
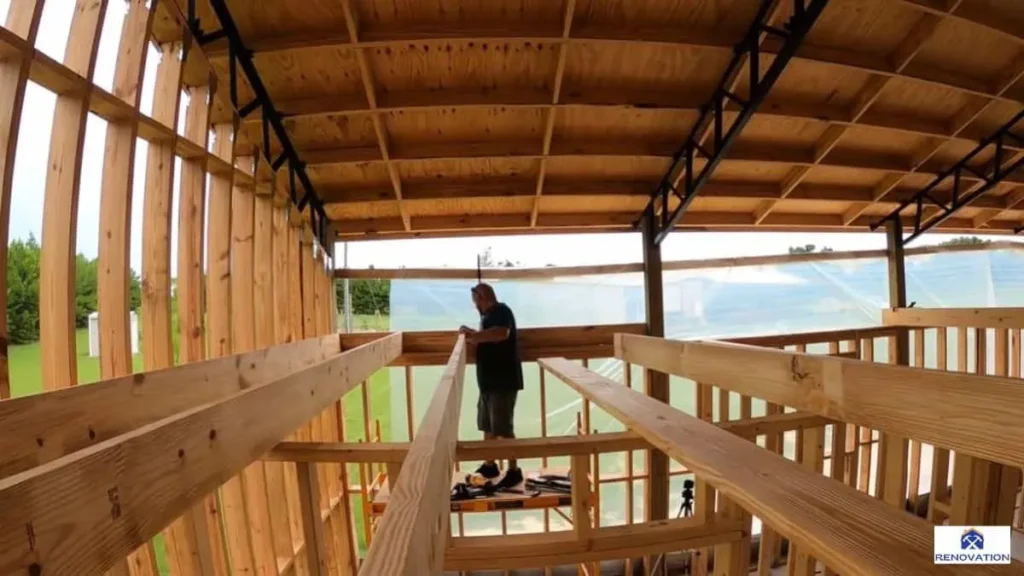
Attaching ceiling joists to the top plate is a critical step in residential framing. Ceiling joists help distribute roof loads evenly across walls and support the ceiling structure below. Proper attachment ensures the building remains stable, preventing sagging, structural shifts, and long-term damage.
The top plate, which runs horizontally along the top of framed walls, provides a secure base where joists rest and connect. The strength of this connection directly impacts the stability of the roof, walls, and ceiling.
Understanding how to attach ceiling joists to the top plate correctly is essential for both new construction and renovation projects. Whether building a home addition, finishing an attic, or replacing damaged framing, following best practices ensures safety, structural integrity, and compliance with building codes.
This guide explains the tools, techniques, and methods used to attach ceiling joists to the top plate, offering step-by-step instructions, expert tips, and solutions to common challenges.
The Role of Ceiling Joists and Top Plates
What Are Ceiling Joists?
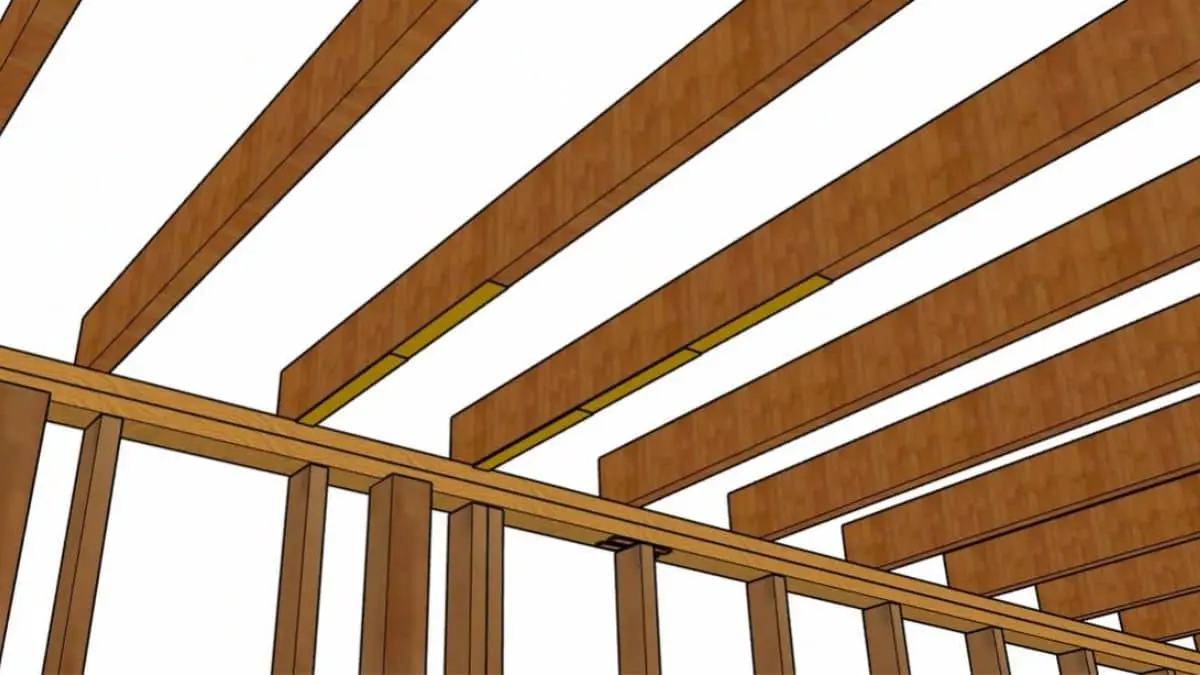
Ceiling joists are horizontal framing members that span across the top of a room, connecting opposite walls. They serve two primary purposes — they support the finished ceiling and help distribute the weight of the roof to the load-bearing walls below.
In addition to supporting ceiling materials like drywall, ceiling joists help prevent the walls from bowing outward under the weight of the roof. This structural function is especially important in homes with pitched roofs, where roof rafters push outward against exterior walls.
What Is a Top Plate?
The top plate is a horizontal framing element installed along the top of the stud walls. In standard construction, walls have either a single top plate or a double top plate for added strength. The top plate acts as the attachment point for ceiling joists, roof rafters, and other structural members.
Top plates also serve a load distribution function, helping to transfer weight from the roof, ceiling, and upper floors evenly across the vertical studs in the wall.
How Ceiling Joists and Top Plates Work Together
Ceiling joists and top plates form a key connection in a home’s structural framework. When ceiling joists rest on and are properly attached to the top plate, they create a continuous load path that distributes forces evenly across the building’s frame. This connection prevents structural issues like wall spreading, ceiling sagging, and uneven load distribution.
In homes with open floor plans or large spans, correctly securing ceiling joists to the top plate becomes even more critical, since those spaces rely on fewer interior support walls. Strong joist-to-plate connections are also essential in seismic zones or areas prone to high winds, where lateral forces could weaken poorly secured framing.
Why Proper Attachment Matters
Securing ceiling joists to the top plate does more than hold the ceiling in place. It also:
- Maintains structural alignment by keeping walls square and true.
- Prevents twisting, sagging, and shifting over time.
- Ensures compliance with residential building codes, which typically specify attachment methods, fastener types, and spacing.
- Supports insulation and ceiling finishes, creating a stable substrate for drywall, plaster, or other materials.
Correctly connecting ceiling joists to the top plate is essential for both structural integrity and the long-term durability of a building’s frame.
Tools and Materials Needed for Attaching Ceiling Joists to Top Plate
Using the right tools and materials ensures a strong and code-compliant connection between ceiling joists and the top plate. Below is a table listing the essential items required for this project.
| Category | Tools & Materials | Purpose |
| Measuring & Layout | Tape measure, carpenter’s square, chalk line | Ensures accurate joist spacing and alignment |
| Cutting Tools | Circular saw or miter saw | Cuts joists to the correct length |
| Fasteners | Nails (16d or per code), structural screws | Secures joists to the top plate |
| Connectors | Metal joist hangers (optional) | Provides additional support at joist ends |
| Fastening Tools | Hammer or nail gun, drill/driver | Drives fasteners into wood |
| Leveling Tools | Level | Ensures joists are level and flush |
| Safety Gear | Safety glasses, gloves, hearing protection | Protects during cutting and fastening |
Note: Always check local building codes to confirm the required fasteners, spacing, and approved attachment methods for your area.
How to Attach Ceiling Joists to Top Plate: Step-by-Step
Attaching ceiling joists to the top plate is a fundamental part of framing that directly affects the strength and stability of a home’s structure. Each step — from planning and positioning to fastening and verifying — ensures the joists are properly secured to transfer loads evenly across the frame. Below is a comprehensive breakdown of each phase.
Planning and Layout
Accurate planning ensures the joists are evenly spaced, aligned with wall studs or rafters above, and properly supported across the entire span. Before cutting any lumber or fastening joists, the layout should be carefully marked on the top plate.
The standard spacing for ceiling joists is 16 inches on center (OC) in most residential construction, though 24-inch spacing may be acceptable for some applications, especially with engineered lumber. To begin the layout, mark the centerline for each joist position along the top plate, ensuring the first and last joists align with exterior or load-bearing walls.
Each mark should indicate both the left and right edges of the joist, not just the center point. This helps ensure accurate positioning during installation. If the ceiling will support additional loads — such as attic storage or mechanical equipment — the spacing may need adjustment, and joist size should be selected to meet the required span rating.
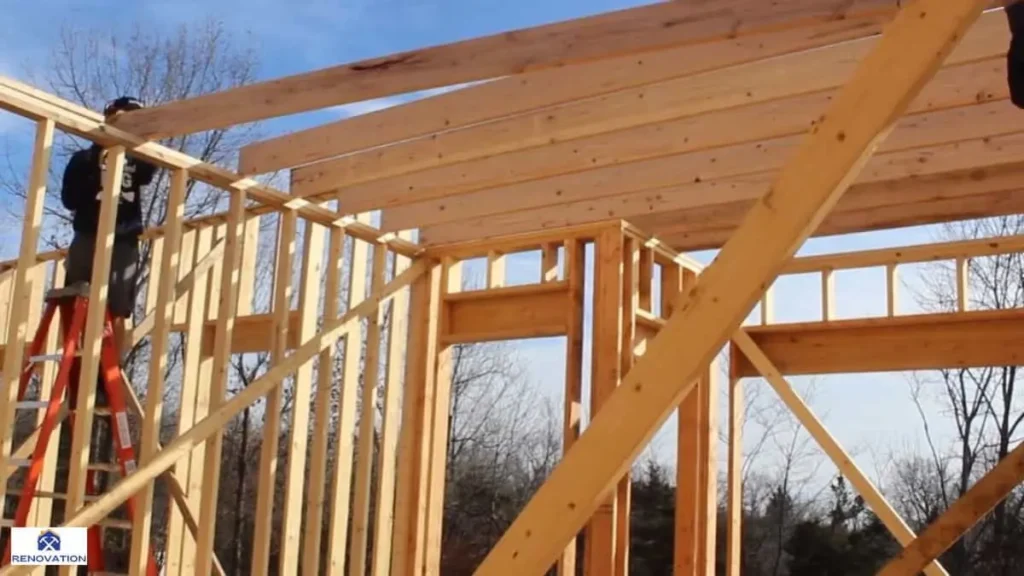
Positioning Ceiling Joists
Once the top plate layout is marked, each ceiling joist is cut to length and positioned directly above its corresponding mark. Each joist should rest flush against the top plate to provide full bearing contact. The end of each joist must make solid contact with the plate, with no gaps that could reduce load transfer.
If using double top plates, the joist should span across both plates, ensuring even distribution of weight. For single top plates, extra attention is required to confirm the joist end is fully seated.
In structures where the ceiling joists tie into roof rafters to form a structural triangle, proper positioning is even more critical. In these cases, the joist serves not only as a ceiling support but also as a tie that prevents the walls from spreading under roof load.
If joist hangers are used (commonly in areas where joists meet a beam rather than a top plate), the hangers must be correctly positioned and nailed into the top plate or beam before the joists are seated.
Attaching Joists Using Nails or Screws
The most common method for securing ceiling joists to the top plate is face nailing or toe nailing. The method used often depends on local building codes, joist size, and whether a single or double top plate is present.
Face Nailing: Face nailing involves driving nails directly through the side of the joist into the top plate. This method works best when the joist runs parallel to the stud walls, providing sufficient side surface for direct attachment. It is less common in modern framing because it requires exposed joist ends.
Toe Nailing: Toe nailing is the preferred method in most residential framing projects. It involves driving nails at an angle through the joist end into the top plate. Typically, 3 to 4 nails per joist end are used — 2 on one side and 1 or 2 on the opposite side. Nails should be driven at a 45-degree angle, ensuring they penetrate both the joist and top plate firmly.
Structural Screws: In some cases, especially for remodeling or repair work, structural screws may be used instead of nails. Screws provide higher withdrawal resistance (resistance to being pulled out) and are often easier to install in tight spaces. However, screws may not always meet code for primary structural fastening unless specified by an engineer.
Joist Hangers (Optional): For additional support, or when working with non-standard joist layouts, metal joist hangers can provide extra load capacity. Hangers wrap around the joist end and are nailed directly into the top plate or adjacent framing members, providing a secure mechanical connection. If used, all nail holes in the hanger must be filled to meet load ratings.
Verifying Structural Integrity
Once all joists are attached, verifying the entire assembly ensures the framing will meet load requirements and resist shifting over time. There are several critical checks at this stage:
- Check for Level: Use a 4-foot level to confirm all joists are even and level across the span. Uneven joists could cause sagging ceilings or drywall cracks.
- Confirm End Bearing: Each joist end must make full contact with the top plate. Any gaps reduce the strength of the connection.
- Inspect Nail Placement: Verify that all nails or screws are properly seated, driven at the correct angle, and not overdriven or underdriven. Improper fastening can compromise structural integrity.
- Review Joist Spacing: Measure between each joist to confirm they follow the planned spacing. Consistent spacing is critical for both load distribution and the proper installation of ceiling finishes like drywall.
- Assess Lateral Stability: In some cases, blocking or bridging may be required between joists to prevent twisting or lateral movement. This is especially important for joists over long spans.
Once these checks are complete, the ceiling framing is ready for inspection (if required) and the next stage of construction — typically the installation of ceiling insulation and finishes.
Properly securing ceiling joists to the top plate is just one part of ensuring a strong and stable structure. If you’re working on floor framing as well, understanding the correct way to attach floor joists to the sill plate is equally important for maintaining the structural integrity of your home from the ground up. This connection supports the entire weight of the floor system and ensures it stays firmly anchored to the foundation.
Best Practices for Secure Ceiling Joist Installation
Attaching ceiling joists to the top plate is more than just a structural task — it directly affects the safety, durability, and overall performance of the home’s framing system. Following established best practices ensures the joists remain secure under normal loads, environmental stresses, and over time. Below are the most important factors to ensure strong and code-compliant joist installation.
Follow Local Building Codes
Compliance with local building codes is mandatory for all ceiling joist installations. These codes are developed to ensure structural safety and load-bearing capacity based on factors like climate, seismic activity, and intended use of the space.
Local codes dictate important details, including:
- Joist span limits: The maximum allowable length between bearing points depends on joist size, species, and spacing. For example, a 2×8 joist may span up to 12 feet at 16 inches on center, depending on wood species.
- Nailing patterns: Codes often specify the number, size, and angle of nails required for attaching joists to top plates, particularly for toe-nailing.
- Lateral bracing requirements: In areas with high wind or seismic risk, blocking or strapping may be required between joists to prevent lateral movement.
- Joist hanger specifications: If joist hangers are used, they must meet load requirements and be installed with the correct type and number of nails.
- Fire-resistance requirements: Some codes require additional fire-blocking measures in ceiling assemblies, particularly in multi-family dwellings.
Even if a project is not subject to formal inspections, following code guidelines ensures structural safety, reduces the risk of failure, and maintains property value. Code compliance is especially important when modifying existing framing, where improper joist connections can compromise the entire structure.
Use High-Quality Fasteners and Hardware
The strength of the ceiling joist attachment depends directly on the quality of the fasteners and hardware used. Inferior nails, screws, or connectors can weaken over time, especially in homes exposed to moisture, temperature fluctuations, or high loads.
Nails: For most standard residential ceiling joist installations, 16d common nails are recommended for toe-nailing joists to the top plate. These nails are approximately 3.5 inches long, providing sufficient penetration into both the joist and top plate. In areas requiring higher withdrawal strength, ring-shank nails may be specified.
Structural Screws: In renovation projects where access is limited, or where nails cannot be driven at the proper angle, structural screws rated for framing applications can be used. These screws should be designed for shear and withdrawal strength, with lengths appropriate for joist thickness and full penetration into the top plate.
Joist Hangers: Where joists terminate against beams or perpendicular framing members, metal joist hangers offer superior support. These should be sized specifically for the joist dimensions and attached using manufacturer-approved hanger nails or structural screws — never drywall screws, which lack the required shear strength.
Corrosion Resistance: In areas with high humidity, coastal climates, or unconditioned spaces like attics, fasteners and connectors should be galvanized or stainless steel to resist rust and corrosion. Corroded fasteners lose strength over time, posing a structural risk.
Installation Precision: Fasteners should always be driven straight and at the correct angle. Overdriven nails can split wood, while underdriven nails leave a gap that reduces holding power. Each fastener must fully engage the joist and the top plate for maximum strength.
Addressing Common Challenges
Even with careful planning and quality materials, several challenges can arise when attaching ceiling joists to top plates. Recognizing these issues early helps prevent errors that could compromise the structure.
Uneven Top Plates: In older homes, top plates may sag, bow, or have irregularities due to settling or past repairs. Installing joists on an uneven top plate can result in uneven ceilings and compromised load distribution. Before placing joists, check the top plate for level and either shim low spots or plane high spots to create a smooth, even bearing surface.
Twisted or Warped Joists: Lumber imperfections are common, especially in long spans. Twisted joists are difficult to seat flush against the top plate and often pull away over time. When selecting joists, check for straightness and reject any severely warped boards. If minor twists are present, temporary bracing or blocking can help straighten the joist during installation.
Inconsistent Joist Spacing: Accurate joist spacing is critical for load distribution and ceiling material installation. Even minor spacing errors can create weak points in the ceiling system. Layout should be double-checked before securing any joists, and spacers or jigs can be used to maintain consistent gaps during installation.
Limited Nailing Access: In some framing configurations, space may be too tight to properly toe-nail joists at the correct angle. This is particularly common near corners, eaves, or when retrofitting in existing structures. In these cases, angled structural screws or specialized framing connectors may be required to ensure proper attachment.
Thermal and Moisture Expansion: In unconditioned attic spaces, joists can expand and contract with changes in temperature and humidity. This movement can gradually loosen fasteners, especially in improperly nailed joints. Using the correct nail type, driving nails at the proper angle, and ensuring full contact between joist and plate helps mitigate this risk.
Load Changes: If the ceiling will support additional weight, such as HVAC equipment, attic storage, or heavy ceiling finishes like plaster, standard framing methods may not provide adequate support. In these cases, engineered joists, reinforced hangers, or double joists may be required, along with adjustments to the top plate attachment.
You Can Read Also: Reinforce Garage Ceiling Joists
Common Mistakes to Avoid When Attaching Ceiling Joists to Top Plate
Properly attaching ceiling joists to the top plate is a critical step in ensuring a stable and structurally sound ceiling system. However, even experienced builders and DIY enthusiasts sometimes make mistakes that weaken the overall structure or lead to long-term performance issues.
Incorrect Nail Placement
One of the most common mistakes is driving nails at the wrong angle or in the wrong location when toe-nailing joists to the top plate. Nails driven too steeply into the joist or too shallowly into the plate often fail to provide adequate holding power. This reduces the connection’s resistance to both vertical loads and lateral forces. Proper toe-nailing requires driving nails at a shallow angle, ensuring they penetrate both the joist and the top plate deeply enough to resist withdrawal under load.
Another frequent issue is using too few nails or placing them too close to the edge of the wood, which can cause splitting. Building codes typically specify the number and placement of nails, and failing to follow these guidelines weakens the connection.
Using the Wrong Fasteners
Choosing incorrect fasteners is another common oversight. Standard framing nails are often used when structural fasteners designed for joist-to-plate connections would provide greater holding strength. Drywall screws, for example, lack the shear strength necessary for structural framing and should never be used. For joist hangers, using nails or screws not approved by the manufacturer can lead to hanger failure under load.
Fastener length also matters. Nails or screws that are too short may not penetrate the full depth of the top plate, while fasteners that are too long can split the wood or penetrate into wiring or plumbing within the wall cavity.
Failing to Check for Level and Alignment
Rushing the installation without verifying the alignment of joists and the levelness of the top plate can lead to uneven ceilings and poor load distribution. If joists are not perfectly parallel, ceiling drywall may crack over time, and the joists themselves may be more prone to twisting or sagging. Each joist should be checked for level, and spacers should be used to maintain consistent spacing throughout the installation.
Additionally, failing to check for level along the length of the top plate can lead to uneven bearing surfaces. This often results in gaps between the joist and the plate, reducing the effective contact area and weakening the joint.
Ignoring Wood Quality Issues
The quality of the lumber plays a critical role in the strength of the connection between joists and the top plate. Installing warped, twisted, or overly knotty joists makes it difficult to achieve tight, secure connections. Over time, these defects can worsen, causing joists to pull away from the top plate or sag under load.
Even if structurally sound lumber is used, improper storage before installation can introduce problems. Joists stored outdoors without proper cover may absorb moisture, causing swelling and increasing the risk of splitting when fasteners are driven.
Overlooking the Importance of Lateral Bracing
Even if the joists are correctly attached to the top plate, they can shift or twist over time if not properly braced. Inadequate blocking between joists or missing lateral bracing in longer spans allows movement that places additional stress on the joist-to-plate connection. This can eventually lead to nail withdrawal or splitting at the joint.
In areas with seismic activity or high wind loads, bracing is even more critical. Without it, the ceiling framing may fail under lateral forces, especially in homes with wide spans or open-concept layouts.
Failing to Follow Local Building Codes
Local building codes exist to ensure structural safety and performance, but some installers either overlook or intentionally bypass code requirements. This can include using the wrong size joists, exceeding allowable spans, or failing to meet minimum fastener requirements. Even small deviations from code can have serious consequences, especially when combined with other errors.
Code violations not only compromise safety but can also lead to costly rework if discovered during inspections or when selling the home. Always reviewing and adhering to current local building codes ensures that the ceiling joist connections meet modern safety standards.
Misunderstanding Load Requirements
Not all ceilings support the same loads. Joists in attic spaces, for example, may need to support stored items in addition to the ceiling finish itself. Rooms with heavy ceiling fixtures — such as chandeliers — also impose higher point loads on individual joists. Using standard residential joist sizes and attachment methods without considering these additional loads can lead to sagging, cracking, or even structural failure.
Proper load calculations should be performed for any ceiling that will support additional weight. This may require upsizing joists, reducing spacing, or reinforcing the top plate attachment with additional fasteners or metal connectors.
Frequently Asked Questions (FAQ)
What type of nails or screws should be used for securing ceiling joists?
Framing nails (10d or 16d) are commonly used for toe-nailing ceiling joists to the top plate. If using joist hangers, specialized hanger nails or structural screws recommended by the manufacturer should be used for maximum strength.
How far apart should ceiling joists be spaced?
Ceiling joists are typically spaced 16 or 24 inches apart, center to center. The spacing depends on the joist size, span length, and local building codes. Larger spans or heavier loads may require closer spacing or larger joists.
Can I use screws instead of nails to attach ceiling joists?
Nails are generally preferred over screws for structural framing because they provide better shear strength. However, structural screws rated for framing applications can be used if specified by the building code or manufacturer.
How do I ensure ceiling joists are level and properly aligned?
Use a laser level or spirit level to check for uniform height across all joists. Installing temporary bracing and measuring from reference points ensures even spacing and proper alignment before securing the joists permanently.
Do I need joist hangers for ceiling joists?
Joist hangers are not always required but are recommended for added strength, especially in areas with high wind or seismic activity. They also help support heavier loads, such as in attic spaces or ceilings with large fixtures.